

Introduction
In today's article, we will make our own Alarm
clock. You will be able to hear the alarm sound after 15 seconds and the
application will end on click of a button.
Step 1
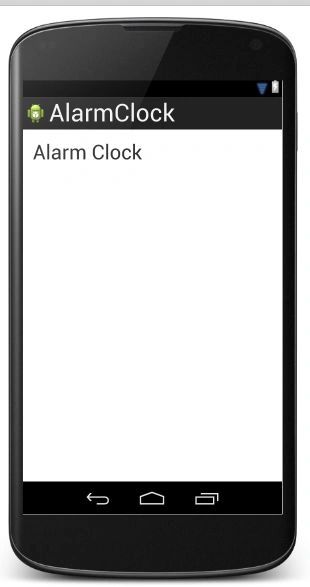
Open "activity_main.xml" and add the following
code to it: (Inside LinearLayout element)
- <TextView
- android:layout_width="wrap_content"
- android:layout_height="wrap_content"
- android:text="@string/hello_world"
- android:textSize="30dp"/>
The layout looks like:
Step 2
Right-click on layout-> New-> Layout resource
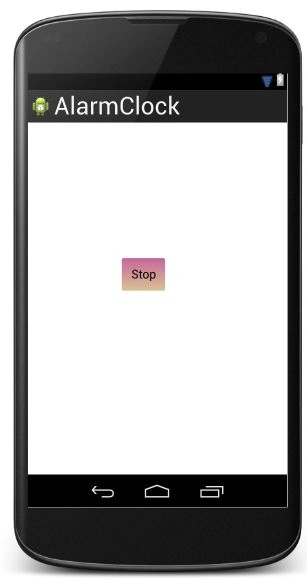
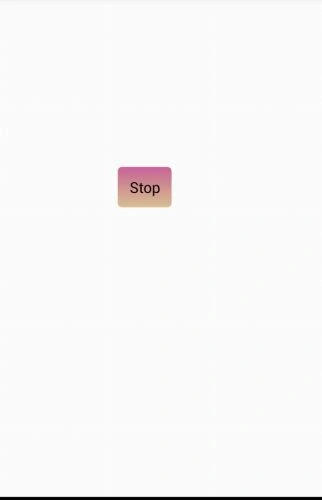
file. Name this file as "alarm_layout". This file is to display a button to stop
the alarm. Add the following code to this file:
- <Button
- android:id="@+id/alarm"
- android:layout_width="wrap_content"
- android:layout_height="wrap_content"
- android:text="Stop"
- android:layout_marginTop="200dp"
- android:layout_marginLeft="140dp"
- android:background="@drawable/button_lay"/>
The layout looks like:
Step 3
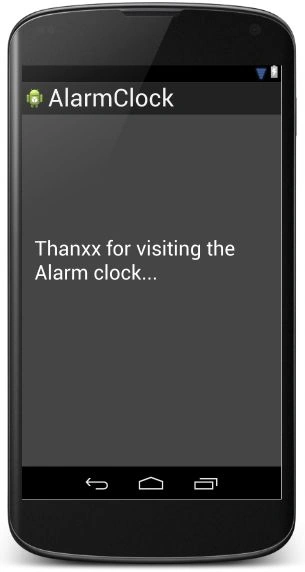
Make a new layout file and name it as "bye_layout".
Add the following code to it: (Inside LinearLayout element)
- <TextView
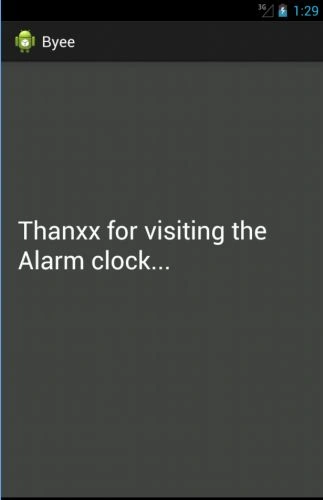
- android:text="Thanxx for visiting the Alarm clock..."
- android:layout_height="wrap_content"
- android:layout_width="fill_parent"
- android:textSize="30dp"
- android:layout_marginTop="180dp"
- android:textColor="#FFFFFF"
- android:paddingLeft="20dp"
- android:paddingRight="20dp"/>
The layout looks like:
Step 4
Open "MainActivity.java" and add the following
code to it:
- package com.alarmclock;
- import android.app.AlarmManager;
- import android.app.PendingIntent;
- import android.content.Context;
- import android.content.Intent;
- import android.os.Bundle;
- import android.app.Activity;
- import android.view.Menu;
- import android.view.View;
- import android.view.Window;
- import android.widget.Button;
- import java.util.Calendar;
- public class MainActivity extends Activity {
- @Override
- protected void onCreate(Bundle savedInstanceState) {
- super.onCreate(savedInstanceState);
- this.requestWindowFeature(Window.FEATURE_NO_TITLE);
- setContentView(R.layout.activity_main);
- Calendar t = Calendar.getInstance();
- t.add(Calendar.SECOND, 15);
- Intent i = new Intent(this, AlarmSound.class);
- PendingIntent pending = PendingIntent.getActivity(this, 1235, i, PendingIntent.FLAG_CANCEL_CURRENT);
- AlarmManager alarm = (AlarmManager) getSystemService(Activity.ALARM_SERVICE);
- alarm.set(AlarmManager.RTC_WAKEUP, t.getTimeInMillis(), pending);
- }
- @Override
- public boolean onCreateOptionsMenu(Menu menu) {
- getMenuInflater().inflate(R.menu.main, menu);
- return true;
- }
- }
In the above code activity, "AlarmC" class will be
called after 15 seconds. "PendingIntent.FLAG_CANCEL_CURRENT"
ensures that after 15 seconds the current activity will be canceled and the new
activity ie "AlarmSound" is started. "AlarmManager" allows access to system
alarm services. This class allows you to schedule your application to run at
some time in the future.
Step 5
Right click on the package-> New-> Java class.
Name this class as "AlarmSound" and add the following code to it:
- package com.alarmclock;
- import android.app.Activity;
- import android.content.Context;
- import android.content.Intent;
- import android.media.AudioManager;
- import android.media.MediaPlayer;
- import android.media.RingtoneManager;
- import android.net.Uri;
- import android.os.Bundle;
- import android.util.Log;
- import android.view.MotionEvent;
- import android.view.View;
- import android.view.Window;
- import android.view.WindowManager;
- import android.widget.Button;
- import java.io.IOException;
- public class AlarmSound extends Activity {
- private MediaPlayer player;
- final Context context=this;
- @Override
- protected void onCreate(Bundle savedInstanceState) {
- super.onCreate(savedInstanceState);
- this.requestWindowFeature(Window.FEATURE_NO_TITLE);
- this.getWindow().setFlags(WindowManager.LayoutParams.FLAG_FULLSCREEN,WindowManager.LayoutParams.FLAG_FULLSCREEN);
- setContentView(R.layout.alarm_layout);
- Button stop = (Button) findViewById(R.id.alarm);
- stop.setOnTouchListener(new View.OnTouchListener() {
- public boolean onTouch(View arg0, MotionEvent arg1) {
- player.stop();
- Intent i=new Intent(context,Bye.class);
- startActivity(i);
- return false;
- }
- });
- play(this, getAlarmSound());
- }
- private void play(Context context, Uri alert) {
- player = new MediaPlayer();
- try {
- player.setDataSource(context, alert);
- final AudioManager audio = (AudioManager) context
- .getSystemService(Context.AUDIO_SERVICE);
- if (audio.getStreamVolume(AudioManager.STREAM_ALARM) != 0) {
- player.setAudioStreamType(AudioManager.STREAM_ALARM);
- player.prepare();
- player.start();
- }
- } catch (IOException e) {
- Log.e("Error....","Check code...");
- }
- }
- private Uri getAlarmSound() {
- Uri alertSound = RingtoneManager.getDefaultUri(RingtoneManager.TYPE_ALARM);
- if (alertSound == null) {
- alertSound = RingtoneManager.getDefaultUri(RingtoneManager.TYPE_NOTIFICATION);
- if (alertSound == null) {
- alertSound = RingtoneManager.getDefaultUri(RingtoneManager.TYPE_RINGTONE);
- }
- }
- return alertSound;
- }
- }
"getAlarmSound()" returns the alarm sound set in the device. If
the alarm tone is not set, the default tone will be returned. "play()" will start
the Media Player that plays the sound. Also if "stop" button is clicked, a new
activity called "bye" will be called and this will end our application.
Step 6
Create a new Java class and name it as "Bye".
Add the following code to it:
- package com.alarmclock;
- import android.app.Activity;
- import android.os.Bundle;
- public class Bye extends Activity {
- @Override
- protected void onCreate(Bundle savedInstanceState) {
- super.onCreate(savedInstanceState);
- setContentView(R.layout.bye_layout);
- }
- }
Step 7
Finally, make the following changes in
"AndroidManifest.xml"
- <manifest xmlns:android="http://schemas.android.com/apk/res/android"
- package="com.alarmclock"
- android:versionCode="1"
- android:versionName="1.0" >
- <uses-permission android:name="android.permission.INTERNET" />
- <uses-sdk
- android:minSdkVersion="7"
- android:targetSdkVersion="16" />
- <application
- android:allowBackup="true"
- android:icon="@drawable/ic_launcher"
- android:label="@string/app_name"
- android:theme="@style/AppTheme"
- android:debuggable="true">
- <activity
- android:name="com.alarmclock.MainActivity"
- android:label="@string/app_name" >
- <intent-filter>
- <action android:name="android.intent.action.MAIN" />
- <category android:name="android.intent.category.LAUNCHER" />
- </intent-filter>
- </activity>
- <activity
- android:name="com.alarmclock.AlarmSound"
- android:label="@string/app_name" >
- </activity>
- <activity
- android:name=".Bye"
- android:label="Byee"/>
- </application>
- </manifest>
Note that we have added the internet
permission.
Step 8
This application will not run on the emulator
because the emulator does not consist of the ringtones. Even if you will try the
project on the emulator you will not be able to hear the sound. So it's better to run
the application on a device.
To run the application on an android phone,
install the "apk" of the application on your device. "apk" of your application is
present in "Build"-> "Apk". To install the apk, mail the mail to your Gmail
account.
Go to settings in your phone-> Security->Allow non-market apps.
If you then access your account from the native Gmail app on the phone it will
recognize that the attachment is an app and offers an "Install" button. Install
the app. After the installation completes, run the application.
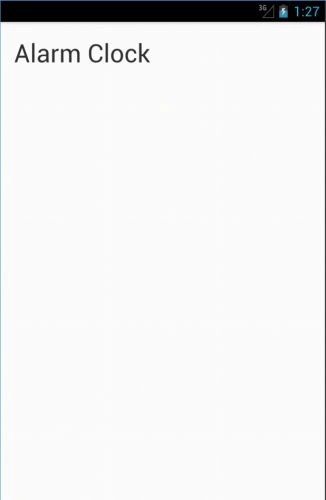
The output snapshots:
After 15 sec you will see the screen shown below. This is the time you will hear the alarm sound until you press the stop button.
Clicking the stop button stops the alarm and gives the following
screen
Thank you... Enjoy coding :)
Join the conversation! Your thoughts help the community grow.