

Introduction
This article shows how to create a simple login form in the ASP.NET Web API.
The following is the procedure for creating a login form in the Web API.
Step 1
First create a Web API application as in the following:
- Start Visual Studio 2012.
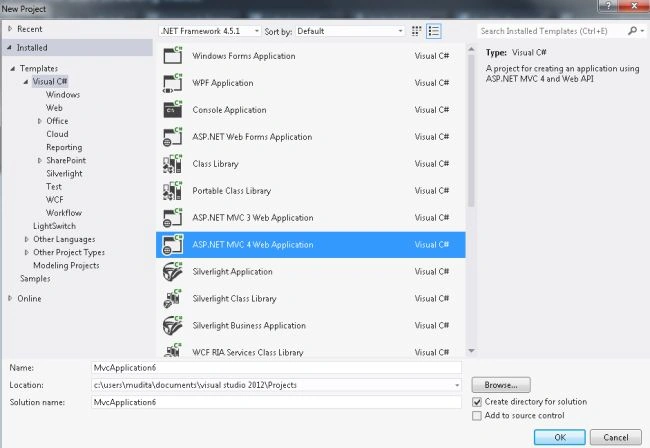
- From the start window select "New Project".
- From the new project window select "Installed" -> "Visual C#" -> "Web".
- Select "ASP.NET MVC4 Web Application" and click the "Ok" button.
- From the "MVC4 Project" window select "Web API".
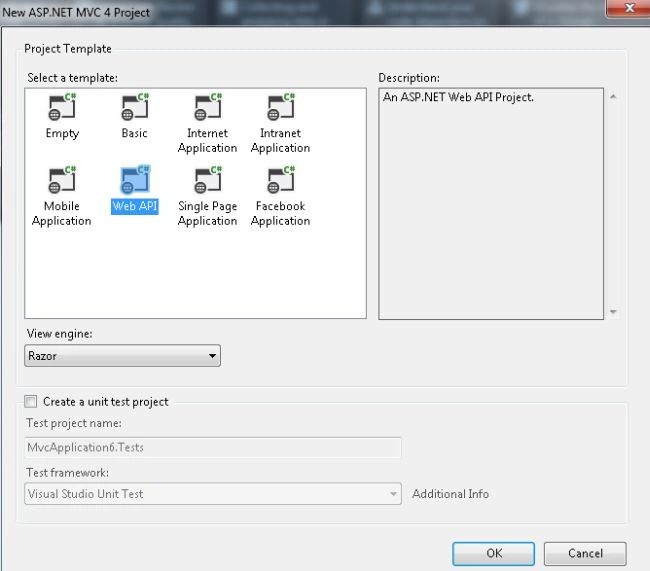
- Click the "OK" button.
Step 2
Add a Model class.
- In the "Solution Explorer".
- Right-click on the "Model" folder.
- Select "Add" -> "class".
- From the Add new item window select "Installed" -> "Visual C#".
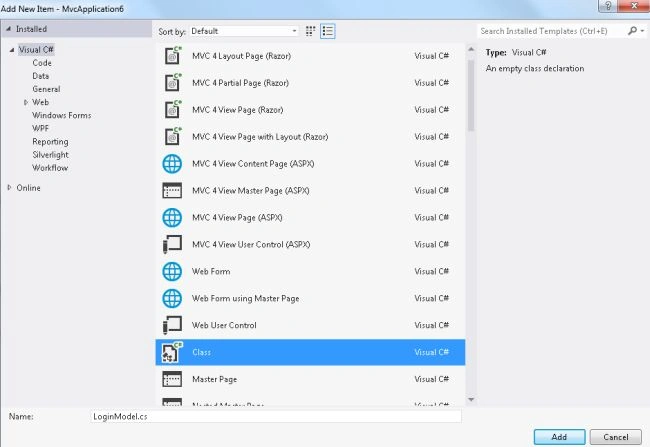
- Select "Class" and click on the "Add" button.
Now add the following code:
- using System;
- using System.Collections.Generic;
- using System.Linq;
- using System.Web;
- namespace MvcApplication6.Models
- {
- public class LoginModel
- {
- public string UserName { get; set; }
- public string UserPassword { get; set; }
- }
- }
Step 3
Now in the controller we add the following code:
- In the "Solution Explorer".
- Expand "Controller" folder.
- Select the "HomeController".
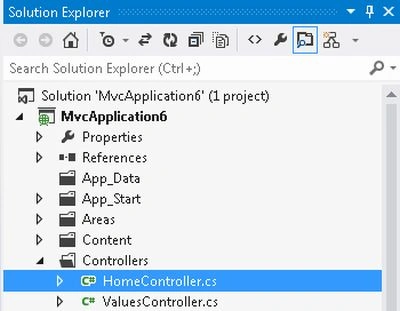
Add the following code:
- using System;
- using System.Collections.Generic;
- using System.Linq;
- using System.Web;
- using System.Web.Mvc;
- using MvcApplication6.Models;
- namespace MvcApplication6.Controllers
- {
- public class HomeController : Controller
- {
- public ActionResult Index()
- {
- LoginModel obj = new LoginModel();
- return View(obj);
- }
- [HttpPost]
- public ActionResult Index(LoginModel objuserlogin)
- {
- var display = Userloginvalues().Where(m => m.UserName == objuserlogin.UserName && m.UserPassword == objuserlogin.UserPassword).FirstOrDefault();
- if (display != null)
- {
- ViewBag.Status = "CORRECT UserNAme and Password";
- }
- else
- {
- ViewBag.Status = "INCORRECT UserName or Password";
- }
- return View(objuserlogin);
- }
- public List<LoginModel> Userloginvalues()
- {
- List<LoginModel> objModel = new List<LoginModel>();
- objModel.Add(new LoginModel { UserName="user1",UserPassword="password1"});
- objModel.Add(new LoginModel { UserName = "user2", UserPassword = "password2" });
- objModel.Add(new LoginModel { UserName = "user3", UserPassword = "password3" });
- objModel.Add(new LoginModel { UserName = "user4", UserPassword = "password4" });
- objModel.Add(new LoginModel { UserName = "user5", UserPassword = "password5" });
- return objModel;
- }
- }
- }
In the code above is the list of UserNames and Passwords. These are validated for the login.
Step 4
In the View write the following code:
- In the "Solution Explorer".
- Expand the "Views" folder.
- Select "Home" -> "Index.cshtml".
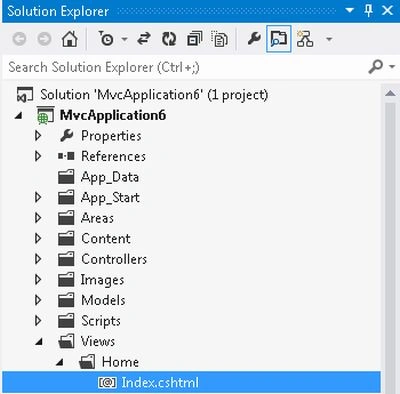
Add the following code:
- @model MvcApplication6.Models.LoginModel
- @{
- ViewBag.Title = "Index";
- }
- <script language="javascript">
- function display() {
- if ($("#txtusername").attr("value") == "")
- {
- alert("Please Enter your UserName.");
- return false;
- } else if ($("#txtuserpassword").attr("value") == "") {
- alert("Please enter UserPassword.");
- return false;
- }
- alert("Login Successfully");
- return true;
- }
- </script>
- <h3>Simple We API Login Form </h3>
- @using (Html.BeginForm("Index", "Home"))
- {
- <table width="40%" cellpadding="1" cellspacing="5">
- <tr>
- <td colspan="2" style="color:#f00;font-size:larger">@ViewBag.Status</td>
- </tr>
- <tr>
- <td align="right">User Name :</td>
- <td>@Html.TextBoxFor(m => m.UserName, new {@style="width:200px",@id="txtusername" })</td>
- </tr>
- <tr>
- <td align="right">User Password :</td>
- <td>@Html.PasswordFor(m => m.UserPassword, new {@style="width:200px",@id="txtuserpassword" })</td>
- </tr>
- <tr>
- <td colspan="2">
- <input type="submit" value="Login" title="login" onclick=" display();"/>
- </td>
- </tr>
- </table>
- }
Step 5
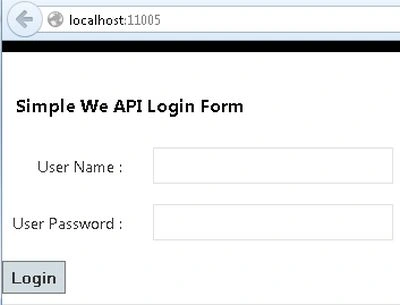
Execute the application. The output will be:
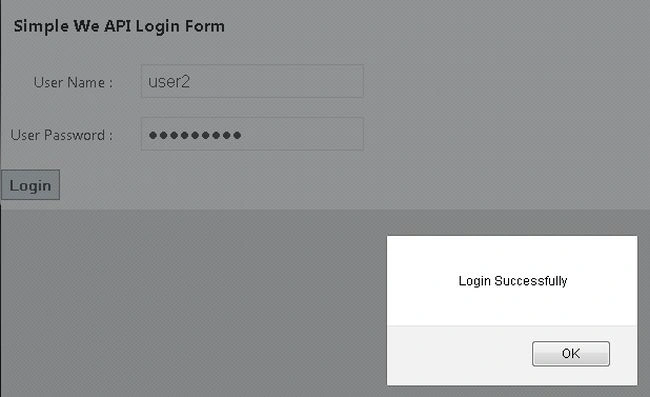
Enter the UserName and UserPassword declared in the controller. The output will be:
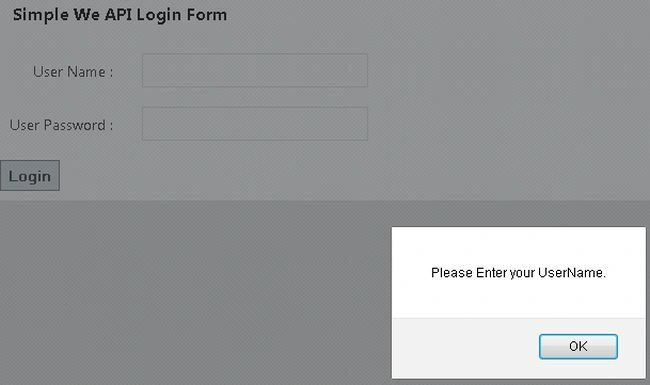
Now leavt the UserName TextBox empty; then its output looks as:
Surya Pratap SinghPosted Apr 2, 2017, 1:54 AM
It's nice but not useful only basic understanding.
Yogesh SharmaPosted Feb 26, 2016, 2:07 AM
But, if i want to check it same way from sql table ????
Yogesh SharmaPosted Feb 26, 2016, 2:06 AM
In this articles you have checked username and password in line (i.e already defined)...
Ajeet MishraPosted Oct 23, 2015, 8:25 AM
nice