

Introduction
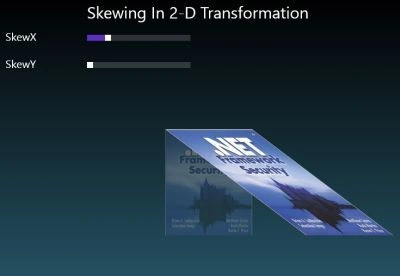
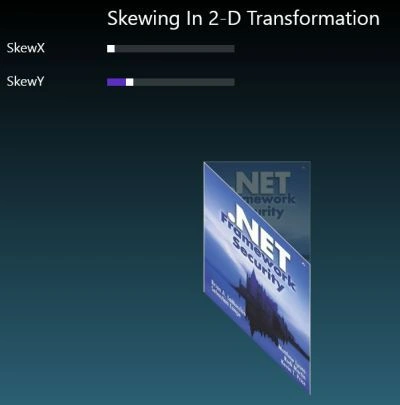
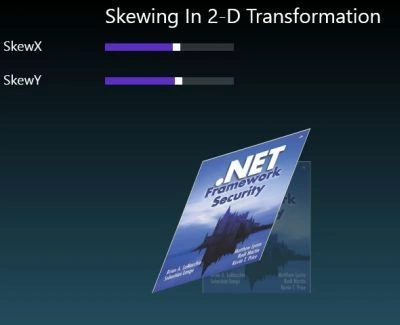
The operations of 2-D Transformation includes Rotation, Scaling, Skewing and Translate. Today I am going to explain the Skewing operation of this 2-D Transformation. In all of these four the skew is probably the trickiest to understand, since its values (in degrees) don't appear to apply in the ways that one might expect. The easiest way to consider skew is to think of the values as "pulling" on opposite sides of the element box to create the angle specified. In order to see how it works let's use the following steps.
Step 1
First you have to open Visual Studio 2012 and then select File -> New -> project. A window is shown; in that window select Windows Store inside the Visual C# from the left pane and then select BlankPage from the center pane then give a name for your application, for eample I used the name "Skewing1", then click ok.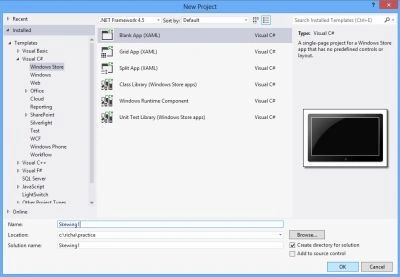
Step 2
Add the image to your application in which you apply the skewing operation.
Step 3
Open the MainPage.xaml file and write the code in this as:
<Page
x:Class="Skewing1.MainPage"
xmlns="http://schemas.microsoft.com/winfx/2006/xaml/presentation"
xmlns:x="http://schemas.microsoft.com/winfx/2006/xaml"
xmlns:local="using:Skewing1"
xmlns:d="http://schemas.microsoft.com/expression/blend/2008"
xmlns:mc="http://schemas.openxmlformats.org/markup-compatibility/2006"
mc:Ignorable="d">
<Grid>
<Grid.Background>
<LinearGradientBrush EndPoint="0.5,1" StartPoint="0.5,0">
<GradientStop Color="Black"/>
<GradientStop Color="#FF4DAACD" Offset="1"/>
</LinearGradientBrush>
</Grid.Background>
<Grid.RowDefinitions>
<RowDefinition Height="50"/>
<RowDefinition Height="50"/>
<RowDefinition Height="50"/>
<RowDefinition Height="50"/>
</Grid.RowDefinitions>
<Grid.ColumnDefinitions>
<ColumnDefinition Width="150"/>

Join the conversation! Your thoughts help the community grow.