

Introduction
TimePicker represents a control that allows a user to pick a
time value.
Step 1
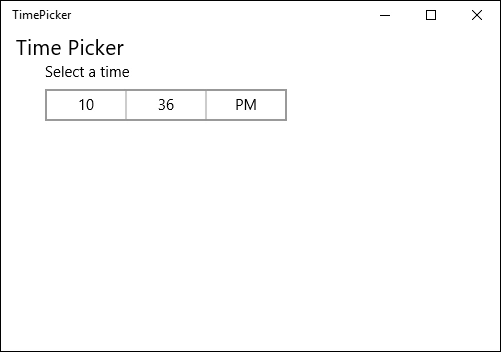
Open a blank app and add TimePicker and Textblock control either from the toolbox or by copying the following XAML Code into your grid.
- <TextBlock Text=" Time Picker " FontSize="20">
- </TextBlock>
- <StackPanel Margin="20,30,0,0">
- <TimePicker Name="myTime" Header="Select a time" ClockIdentifier="12HourClock" TimeChanged="myTime_TimeChanged" Margin="15,0,0,0">
- </TimePicker>
- <TextBlock x:Name="selectedTime" Margin="15,15,0,0" Foreground="Green" />
- </StackPanel>
The Header defines a small text above the TimePicker control.
The ClockIdentifier defines whether to show a 12 hour or 24-hour clock. By default, it is a 12-hour clock. By selecting it for 24 hours the AM/PM selection part will not be available.
 Step 2
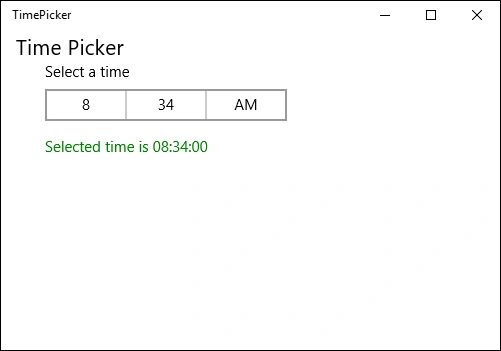
Copy and paste the following code to the myTime_Time Changes event on the cs page and run your application.
- selectedTime.Text = "Selected time is " + e.NewTime.ToString();
Summary
In this article, we learned about TimePicker Control For Windows 10.
Mari ShankariPosted Aug 2, 2017, 3:23 AM
Any blank App?? Could you please explain me in detail if anybody knows this clear
Kuppurasu NagarajPosted Feb 11, 2016, 12:39 PM
Nice Ramees..
Gowtham KPosted Oct 30, 2015, 12:38 PM
Nice One, Thanks for sharing
Nilesh JadavPosted Oct 30, 2015, 11:54 AM
Good one !
RameesPosted Oct 30, 2015, 9:35 AM
Thanks :)
Sibeesh VenuPosted Oct 30, 2015, 5:11 AM
Nice Share
Mukesh KumarPosted Oct 30, 2015, 2:12 AM
Good Job..
Harshad PansuriyaPosted Oct 30, 2015, 1:37 AM
Nice one