

Why Use Azure ML Designer?
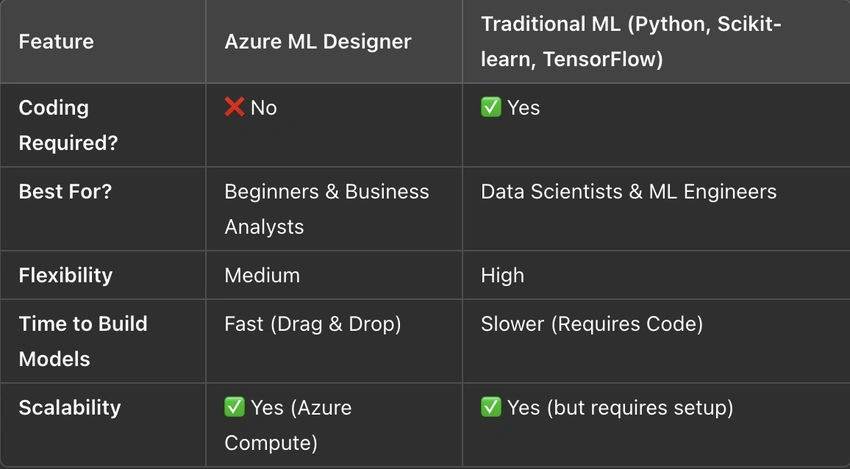
Machine learning often requires extensive coding and data engineering skills, but Azure ML Designer offers a drag-and-drop interface that simplifies the process. With it, you can create, train, and deploy machine learning models without writing a single line of code. Whether you're a beginner exploring ML or a data scientist looking to streamline workflows, Azure ML Designer provides a visual approach to machine learning.
Imagine building a machine learning pipeline like constructing a flowchart—simply drag components (datasets, transformations, algorithms) onto the canvas and connect them. That’s Azure ML Designer in action.
How Does Azure ML Designer Work?
Azure ML Designer follows a modular approach where each step in the machine learning pipeline is represented as a visual block. The key stages include:
- ✅ Ingesting Data: Import datasets from Azure Blob Storage, Databases, or local files.
- ✅ Data Preprocessing: Clean, transform, and filter datasets using built-in functions.
- ✅ Model Selection & Training: Choose from a variety of ML models and train them visually.
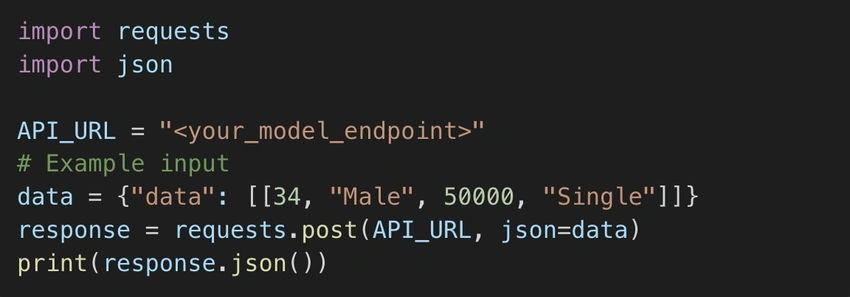
- ✅ Evaluation & Deployment: Test models and deploy them as REST API endpoints.
Building a Machine Learning Model
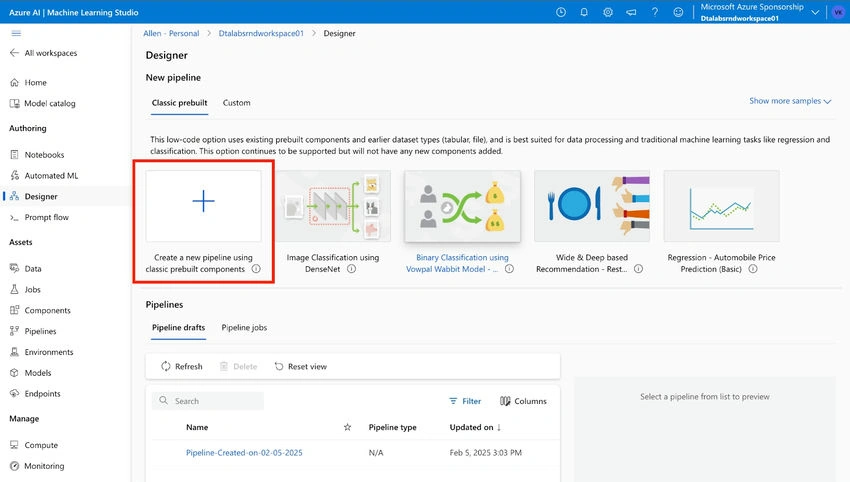
Step 1. Accessing Azure ML Designer
- Navigate to Azure Machine Learning Studio (Azure ML Portal).
- Open Azure ML Designer from the left sidebar.
- Click "+ New Pipeline" to start a new project.
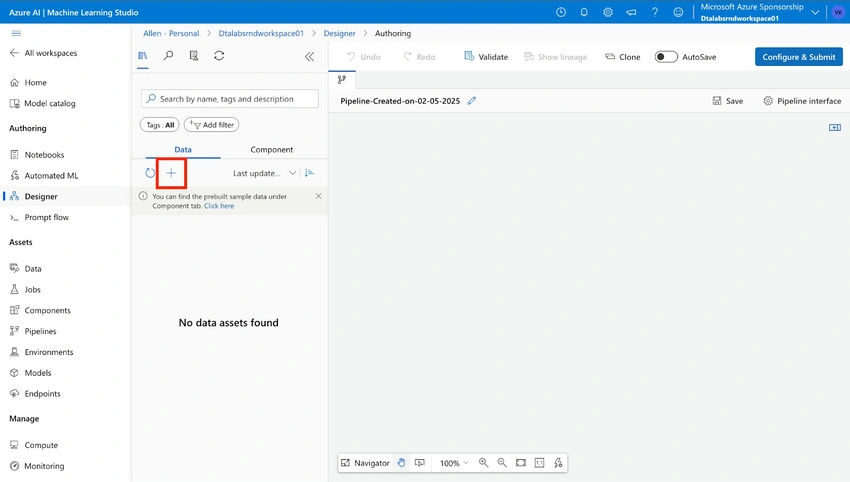
Step 2. Adding a Dataset
- Drag and drop the Dataset module onto the canvas.
- If using built-in datasets, choose from Microsoft’s sample datasets.
- If uploading your own data, click "+ Create Dataset" → Select CSV, JSON, or Parquet files.
📌 Pro Tip. Ensure the dataset is cleaned before training to avoid data bias.
Step 3. Data Preprocessing
- Drag "Select Columns in Dataset" to filter relevant features.
- Use "Clean Missing Data" to handle null values.
- Apply "Normalize Data" if working with numerical features.

Join the conversation! Your thoughts help the community grow.