
🔷 Introduction
In Microsoft SharePoint, document collaboration is a core feature. However, when multiple users work on the same file, there is a risk of overwriting changes.
To solve this, SharePoint provides the Check In / Check Out functionality, which helps control editing and maintain document integrity.
This feature ensures that only one user edits a document at a time while others can still view it.
🔷 What is Check Out in SharePoint?
Check Out means locking a document for editing.
When a user checks out a file:
Only that user can edit it
Others can view it in read-only mode
It prevents conflicts and accidental overwrites
👉 Think of it like taking a company file to your desk — no one else can change it until you put it back.
🔷 What is Check In in SharePoint?
Check In means saving and publishing your changes back to the library.
Once checked in:
Changes become visible to others
Other users can now edit the file
You can also:
Add comments
Create versions (if versioning is enabled)
👉 Changes are not visible to others until the file is checked in.
🔷 How Check In / Check Out Works (Step-by-Step)
✔️ Step 1: Check Out the Document
Go to the SharePoint Document Library
Select the file
Click … (More options)
Click Check Out
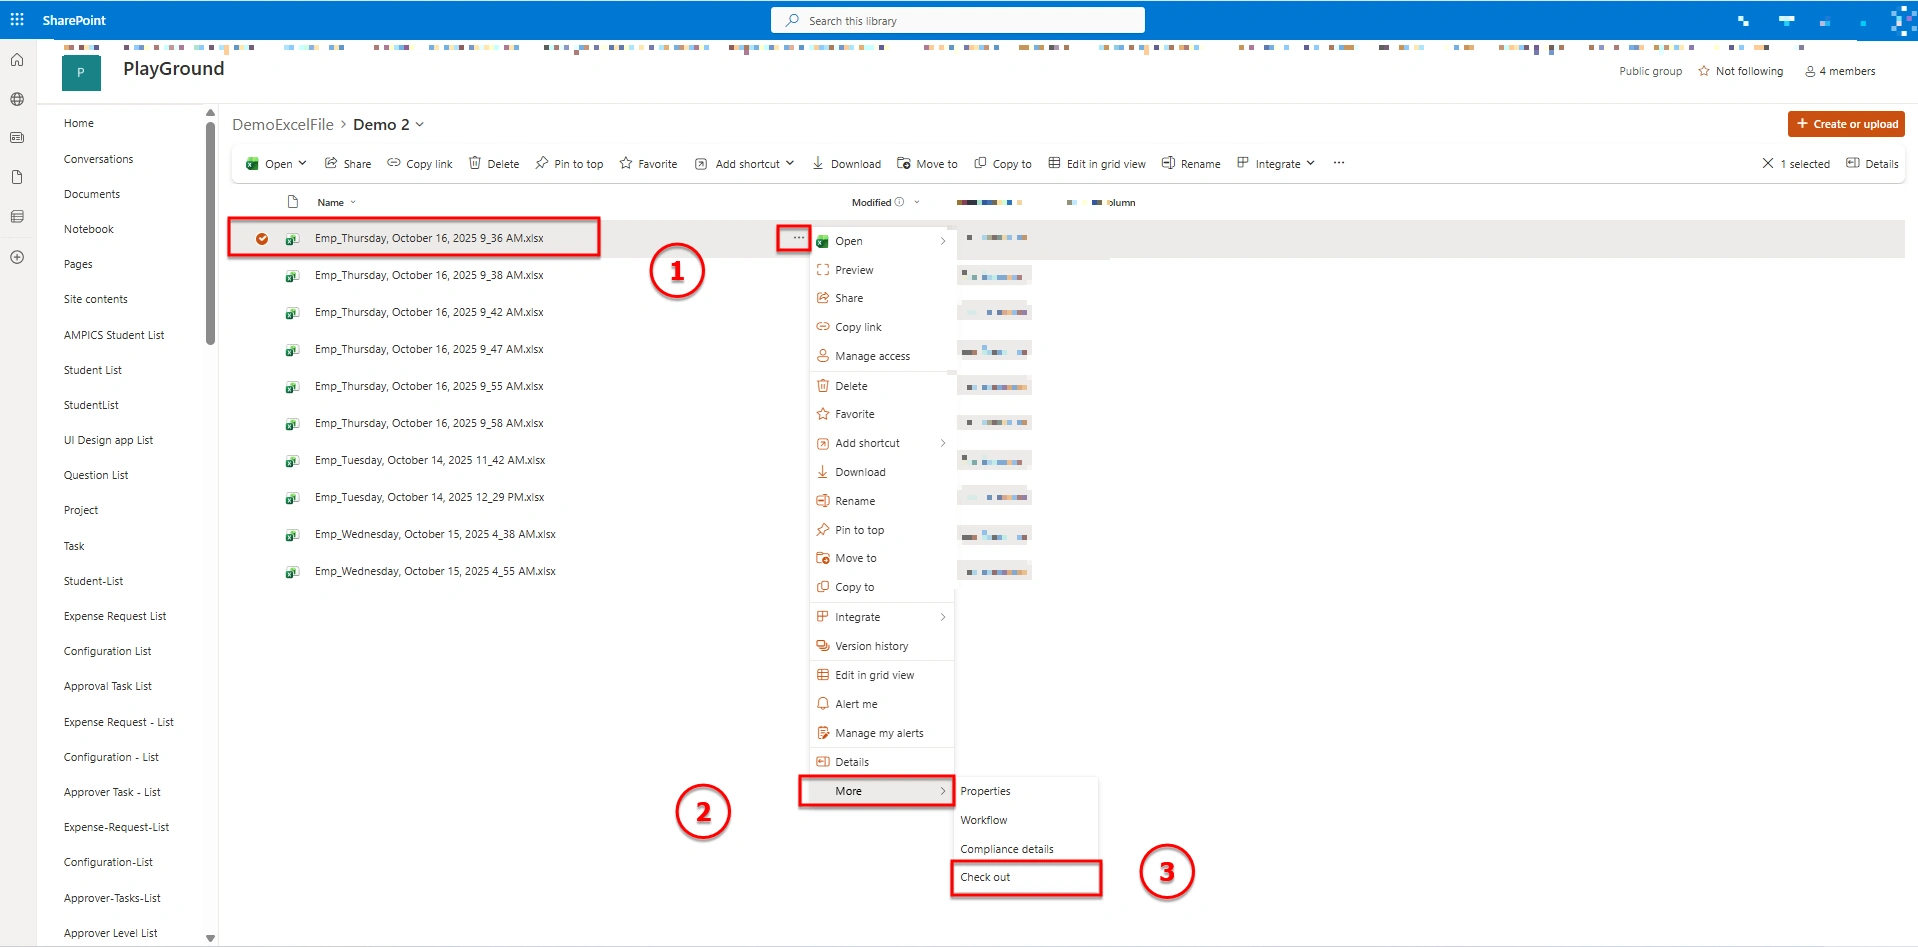
👉 Now the file is locked for editing
When a user clicks Check Out:
A confirmation popup appears (Check Out confirmation message)
After confirming, the document gets locked for editing
In the document library, the file shows a green arrow icon / checkout indicator next to it

👉 This icon indicates that the document is currently checked out by a user
Step 2: Edit the Document
Open the document (browser or desktop app)
Make required changes
Save the document
👉 You can save multiple times while it is checked out
Step 3: Check In the Document
Go back to the library
Select the file
Click Check In
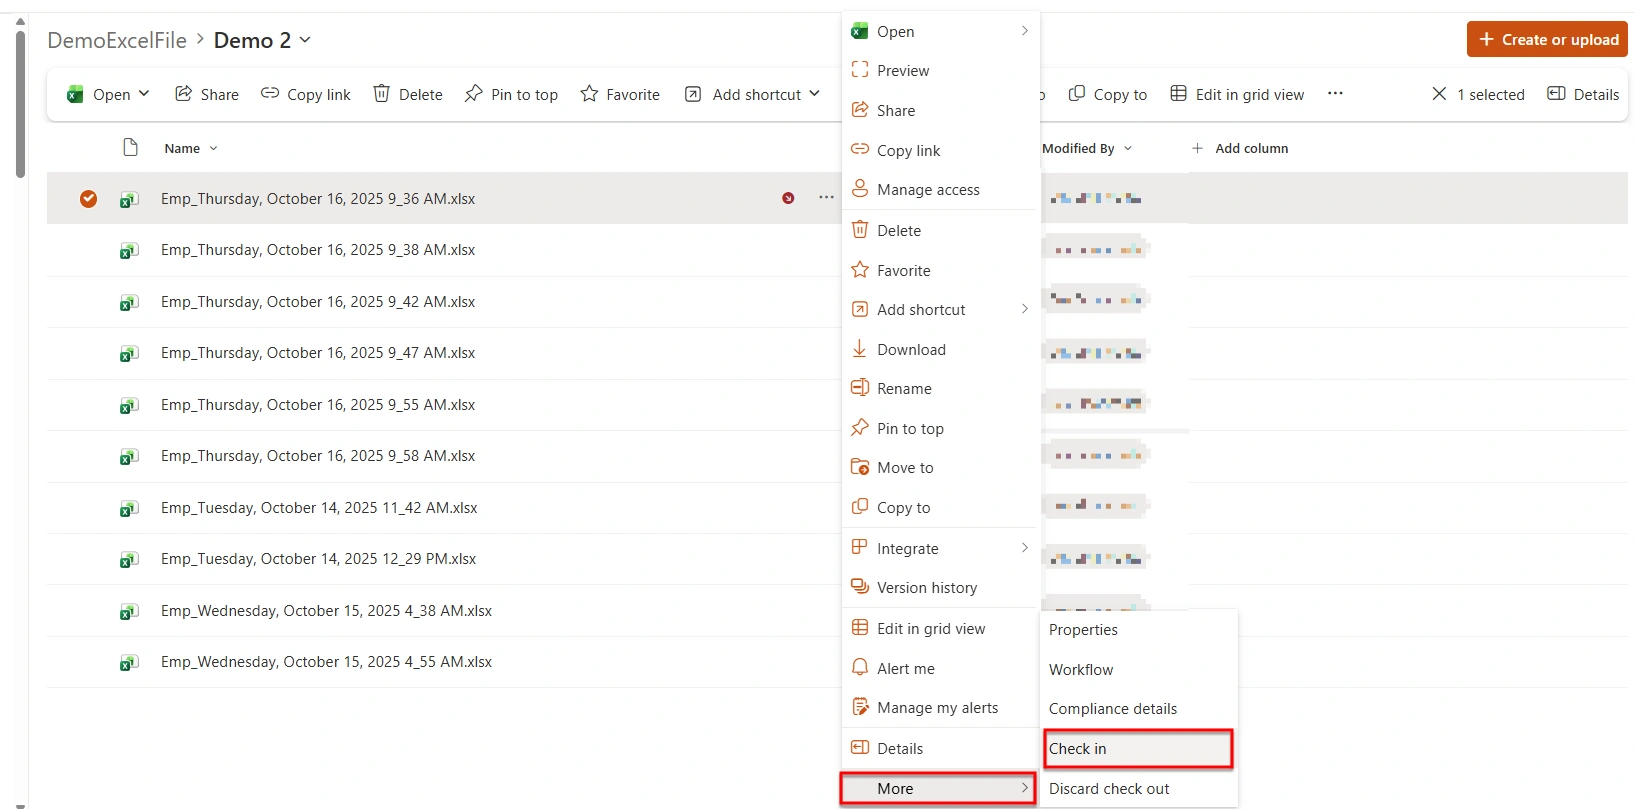
Add comments (optional but recommended)
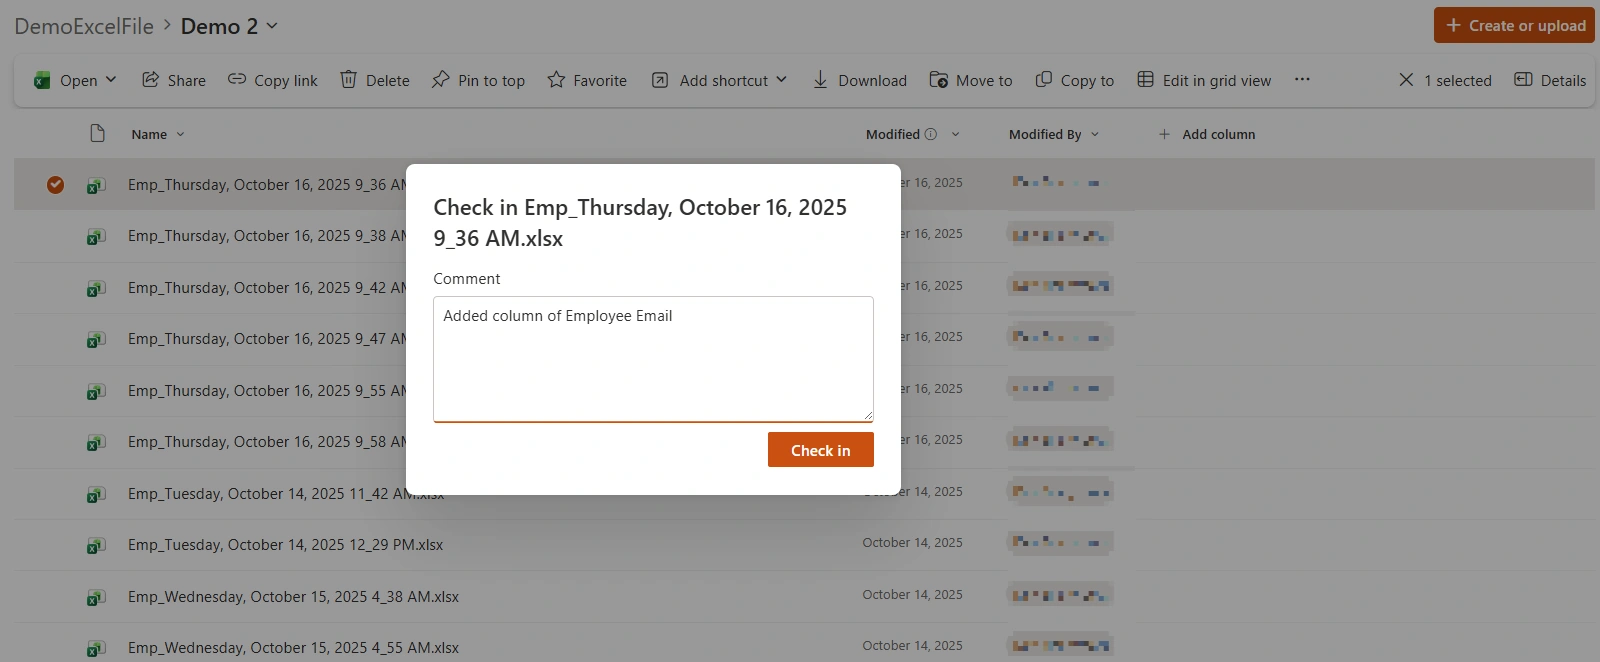
Click OK
👉 Now others can edit the file
🔷 Versioning with Check In / Check Out
When versioning is enabled:
Each check-in creates a new version
Two types of versions:
Major versions → Published
Minor versions → Draft
Users can also add comments during check-in to describe what changes were made
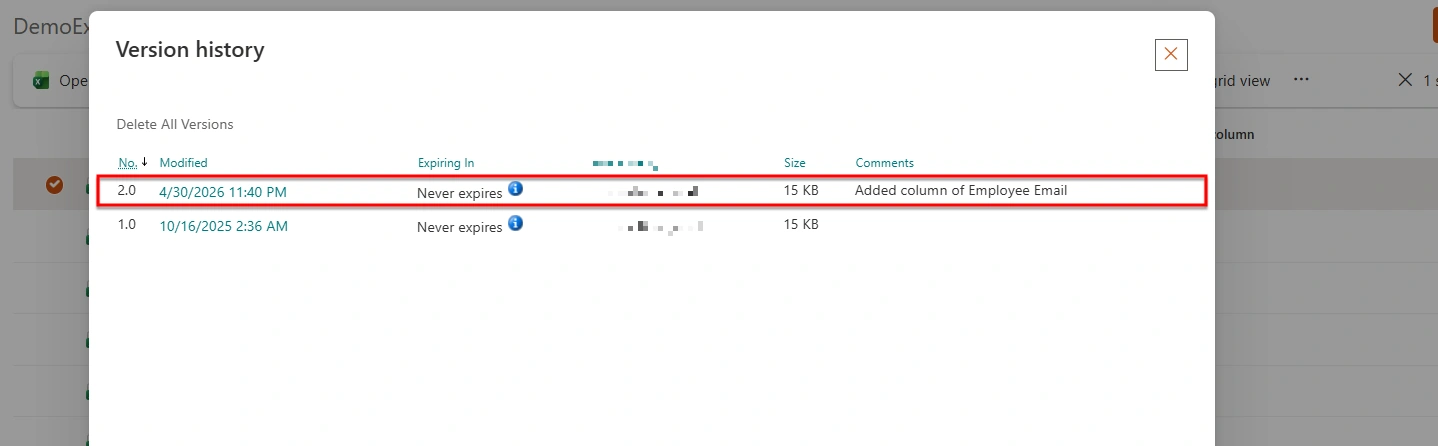
👉 Versioning helps track changes and restore older versions if needed
🔷 Discard Check Out
If you don’t want to save changes:
Select the file
Click Discard Check Out
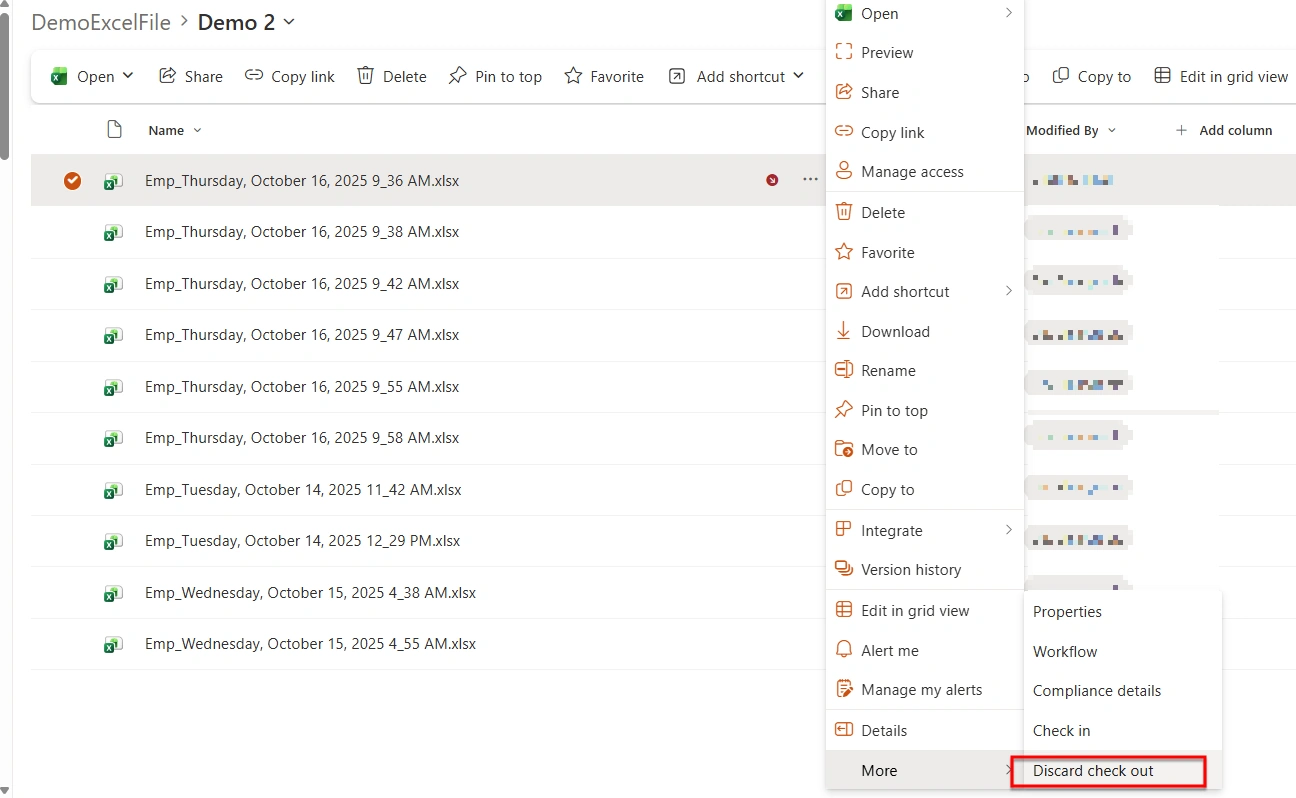
👉 This removes your changes and restores the last saved version
🔷Why Use Check In / Check Out?
✅ Prevents Editing Conflicts: Only one user can edit the document at a time, ensuring no overlapping changes.
✅ Improves Data Accuracy: Reduces the risk of accidental overwrites or incorrect updates by multiple users.
✅ Enables Version History Tracking: Every check-in creates a saved version, making it easy to track changes and revert if needed.
🔷 When NOT to Use It
If the document needs to be edited by multiple users at the same time
When real-time collaboration is required for faster updates
👉 SharePoint allows real-time editing without checkout in modern collaboration scenarios
🔷 Conclusion
The Check In / Check Out feature in SharePoint helps control document editing by avoiding conflicts and tracking changes through version history.
For better collaboration, it should be used along with versioning and co-authoring in modern teamwork.
Join the conversation! Your thoughts help the community grow.