

In this article I am going to discuss about "WEB PARTS" in ASP.NET 2.0,the most exciting feature of ASP.NET 2.0.
- Web Part Manager
- Web Part Zone
- Catalog Part
- Catalog Zone
- Connections Zone
- Editor Part
- Editor Zone
In this exercise, lets see the usage of Web Part Manager, WebPartZone and how to use conventional Web Controls (ASP.NET CONTROLS/User Controls) as Web Parts.
- Web Part Zone can contain one or more Web Part controls.
- This provides the layout for the Controls it contains. A single ASPX page can contain one or more Web Part Zones.
- A Web Part Control can be any of the controls in the toolbox or even the customized user controls.
How to create a Web Part Page:
Step 1: Create a table, which can accommodate 3 rows and 1 column.
Step 2: Add a "Web Part Manager" to the page by dragging from the Tool Box under the Web Parts Category
Step 3: Add a "Web Part Zone" Control to the page by dragging from the Tool Box
Step 4: Add one more "Web Part Zone" Control to the page by dragging from the Tool Box.
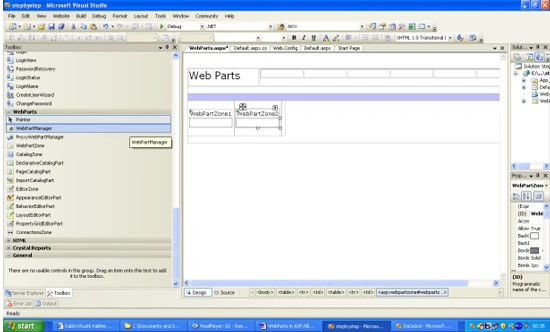
Figure 1
Step 7: Select "Web User Control" as the type and name it as "myusercontrol.ascx".
Step 8: Add a table having 1 row and 1 column and add the following text inside the <td> </td>
Step 9: "Welcome to webparts home". The web parts HomePage is highly personalizable. To personalize this page, use the links in the upper corner.
Step 10: HTML Content can be added basing on your interest.
Step 11: Switch to Design View and drag and drop myusercontrol.ascx in webpartzone1.
Step 12: Now your Page in Design View will look similar to the one below:
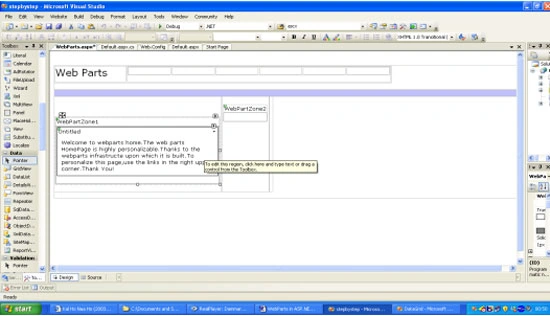
Figure 2
Step 13: Change the title of the user control to "Webparts". This can be done by selecting the user control and switching to "Source".
Step 14: Inside the <Zone Template> you can find this tag:
- <uc1:myusercontrol ID="Myusercontrol1" runat="server" />
Change this to:
- <uc1:myusercontrol ID="Myusercontrol1" runat="server" Title=”WebParts”/>
Step 15: Any web control can be added to the Web Part Zone. To prove this pick any control from the tool box and drop it in the "Web Part Zone2". For interactive ness, I am using Calendar Control in my Web Part Zone2.
Step 16: Change the Title of the Calendar Control to "MyCalendar Control" in the same way as you have done for myusercontrol.ascx.
Step 17: After adding Calendar Control, my page looks like this in the Run Mode:
Step 18: Now comes the most interesting part of Web Parts.
The Beauty of "Web Parts" is that it maintains its own Database for storing the User Preferences by assigning a unique User ID to each and every user accessing the "Web Parts".
To prove this lets see the example I have specified below:
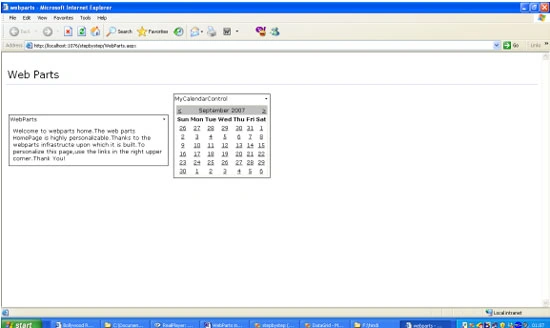
Figure 3
Step 19: On the Browser you can see a smart tag (the drop down arrow in blue on the top right hand corner for each zone). If you click on any of the tags, your pages will look similar to this:
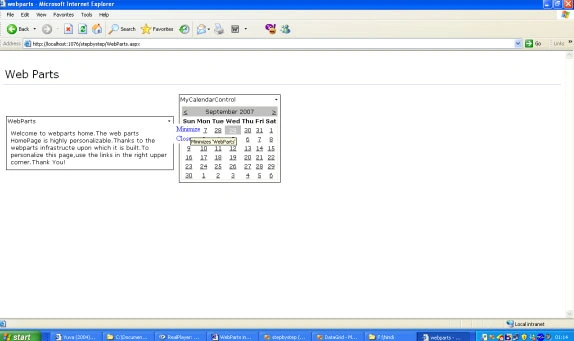
Figure 4
Step 20: You will be provided with two options.
- Minimize
- Close
Step 21: Click on "Minimize" your page will look similar to this:
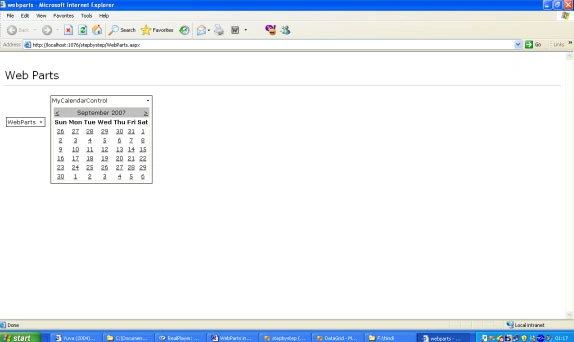
Figure 5
Step 22: Close your Browser and come back to the Design Part of the Page.
Step 23: Now execute your application again to check the preferences are saved or not.
Step 24: Interestingly, if you can observe the settings you have made to Zone1 are applied and you can see that WebPartZone1 is still minimized.
Step 25: So your application on the Browser should be similar to this:
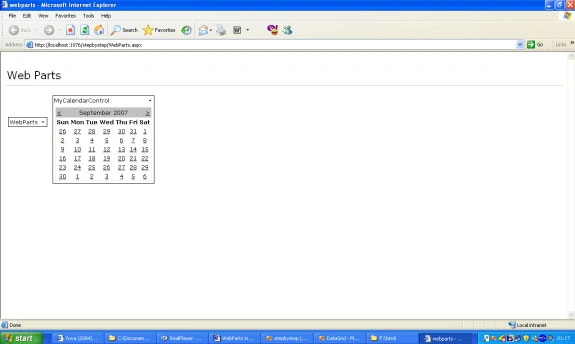
Figure 6
anand sengarPosted Jun 13, 2011, 3:13 AM
i have followed all step describing by you. it's very nice post. but i got error - Failed to generate a user instance of SQL Server due to a failure in starting the process for the user instance. The connection will be closed. kindly help me out thank you
Bharath TabetiPosted Oct 25, 2007, 4:01 AM
"Error occured while establishing a connection to SQL Server 5005".. How should I configure it with SQL Server 2000. When I disable Personalisation for the WebPartManager It is working fine, but with out smart tags Please help.. [email protected]