

This is the second article in our Unit Testing in .NET Core series! In the previous article: Introduction to Unit Testing in .NET Core.
We covered an introduction to unit testing and explored the various testing frameworks available in .NET Core. Now, in this article, we'll take a deep dive into xUnit.net and learn how to write our first unit test using this powerful library. So let's get started.
Setting up the project
To begin our journey into writing our first unit test, we'll create a straightforward calculator application. Using Visual Studio, we'll start by setting up a class library project named SimpleCalculatorApp. Inside this project, we'll add a class called, where we'll implement separate methods for Add, Subtract, Multiply, and Divide operations. Here's the resulting code section for the Calculator.cs class.
namespace SimpleCalculatorApp
{
    public class Calculator
    {
        public int Add(int num1, int num2)
        {
            return num1 + num2;
        }

        public int Subtract(int num1, int num2)
        {
            return num1 - num2;
        }

        public int Multiply(int num1, int num2)
        {
            return num1 * num2;
        }

        public int Divide(int num1, int num2)
        {
            if (num2 == 0)
            {
                throw new ArgumentException("Cannot divide by zero.");
            }

            return num1 / num2;
        }
    }
}
Setting up the test project
Now that we have our Calculator class and methods ready for testing let's start writing the unit tests. To do this, we'll add a Unit Test project to our application by following these simple steps:
-
In Visual Studio, right-click on the existing solution that contains the SimpleCalculatorApp project, and choose "Add" from the context menu.
-
Select "New Project" to open the Create a new project dialog.
-
In the search box, type "xUnit" to find the xUnit.net Test Project template.
-
Choose the xUnit Test Project template, and give it a name like SimpleCalculatorApp.Tests, and click "Create."
Once the Unit Test project is added, we are ready to begin writing and running unit tests for the Calculator class. To do that, we need to add a reference to the SimpleCalculatorApp project in our test project. For that, perform the following steps.
-
Right-click on the SimpleCalculatorApp.Tests project in the Solution Explorer.
-
Select "Edit Project File" from the context menu.
-
Add a reference to the SimpleCalculatorApp project by adding the following lines inside the
<ItemGroup>element:<ItemGroup> <ProjectReference Include="..\SimpleCalculatorApp\SimpleCalculatorApp.csproj" /> </ItemGroup>
Create and Run xUnit Tests
-
In the SimpleCalculatorApp.Tests project, we will find a default test class named
UnitTest1.cs. -
Rename
UnitTest1.cstoCalculatorTests.cs. A recommended practice is to name our test classes using the pattern<class-under-test>Tests.cs. -
Inside the
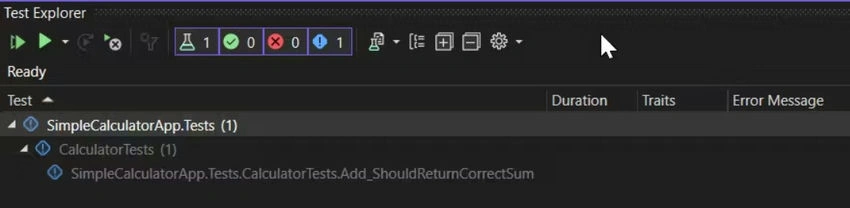
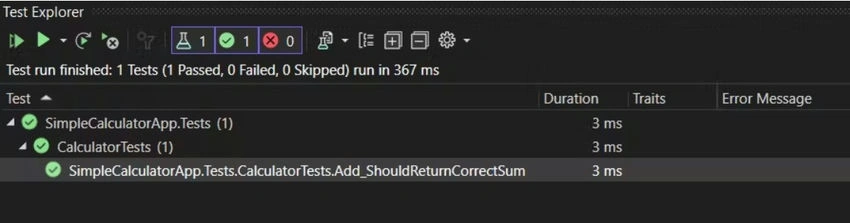
CalculatorTestsclass, let's write our first xUnit test method. In this test method, we will test theAddmethod from theCalculatorclass.using SimpleCalculatorApp; using Xunit; public class CalculatorTests { [Fact] public void Add_ShouldReturnCorrectSum() { // Arrange var calculator = new Calculator(); int a = 5; int b = 3; // Act int result = calculator.Add(a, b); // Assert Assert.Equal(8, result); } }Let's break down the above code step by step.
-
The code starts by importing the Xunit namespace, which provides the necessary classes and attributes to write unit tests.
-
The
CalculatorTestsclass is created, which will contain our unit test methods. It is marked with the[Fact]attribute, indicating that the method inside this class is a test that should be executed. The[Fact]is an attribute provided by xUnit to define a method as a unit test method. The test runners will take up all the methods decorated by[Fact]attribute for execution. -
This is followed by the test method itself. The test method is called
Add_ShouldReturnCorrectSum. This method tests theAddmethod of a class calledCalculator. The test method is divided into three parts - Arrange, Act and Assert. -
The
Arrangesection is where we set up the test environment. We create an instance of theCalculatorclass and assign values to two variables,aandb, representing positive numbers (in this case, 5 and 3). -
The
Actsection is where we perform the action we want to test. Here, we call theAddmethod of theCalculatorclass and pass the values ofaandbas arguments. The result of the addition is stored in a variable calledresult. -
The
Assertsection is where we verify whether the test passed or failed. We use theAssert.Equalmethod from Xunit to check ifresultthe addition is equal to the expected value, which is 8 (5 + 3 = 8).
-
Join the conversation! Your thoughts help the community grow.