

Introduction
In this article, we will delve into the process of seamlessly uploading files and their associated metadata from PowerApps to a SharePoint library using Power Automate. The following three straightforward steps will guide you through the entire procedure.
Step 1. PowerApps Form
Begin by creating a user-friendly PowerApps form that incorporates an attachment control along with three metadata properties.
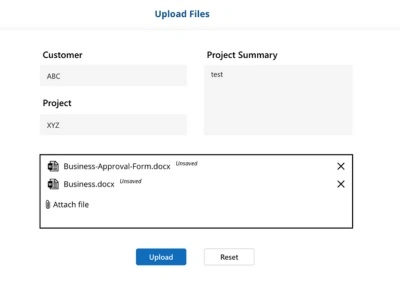
Step 2. Configure Power Automate Flow
Whether integrated within PowerApps or created separately from the Power Automate landing page, set up a flow with the following steps:
- Name Your Flow: Give your flow a meaningful name, such as "UploadFiles_To_SP
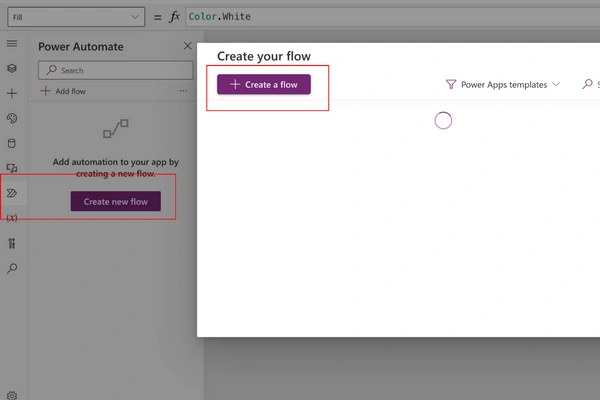
- Add Inputs: Select "Add an input" and choose File and Text based on the number of inputs in your form.
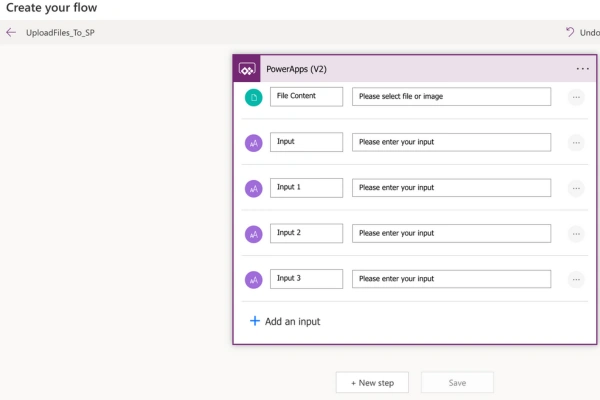
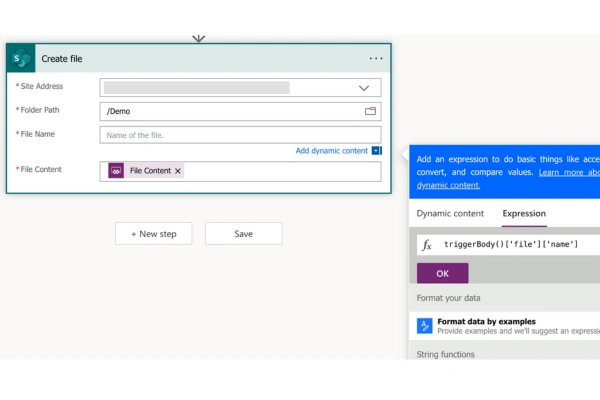
Create File Action
- Select the "Create File" action.
- Choose "File Content" from dynamic content.
- For "File Name," use the expression triggerBody()['file']['name'].
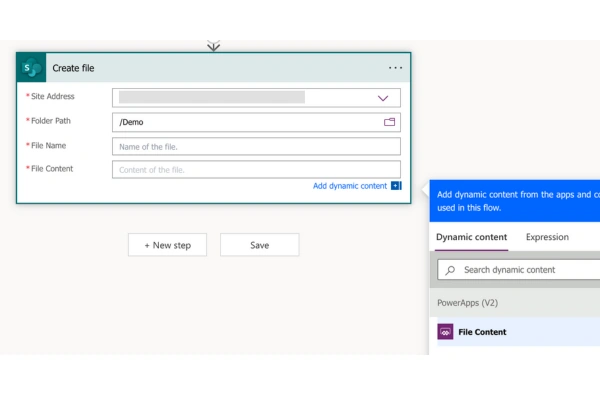
Update File Properties Action
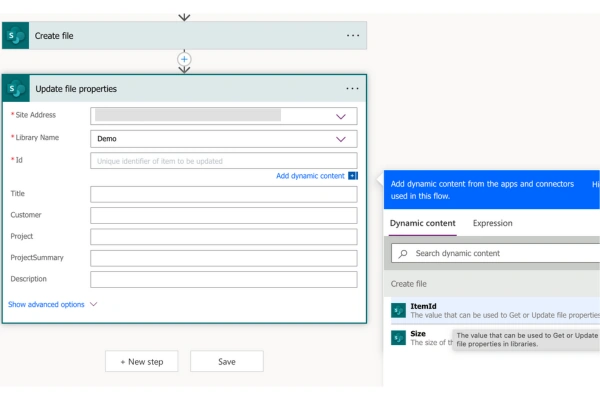
- Add the "Update file properties" action.
- Select the dynamic content ItemId from the create file action.
Metadata Handling
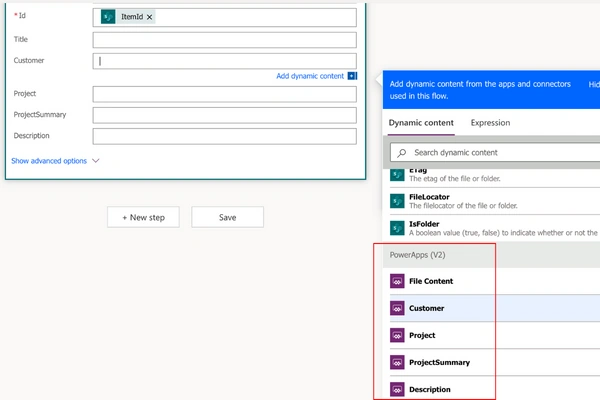
- For metadata, reference the PowerApps trigger and rename the inputs for clarity.
- Save the flow once all configurations are complete.
Step 3. PowerApps Fx & Integration
In case of errors, carefully review the PowerApps trigger order. Ensure that the values are correctly passed from PowerApps to Power Automate.

Add the following code to the OnSelect property of the upload button:
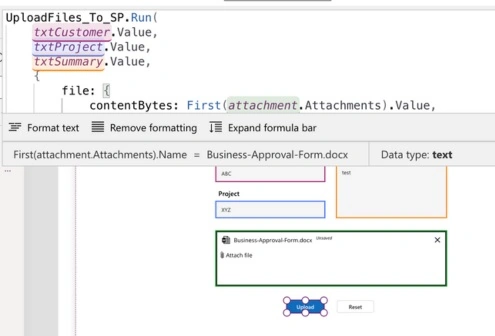
UploadFiles_To_SP.Run(
    txtCustomer.Value,
    txtProject.Value,
    txtSummary.Value,
    {
        file: {
            contentBytes: First(attachment.Attachments).Value,
            name: First(attachment.Attachments).Name
        }
    }
)
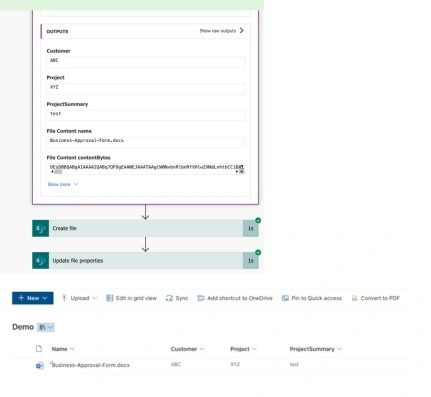
With this implementation, your flow will execute successfully.
Conclusion
Achieving a seamless file upload and metadata handling process from PowerApps to SharePoint library is simplified into three comprehensive steps. By integrating PowerApps forms, configuring Power Automate flows, and ensuring proper PowerApps trigger order, users can efficiently manage file uploads and associated metadata in SharePoint. This streamlined process enhances user experience and facilitates effective data management.
Happy learning!
Aayushi BPosted Mar 29, 2024, 3:40 PM
How to upload multiple images in Library with image control image should be saved in specific choice column