

Overview
Today, we will see how to upload files, whether it's a Word file, pdf, zip files etc., and save them in the Oracle database as well as retrieve those files and download those. This code is useful when you need to upload various documents in an organization, including process documents, news and so on. Other users will have to download those files and see the contents. To see the content of what you have uploaded, you have to save it in Binary format. Let's start:
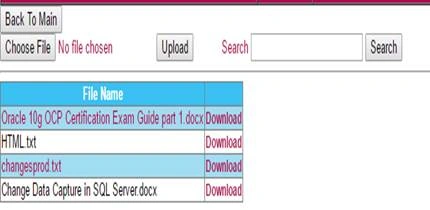
Step 1 : Lets create a table first
First, you need to install the Oracle Database on your machine and create databases in your system. The Oracle SQL Developer is a GUI to access those databases.
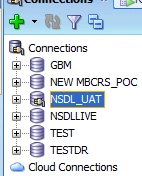
Once you are through with the installation and creation of the database, it is time to add a connection.
Note:
Before installing Oracle, you need to add TNS names in tnsnames.ora in order to communicate with your databases.
Go to your system drive where you had installed the Oracle. This is my path:
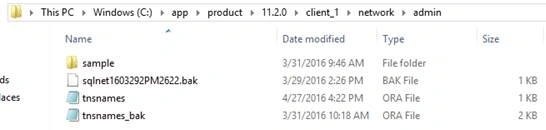
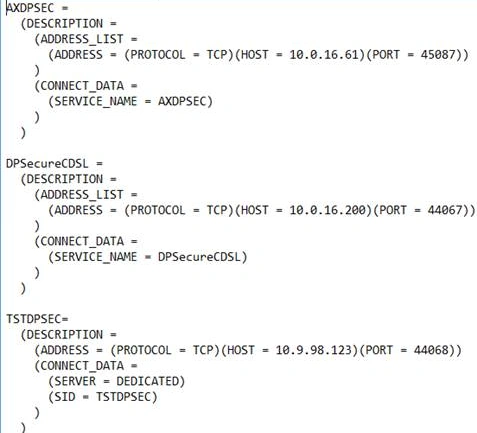
Open tnsname.ora file and add a TNS entry there.
Now, configure the connection in your Oracle SQL Developer.
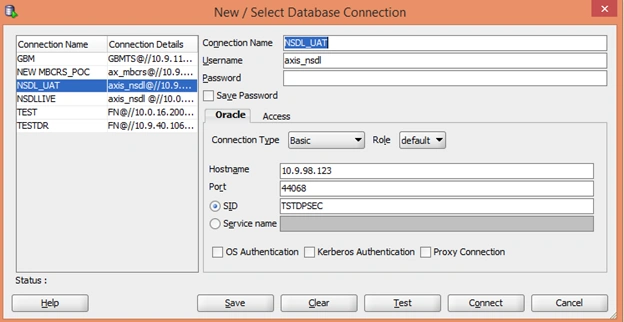
Click on Connect. It will add a connection successfully. We have connected to our database successfully .
Now, let's create a table.
Look at the Data type in Oracle carefully. I made ID as primary key. Oracle doesn’t identify the GUI. So, you have to write a query for this .
The name I gave is Varchar2 with a length of 4000 Bytes (maximum).
Content type is again varchar2 which is again 4000 Bytes long (maximum).
Data is stored in BLOB. ( Remember in the previous article in SQL server we had been storing data in Binary Format). Here, in Oracle, we will be saving Data in BLOB .
Once we have created the table, it's time to create id as autoincrement.
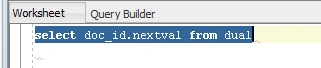
Just type this command,

It will create a sequence, doc_id. Now, just see by selecting the statement if your sequence has been created or not .
Step 2 : Open Visual Studio
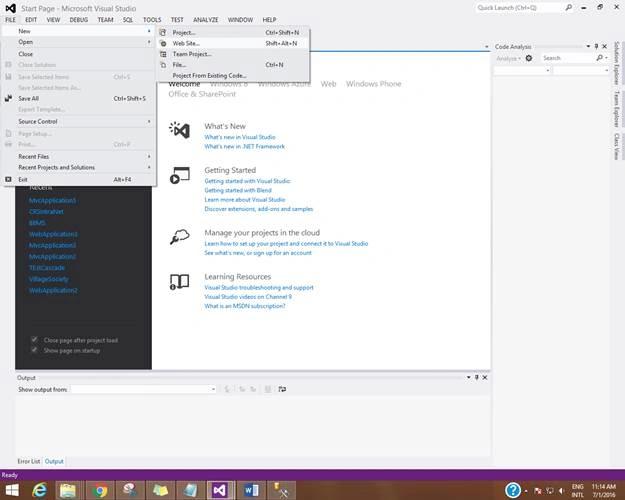
Open Visual Studio File->New Website.
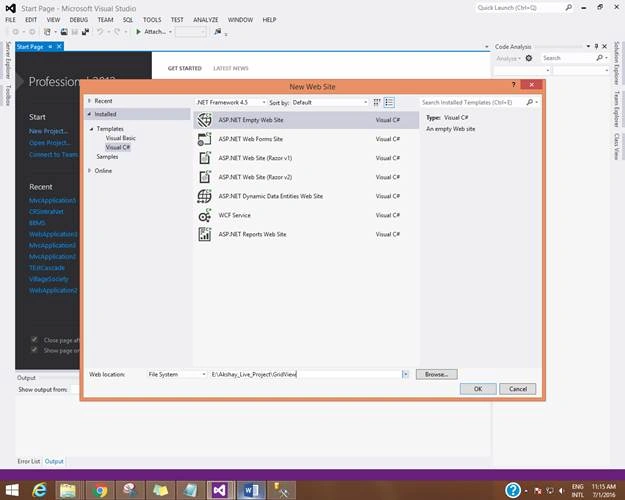
Select ASP.NET Empty Website and Give suitable name as DocumentSaveInBinary,
Now, let's create FileUpload Control as,

- <asp:FileUpload ID="FileUpload1" runat="server" />
- <asp:Button ID="btnUpload" runat="server" Text="Upload" OnClick="Upload" CssClass="btn-primary" />
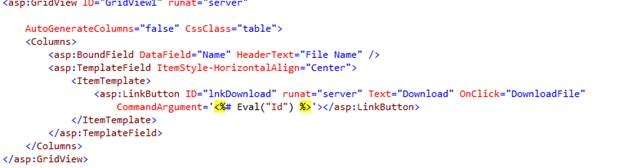
- <asp:GridView ID="GridView1" runat="server"
- AutoGenerateColumns="false" CssClass="table">
- <Columns>
- <asp:BoundField DataField="Name" HeaderText="File Name" />
- <asp:TemplateField ItemStyle-HorizontalAlign="Center">
- <ItemTemplate>
- <asp:LinkButton ID="lnkDownload" runat="server" Text="Download" OnClick="DownloadFile"
- CommandArgument='<%# Eval("Id") %>'></asp:LinkButton>
- </ItemTemplate>
- </asp:TemplateField>
- </Columns>
- </asp:GridView>
So my final Document.aspx code is,
- <%@ Page Language="C#" AutoEventWireup="true" CodeFile="DocumentUpload.aspx.cs" Inherits="_Default" %>
- <!DOCTYPE html PUBLIC "-//W3C//DTD XHTML 1.0 Transitional//EN" "http://www.w3.org/TR/xhtml1/DTD/xhtml1-transitional.dtd">
- <html xmlns="http://www.w3.org/1999/xhtml">
- <head id="Head1" runat="server">
- <title></title>
- <link rel="Stylesheet" href="Styles/bootstrap.min.css" style="" />
- <link rel="Stylesheet" href="Styles/bootstrap.css" />
- </head>
- <body>
- <form id="form1" runat="server">
- <div class="container">
- <asp:FileUpload ID="FileUpload1" runat="server" />
- <asp:Button ID="btnUpload" runat="server" Text="Upload" OnClick="Upload" CssClass="btn-primary" />
- <hr />
- <asp:GridView ID="GridView1" runat="server"
- AutoGenerateColumns="false" CssClass="table">
- <Columns>
- <asp:BoundField DataField="Name" HeaderText="File Name" />
- <asp:TemplateField ItemStyle-HorizontalAlign="Center">
- <ItemTemplate>
- <asp:LinkButton ID="lnkDownload" runat="server" Text="Download" OnClick="DownloadFile"
- CommandArgument='<%# Eval("Id") %>'></asp:LinkButton>
- </ItemTemplate>
- </asp:TemplateField>
- </Columns>
- </asp:GridView>
- </div>
- </form>
- </body>
- </html>
Our File Upload Code is :
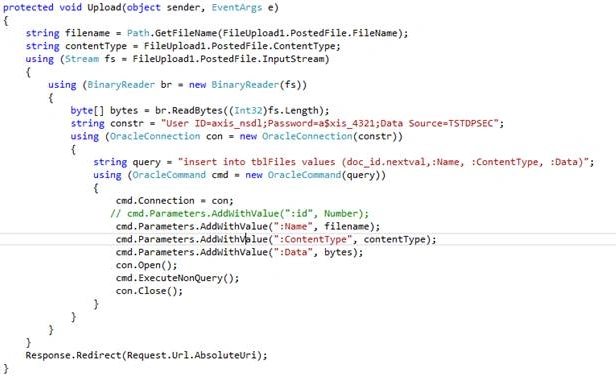
As you see in the above code, we are saving our table FileName,Contentype; here the content types are word, pdf, image and so on and then we are saving the posted file in binary format by using Stream. File which you had uploaded in Fileupload Control and is converted in the binary file through BinaryReader .
Here, I have added a connection string in the code .
Now, while adding, you need to insert the id. See, what I had inserted: sequencename.next val
When we were inserting in SQL, we were using “@” . Here, in Oracle, we are using “:”:
- string constr = "User ID=axis_nsdl;Password=a$xis_4321;Data Source=TSTDPSEC";
- using (OracleConnection con = new OracleConnection(constr))
- {
- string query = "insert into tblFiles values (doc_id.nextval,:Name, :ContentType, :Data)";
- using (OracleCommand cmd = new OracleCommand(query))
- {
- cmd.Connection = con;
- // cmd.Parameters.AddWithValue(":id", Number);
- cmd.Parameters.AddWithValue(":Name", filename);
- cmd.Parameters.AddWithValue(":ContentType", contentType);
- cmd.Parameters.AddWithValue(":Data", bytes);
- con.Open();
- cmd.ExecuteNonQuery();
- con.Close();
- }
- }
- }
- }
- Similarly, we will write the code for download, as we had created Onclick in gridview as Download File
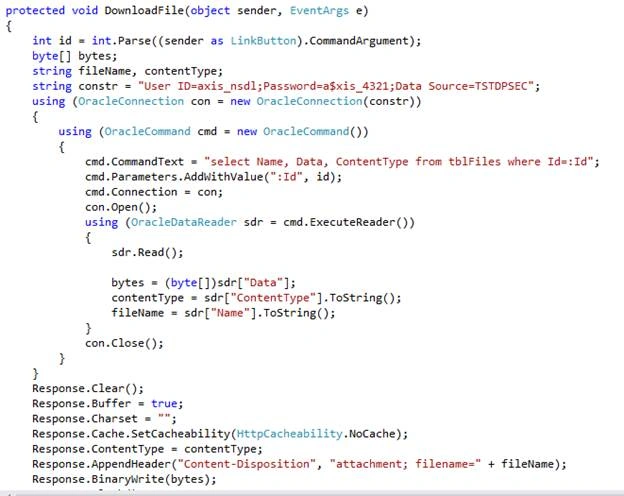
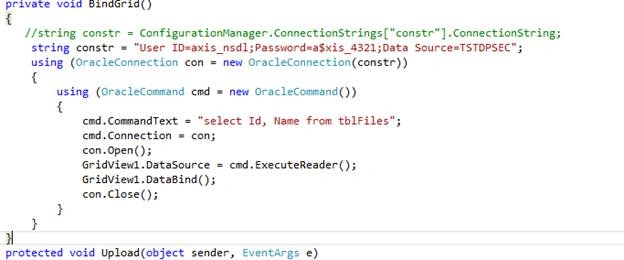
Now, we Will Bind the gridView :
So my Final CS Code is
- using System;
- using System.Collections.Generic;
- using System.Linq;
- using System.Web;
- using System.Data;
- using System.Data.SqlClient;
- using System.IO;
- using System.Web.UI.WebControls;
- using System.Web;
- using System.Configuration;
- using System.Data.OracleClient;
- public partial class _Default : System.Web.UI.Page
- {
- private OracleConnection con = new OracleConnection("User ID=axis_nsdl;Password=a$xis_4321;Data Source=TSTDPSEC");
- protected void Page_Load(object sender, EventArgs e)
- {
- BindGrid();
- }
- private void BindGrid()
- {
- //string constr = ConfigurationManager.ConnectionStrings["constr"].ConnectionString;
- string constr = "User ID=axis_nsdl;Password=a$xis_4321;Data Source=TSTDPSEC";
- using (OracleConnection con = new OracleConnection(constr))
- {
- using (OracleCommand cmd = new OracleCommand())
- {
- cmd.CommandText = "select Id, Name from tblFiles";
- cmd.Connection = con;
- con.Open();
- GridView1.DataSource = cmd.ExecuteReader();
- GridView1.DataBind();
- con.Close();
- }
- }
- }
- protected void Upload(object sender, EventArgs e)
- {
- string filename = Path.GetFileName(FileUpload1.PostedFile.FileName);
- string contentType = FileUpload1.PostedFile.ContentType;
- using (Stream fs = FileUpload1.PostedFile.InputStream)
- {
- using (BinaryReader br = new BinaryReader(fs))
- {
- byte[] bytes = br.ReadBytes((Int32)fs.Length);
- string constr = "User ID=axis_nsdl;Password=a$xis_4321;Data Source=TSTDPSEC";
- using (OracleConnection con = new OracleConnection(constr))
- {
- string query = "insert into tblFiles values (doc_id.nextval,:Name, :ContentType, :Data)";
- using (OracleCommand cmd = new OracleCommand(query))
- {
- cmd.Connection = con;
- // cmd.Parameters.AddWithValue(":id", Number);
- cmd.Parameters.AddWithValue(":Name", filename);
- cmd.Parameters.AddWithValue(":ContentType", contentType);
- cmd.Parameters.AddWithValue(":Data", bytes);
- con.Open();
- cmd.ExecuteNonQuery();
- con.Close();
- }
- }
- }
- }
- Response.Redirect(Request.Url.AbsoluteUri);
- }
- protected void DownloadFile(object sender, EventArgs e)
- {
- int id = int.Parse((sender as LinkButton).CommandArgument);
- byte[] bytes;
- string fileName, contentType;
- string constr = "User ID=axis_nsdl;Password=a$xis_4321;Data Source=TSTDPSEC";
- using (OracleConnection con = new OracleConnection(constr))
- {
- using (OracleCommand cmd = new OracleCommand())
- {
- cmd.CommandText = "select Name, Data, ContentType from tblFiles where Id=:Id";
- cmd.Parameters.AddWithValue(":Id", id);
- cmd.Connection = con;
- con.Open();
- using (OracleDataReader sdr = cmd.ExecuteReader())
- {
- sdr.Read();
- bytes = (byte[])sdr["Data"];
- contentType = sdr["ContentType"].ToString();
- fileName = sdr["Name"].ToString();
- }
- con.Close();
- }
- }
- Response.Clear();
- Response.Buffer = true;
- Response.Charset = "";
- Response.Cache.SetCacheability(HttpCacheability.NoCache);
- Response.ContentType = contentType;
- Response.AppendHeader("Content-Disposition", "attachment; filename=" + fileName);
- Response.BinaryWrite(bytes);
- Response.Flush();
- Response.End();
- }
- protected void BtnSearch_Click(object sender, System.EventArgs e)
- {
- con.Open();
- OracleCommand cmd = new OracleCommand("Select * from Name where tblFiles like '" + txtSearch.Text + "%'", con);
- OracleDataAdapter da = new OracleDataAdapter(cmd);
- DataSet ds = new DataSet();
- da.Fill(ds);
- con.Close();
- GridView1.DataSource = ds;
- GridView1.DataBind();
- }
- protected void btnBack_Click(object sender, System.EventArgs e)
- {
- Response.Redirect("index.html");
- }
- }
- Just Run the Application Debug on Action Events to see the FileUpload and its content.
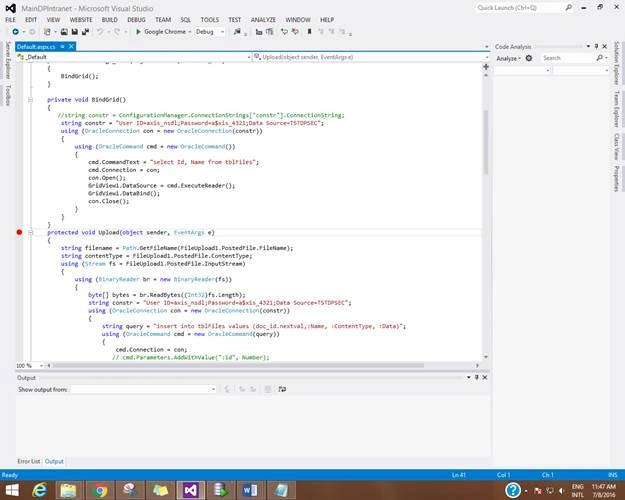
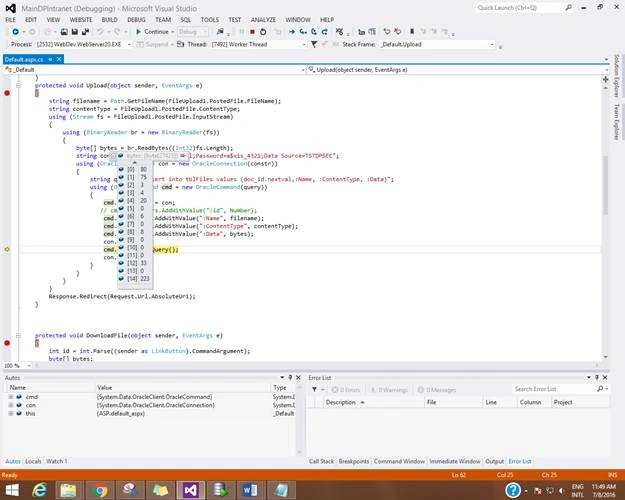
We have successfully uploaded the file. Now, let's download and see the data .
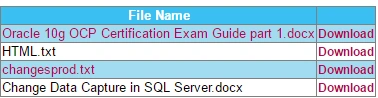

We have successfully downloaded . Now, let's see the Oracle table part

As you can see, the data is stored in BLOB format successfully.
leenaPosted Jun 6, 2018, 5:32 AM
Sir I am facing problem in uploading files of bigger size. getting message {"ORA-01460: unimplemented or unreasonable conversion requested"}
Alex LiPosted Jan 4, 2017, 8:24 PM
Where Can I have the source code?
Vignesh ManiPosted Jul 11, 2016, 5:43 PM
Good one
kalu singh raoPosted Jul 9, 2016, 2:19 AM
Nice...