

This article shows how to upload a file in a web application with the Web API and Entity Framework using AJAX.
Step 1
Create a web API project as shown in Figure 1 and Figure 2.
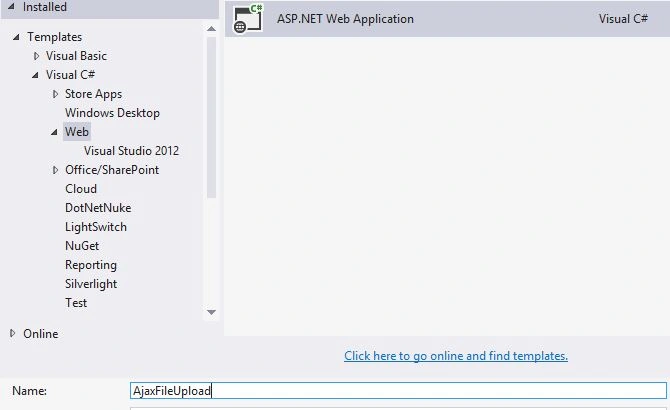
Figure 1
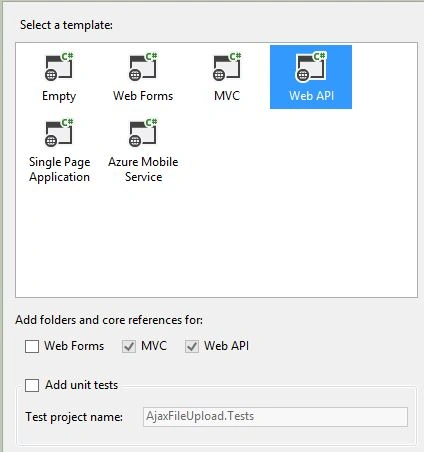
Figure 2
Your project structure will be as shown in Figure 3.
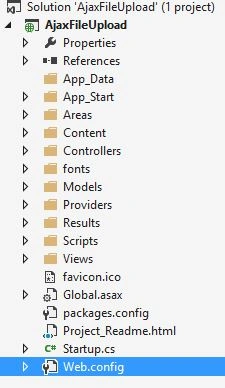
Figure 3
Step 2
Here I have used an image file uploading to explain the process.
Right-click on the model folder and add a class. In my case I named it FileUpload.cs.
Write the following code in the FileUpload class.
- public class FileUpload {
- [Key]
- [DatabaseGenerated(DatabaseGeneratedOption.Identity)]
- public int imageid {
- get;
- set;
- }
- public string imagename {
- get;
- set;
- }
- public byte[] imagedata {
- get;
- set;
- } //this property is used to insert a information of Image in byte format
- }
Right-click on the Model folder and add one more class. In my case I named it FileUploadContext.cs.
Write the following code in the FileUploadContext class.
- public class FileUploadContext: DbContext {
- public FileUploadContext(): base("name=TestConnection") {}
- public DbSet < FileUpload > fileUpload {
- get;
- set;
- }
- }
Step 3
Open the web.confiq file to modify the connection as in the following:
- <connectionStrings>
- <add name="TestConnection" connectionString="Data Source= Your Database server name;Initial Catalog= Your Database Name;Integrated Security=True" providerName="System.Data.SqlClient" />
- </connectionStrings>
Step 4
It's time to add the controller class.
Right-click on the controller folder and add the controller as shown in Figure 4 and Figure 5.
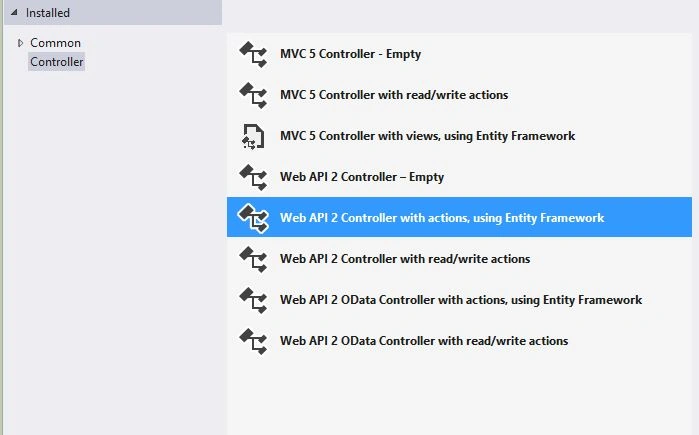
Figure 4
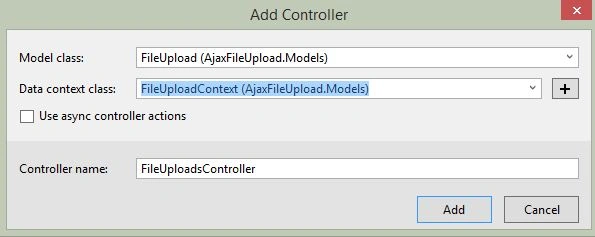
Figure 5
Step 5
Modify the POST based on our application's needs in FileUploadsController.cs.
Replace the code in the POST: api/FileUploads region with the following code in FileUploadsController.cs:
- [HttpPost]
- public IHttpActionResult PostFileUpload() {
- if (HttpContext.Current.Request.Files.AllKeys.Any()) {
- // Get the uploaded image from the Files collection
- var httpPostedFile = HttpContext.Current.Request.Files["UploadedImage"];
- if (httpPostedFile != null) {
- FileUpload imgupload = new FileUpload();
- int length = httpPostedFile.ContentLength;
- imgupload.imagedata = new byte[length]; //get imagedata
- httpPostedFile.InputStream.Read(imgupload.imagedata, 0, length);
- imgupload.imagename = Path.GetFileName(httpPostedFile.FileName);
- db.fileUpload.Add(imgupload);
- db.SaveChanges();
- var fileSavePath = Path.Combine(HttpContext.Current.Server.MapPath("~/UploadedFiles"), httpPostedFile.FileName);
- // Save the uploaded file to "UploadedFiles" folder
- httpPostedFile.SaveAs(fileSavePath);
- return Ok("Image Uploaded");
- }
- }
- return Ok("Image is not Uploaded");
- }
Step 6
Create one new folder in the project named UploadedFiles to save the image.
Right-click on the project and add a HTML page.
The Design
- !DOCTYPE html>
- <html
- xmlns="http://www.w3.org/1999/xhtml">
- <head>
- <title>File Upload Demo</title>
- <script src="Js/Upload.js"></script>
- <script type='text/javascript' src='http://ajax.googleapis.com/ajax/libs/jquery/1.10.2/jquery.min.js'></script>
- <link href="https://maxcdn.bootstrapcdn.com/bootstrap/3.3.5/css/bootstrap.min.css" rel="stylesheet">
- </head>
- <body>
- <div id="example">
- <div class="demo-section k-header">
- <h3>Image Upload</h3>
- <br />
- <div>
- <label for="fileUpload">
- Select File to Upload:
- <input id="fileUpload" type="file" name="files" />
- <br />
- <br />
- <input id="btnUploadFile" type="button" value="Upload File" class="btn-primary" />
- </div>
- </div>
- </div>
- </div>
- </body>
- </html>
The Ajax call script
- Upload.js,
- $(document).ready(function() {
- $('#btnUploadFile').on('click', function() {
- var data = new FormData()
- var files = $("#fileUpload").get(0).files;
- // Add the uploaded image content to the form data collection
- if (files.length > 0) {
- data.append("UploadedImage", files[0]);
- }
- // Make Ajax request with the contentType = false, and procesDate = false
- var ajaxRequest = $.ajax({
- type: "POST",
- url: "http://localhost:59453/api/FileUploads",
- contentType: false,
- processData: false,
- data: data
- });
- ajaxRequest.done(function(xhr, textStatus) {});
- });
- });
In the browser:
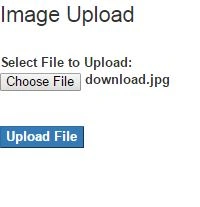
Figure 6
Check the response using the fire bug development tool, as shown in Figure 7.
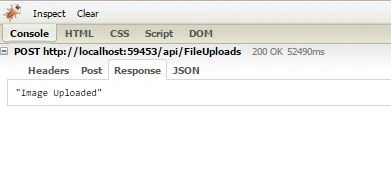
Figure 7
Check your database.
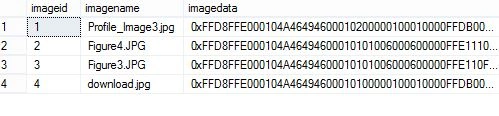
Figure 8
Yes! The image details have been inserted into the table.
Check the UploadedFiles folder as in the following:

Yes! The Image is copied to the UploadedFiles folder.
That's it, enjoy coding.
Robert GichuruPosted Sep 9, 2021, 12:36 PM
Thanks, it works great
carlos torresPosted Oct 22, 2018, 4:43 PM
It does not work for files with more than 1Mb of weight
Senthil KumarPosted Dec 20, 2017, 9:10 AM
Hi How to i download files from db Bytes Data web api code.
Code MachinePosted Apr 27, 2017, 8:47 PM
I can't create the database, my connection string i thinks its ok i'm using Sql Server 2014
Arul RPosted Oct 28, 2015, 5:57 AM
Nice share!!!
Sibeesh VenuPosted Jul 6, 2015, 3:19 AM
Good One.Thanks for sharing :)
SharadPosted Jul 6, 2015, 3:06 AM
Nice Article...
RakeshPosted Jul 6, 2015, 2:54 AM
Good one
Amol SarkatePosted Jul 6, 2015, 1:50 AM
nice
Debasis SahaPosted Jul 6, 2015, 12:58 AM
Good One
Santhakumar MunuswamyPosted Jul 6, 2015, 12:16 AM
Good one