

Introduction
Here, I have to show the complete Demo of How to create user control in the C# window application. I have to show a complete description of user control and the basics of user control. After learning this document, you have to be able to make user control according to your own requirements. I have to cover the listed topics:
- Why do we make User control?
- User control complete Demo.
- Advantages of using User control.
- How to use user control?
1. Why do we make User control
This provides additional re-use flexibility with a large-scale web project. It also helps to find a bug and resolve a bug in a short time. If you want some changes in your code, then you have to write code in one place (user control) that affects every web form or every Form of window application. Using this technique, you can save your extra effort and also save your time.
2. User control Complete Demo
Here, I have to show the Demo make user control in Windows application C#.
Step 1. Create a WPF Universal window form project
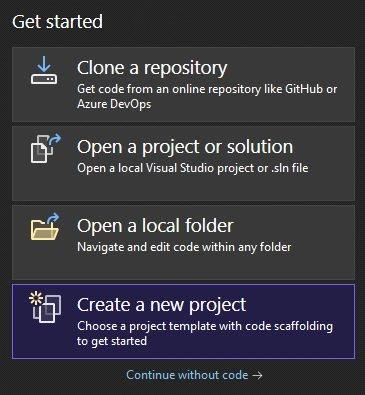
First, open Visual Studio 2022 and click on Create a New Project
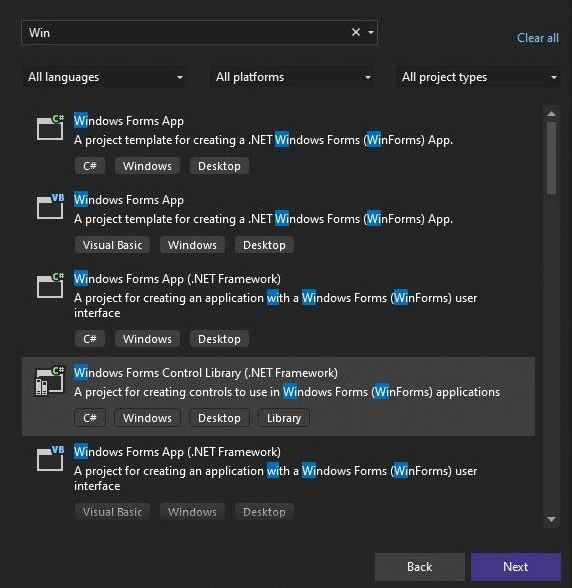
Step 2. Search Windows Forms Control Library(Window Forms Control Library) in the Search box (Search for templates (Alt+s)), select Windows Forms Control Library(.NET Framework)
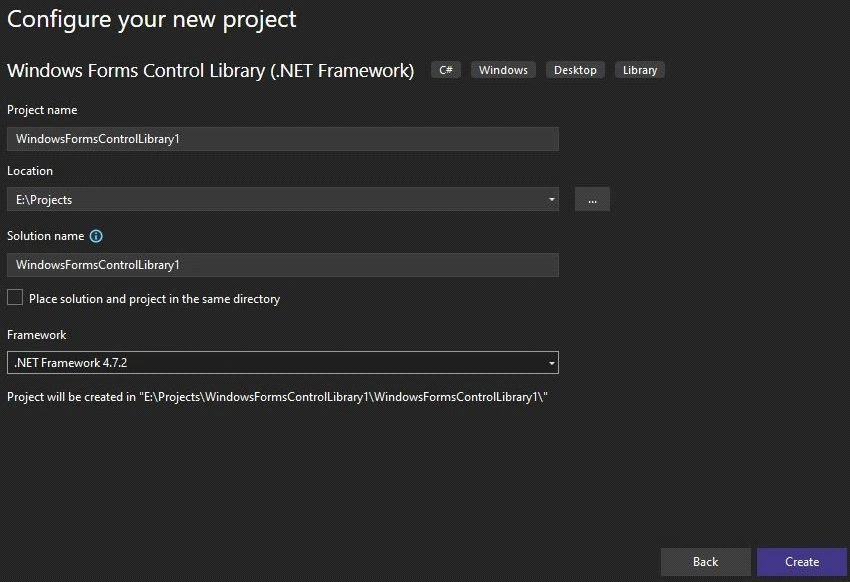
Step 3. Enter a project name and click next.
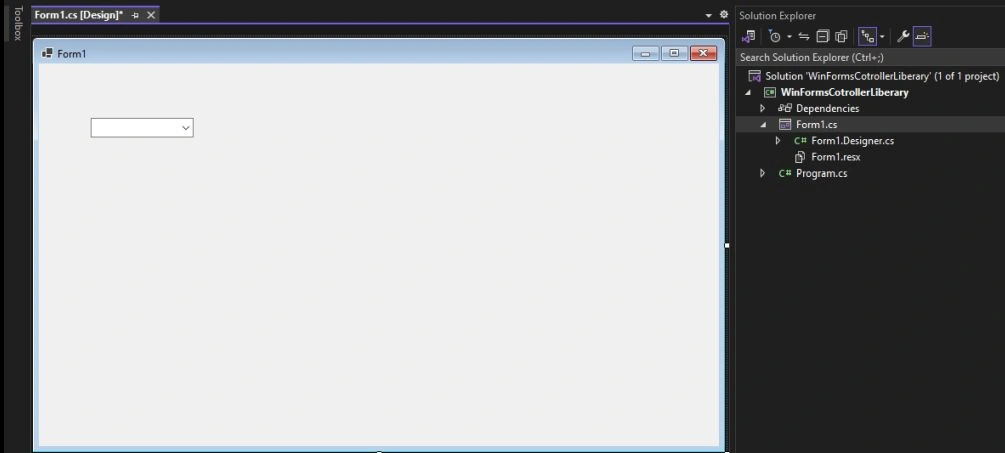
Step 4. Windows Forms Control Library project structure
After that, I have to write code in this library.
Here I have to show a demo. My requirement is I want a combo box bound with Some State Name. And because I have to use this combobox in multiple forms of window applications. So, I have to create this user control.
My Design Part. Here, I have to drag and drop the Combobox from the toolbox.
Step 5. Code of UserControl1
namespace WindowsFormsControlLibrary1
{
    partial class UserControl1
    {
        /// <summary>
        /// Required designer variable.
        /// </summary>
        private System.ComponentModel.IContainer components = null;
        /// <summary>
        /// Clean up any resources being used.
        /// </summary>
        /// <param name="disposing">true if managed resources should be disposed; otherwise, false.</param>
        protected override void Dispose(bool disposing)
        {
            if (disposing && (components != null))
            {
                components.Dispose();
            }
            base.Dispose(disposing);
        }
        #region Component Designer generated code
        /// <summary>
        /// Required method for Designer support - do not modify
        /// the contents of this method with the code editor.
        /// </summary>
        private void InitializeComponent()
        {
            this.comboBox1 = new System.Windows.Forms.ComboBox();
            this.SuspendLayout();
            //
            // comboBox1
            //
            this.comboBox1.FormattingEnabled = true;
            this.comboBox1.Location = new System.Drawing.Point(93, 54);
            this.comboBox1.Name = "comboBox1";
            this.comboBox1.Size = new System.Drawing.Size(121, 21);
            this.comboBox1.TabIndex = 0;
            //
            // UserControl1
            //
            this.AutoScaleDimensions = new System.Drawing.SizeF(6F, 13F);
            this.AutoScaleMode = System.Windows.Forms.AutoScaleMode.Font;
            this.Controls.Add(this.comboBox1);
            this.Name = "UserControl1";
            this.Size = new System.Drawing.Size(800, 450);
            this.Load += new System.EventHandler(this.UserControl1_Load);
            this.ResumeLayout(false);
        }
        #endregion
        private System.Windows.Forms.ComboBox comboBox1;
    }
}
3. Advantages of using User control
- Code re-usability.
- Time-saving.
- Less effort.
- Easy to find bugs and fix them.
- Save memory also.
4. How to use User Control
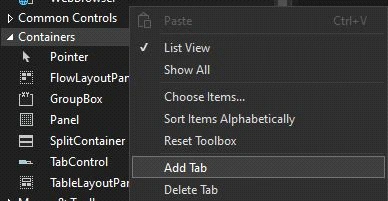
Step 6. Go to=>Tool Box =>right click=>Select Add tab option
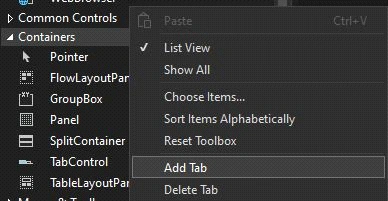
Step 7. After selecting the add tab option, write your tab name: My tab name is Test
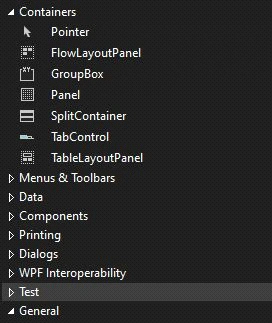
Step 8. Then Go To=>Test(Images) and =>Right click=>select=>Choose item
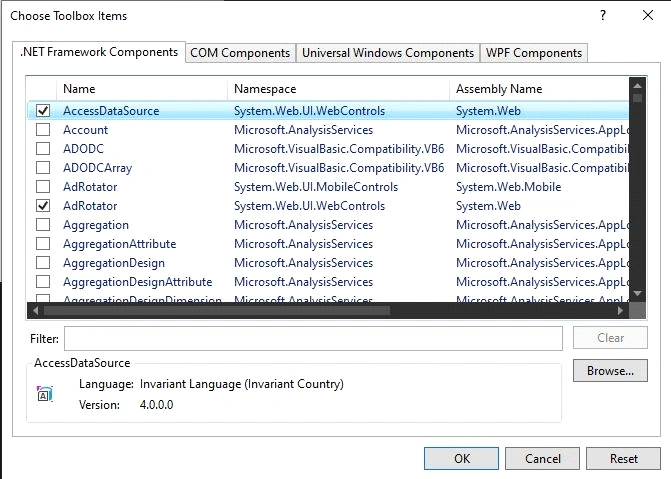
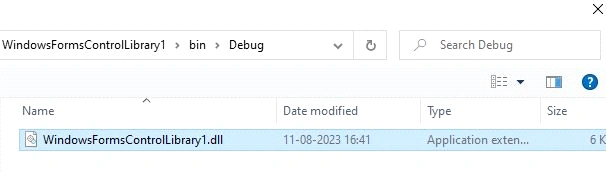
Step 9. Click=>Browse button WindowFormsControlLibrary1.dll
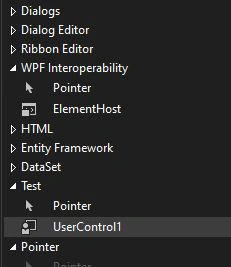
Step 10. After that, you can see your control inside the test tab
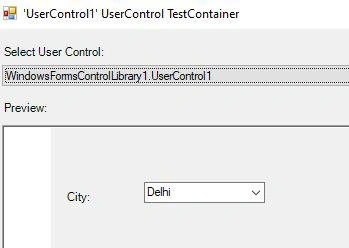
Step 11. After adding control in the toolbox, you can drag and drop control in your Form where you want to use this control. It's my user control. You can make your own user control according to your own requirements.
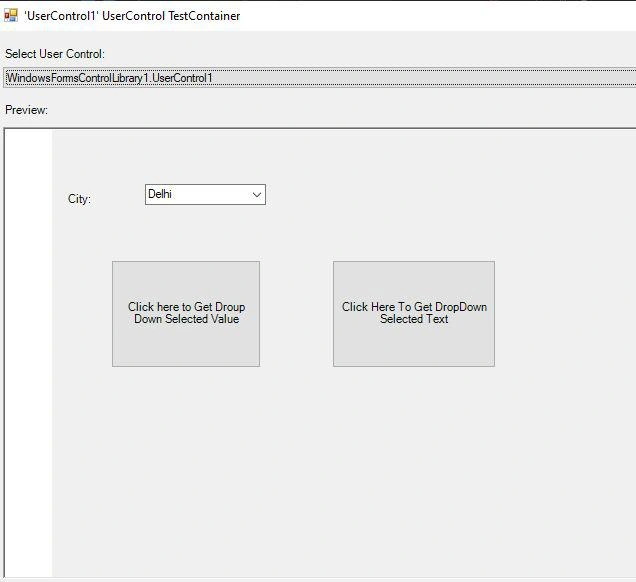
Step 12. If you want to get the custom control selected value and selected text, write this code. Here, I have only shown how you use property defined in custom user control.
using System;
using System.Collections.Generic;
using System.ComponentModel;
using System.Data;
using System.Drawing;
using System.Linq;
using System.Text;
using System.Windows.Forms;

namespace testapp
{
    public partial class Form1 : Form
    {
        public Form1()
        {
            InitializeComponent();
            myCombobox.SelectedIdexChanged += new EventHandler(myCombobox_SelectedIdexChanged);
        }

        void myCombobox_SelectedIdexChanged(object sender, EventArgs e)
        {
            MessageBox.Show(myCombobox.SlectedText);
        }

        private void btnDropdownSelectedvalue_Click(object sender, EventArgs e)
        {
            MessageBox.Show(myCombobox.Selectedvalue.ToString());
        }

        private void btnDropDownSelectedText_Click(object sender, EventArgs e)
        {
            MessageBox.Show(myCombobox.SlectedText);
        }
    }
}
Output
Conclusion
In this article, you will learn about the code that taught user control in C#.
FAQs
Q- What is Windows Forms?
A-Windows Forms (WinForms) is a graphical user interface framework provided by Microsoft for creating desktop applications in the Windows operating system. It allows developers to create rich and interactive user interfaces using a variety of controls and components.
Q- How do I create a new Windows Forms application?
A-You can create a new Windows Forms application using development tools like Visual Studio. In Visual Studio, you can choose to create a new project and select the Windows Forms App template.
Q- What are the controls in Windows Forms?
A-Controls are UI elements that allow users to interact with your application. Examples include buttons, textboxes, labels, checkboxes, and more. You can add these controls to your Form and customize their properties and behavior.
Q- How do I position controls on a form?
A- You can position controls using layout techniques. Windows Forms offers layout managers like FlowLayoutPanel, TableLayoutPanel, and Anchor/Dock properties that help you control how controls behave when the Form is resized.
Q- How can I respond to user actions (events)?
A- Windows Forms controls expose various events that you can handle to respond to user actions. For example, you can write code to respond to a button Click by attaching an event handler to the button's Click event.
Q- How do I style and customize the UI?
A-You can customize the appearance of controls using properties like BackColor, ForeColor Font, etc. Additionally, you can use the built-in themes or create your own custom styles.
Q- Can I use images and icons in Windows Forms?
A-Yes, you can add images and icons to your application using PictureBox controls, ImageList controls, or by setting the "Image" property of certain controls. You can also use third-party libraries for more advanced image manipulation.
Q -What is data binding in Windows Forms?
A-Data binding allows you to link a control's properties to a data source. This way, changes in the data source are automatically reflected in the control, and vice versa. It simplifies updating UI elements with dynamic data.
Rod PerdidoPosted Dec 11, 2019, 11:54 AM
Awesome! Thanks for sharing!
ali hanzazPosted Sep 11, 2019, 4:24 AM
Can you help me with that
ali hanzazPosted Sep 11, 2019, 4:24 AM
What if we have a lot of user control and we can navigate them from a windows form how can we get the data from every field in each user control and put it into a data base using a button
ali hanzazPosted Sep 11, 2019, 4:22 AM
Thanks for sharing
naga rajanPosted Sep 7, 2018, 8:47 AM
Very nice.. Thank you very much
SubashPosted May 11, 2017, 2:51 AM
Thank you very useful share
Thiruppathi RPosted Mar 18, 2016, 9:16 AM
Its not Working
sachin shajuPosted Oct 26, 2015, 6:29 AM
Madam, I got System.data.datarowview while the form_load
imran cPosted Sep 19, 2014, 12:35 PM
nice article
Bri RogPosted Jun 13, 2014, 2:12 PM
Proofread!
Priti KumariPosted Jun 11, 2014, 1:37 AM
You can not run user control library.....you can build your control library and add in your window application project tool box which i described in the above article how to add custom user control in tool box..........?
Ravi kumarPosted Jun 8, 2014, 5:45 PM
how to solve it plz help me mam........
Ravi kumarPosted Jun 8, 2014, 5:45 PM
hello mam, i am facing a error when i run my project. error is:- Failed to create usercontrol 'mycontrolLibrary.usercontrol1'This error message was 'Delegate to an instance methiod cannot have null 'this'.'
Ravi kumarPosted Jun 8, 2014, 5:44 PM
hello mam, i am facing a error when i run my project. error is:- Failed to create usercontrol 'mycontrolLibrary.usercontrol1'This error message was 'Delegate to an instance methiod cannot have null 'this'.'