

Introduction
- Let's create a Silverlight project; let's name it UseOfListBox.
- Then we will place a ListBox on the XAML and let's name it personListBox.
- Let's create an item template of the list box which will look like the following:
- <ListBox x:Name="personListBox" Height="241" HorizontalAlignment="Left" Margin="42,24,0,0" VerticalAlignment="Top" Width="280">
- <ListBox.ItemTemplate>
- <DataTemplate>
- <StackPanel>
- <TextBlock FontFamily="Verdana" Text="{Binding ID}" Margin="0,0,5,0"></TextBlock>
- <TextBlock FontFamily="Verdana" Text="{Binding Name}" Margin="0,0,5,0"></TextBlock>
- <TextBlock FontFamily="Verdana" Text="{Binding Designation}" Margin="0,0,5,0"></TextBlock>
- </StackPanel>
- </DataTemplate>
- </ListBox.ItemTemplate>
So this is the item template that will represent the data. - Create a collection of objects to bind to this list box. So let's create a class such as:
- public class Person {
- public int ID { get; set; }
- public string Name { get; set; }
- public string Designation { get; set; }
- }
- Finally bind the data to the list box like this:
- List < Person > personList = new List < Person > () {
- new Person { ID = 1, Name = "Mukesh", Designation = "Developer" },
- new Person { ID = 2, Name = "Rakesh", Designation = "Developer" },
- new Person { ID = 3, Name = "Rajesh", Designation = "Developer" },
- new Person { ID = 4, Name = "Dinesh", Designation = "Developer" },
- new Person { ID = 5, Name = "Rohit", Designation = "Developer" },
- new Person { ID = 6, Name = "Mohit", Designation = "Developer" }
- };
- personListBox.ItemsSource = personList;
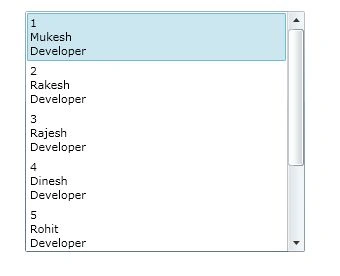
So the output will look something like:
 This was simple and easy.
But there is another way we can create a custom user control which will be integrated as a ListBoxItem. So let's move in that way:
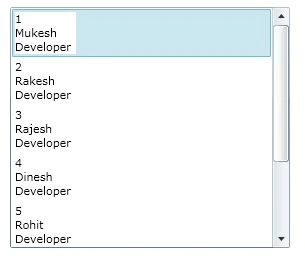
Let's create another page; let's say CustomListBox.xaml. Exactly in the same way, we will place the listBox with the same name. After that, let's create a UserControl named personControl which will look like as follows:
This was simple and easy.
But there is another way we can create a custom user control which will be integrated as a ListBoxItem. So let's move in that way:
Let's create another page; let's say CustomListBox.xaml. Exactly in the same way, we will place the listBox with the same name. After that, let's create a UserControl named personControl which will look like as follows:
- <UserControl x:Class="UseOfListBox.PersonControl" xmlns="http://schemas.microsoft.com/winfx/2006/xaml/presentation" xmlns:x="http://schemas.microsoft.com/winfx/2006/xaml" xmlns:d="http://schemas.microsoft.com/expression/blend/2008" xmlns:mc="http://schemas.openxmlformats.org/markup-compatibility/2006" mc:Ignorable="d" Height="Auto" Width="Auto">
- <Grid x:Name="LayoutRoot" Background="White">
- <StackPanel DataContext="{Binding}">
- <TextBlock FontFamily="Verdana" Text="{Binding ID}" Margin="0,0,5,0"></TextBlock>
- <TextBlock FontFamily="Verdana" Text="{Binding Name}" Margin="0,0,5,0"></TextBlock>
- <TextBlock FontFamily="Verdana" Text="{Binding Designation}" Margin="0,0,5,0"></TextBlock>
- </StackPanel>
- </Grid>
- </UserControl>
Join the conversation! Your thoughts help the community grow.