

Introduction
There is a scenario in which we need to use the AutoComplete feature in the ASP.NET Web Application. Now it depends on what is the easy way to use this AutoComplete feature in the web application.
There are the following two ways with which we can implement the AutoComplete feature:
- Kendo UI
- jQuery UI
Now in this article, I am creating the web application and we will use the Kendo UI AutoComplete feature in the application.
Overview
In the AutoComplete feature, when we type some text into it, it gives some hints depending upon the text. It provides suggestions depending upon the typed text. It also allows multiple-value entries.
Now the source of the suggested data shown by the AutoComplete can come from multiple sources such as through a remote web service, through any array or so on.
Note: The Kendo UI AutoComplete should be created from the HTML element such as input.
Here, in this article we'll create an application and work with the Kendo UI. So, let's start the application using the following procedure:
- Creating Web Application
- Installing Kendo UI
- Running Application
Creating Web Application
In this section, we'll create the ASP.NET Web Application in Visual Studio 2013. Begin with the following procedure:
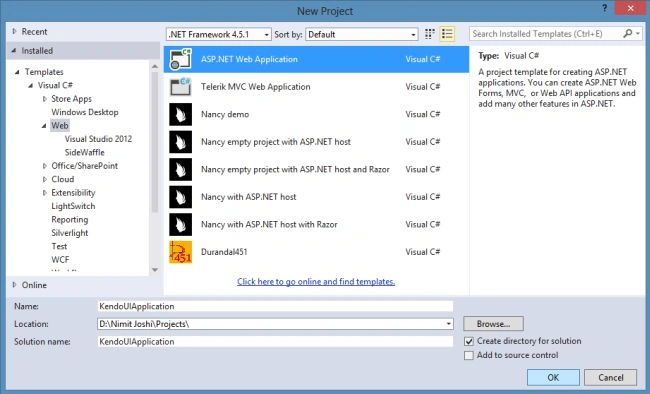
Step 1: Open Visual Studio 2013 and click on "New Project".
Step 2: Select ASP.NET Web Application and enter the name for it.
Step 3: Select the Empty Project Template for the application.
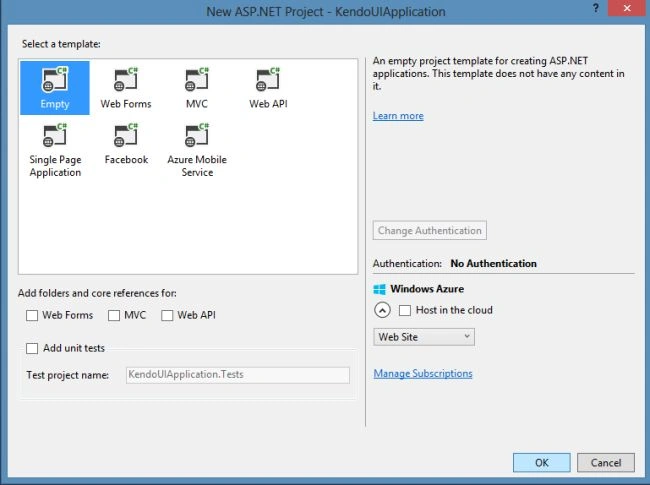
Visual Studio creates the empty application.
Step 4: Now, add the the New Folder named "Scripts" and add a JavaScript file named "Demo".

Step 5: Add a New HTML page in the application.

Installing Kendo UI
In this section, we'll add the reference of the Kendo UI to the application. Use the following procedure.
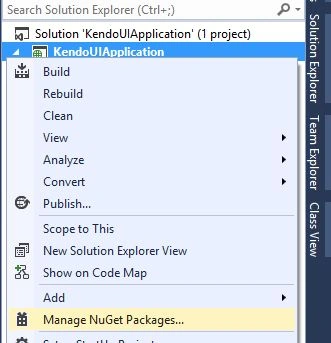
Step 1: In Solution Explorer, just right-click on the project and click on the Manage NuGet Packages.
Step 2: Search for Kendo in the wizard and install it.
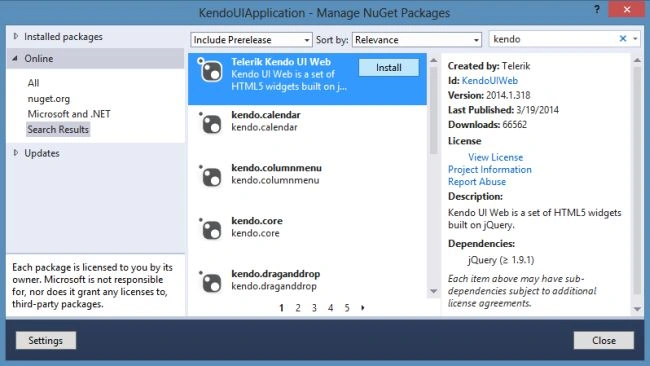
Now the Kendo UI is installed in the application and you can find it in the Scripts folder.
Working with Kendo UI
Now in this section, we'll work with the Kendo UI using the following procedure.
Step 1: Update the HTML page code using the following code:
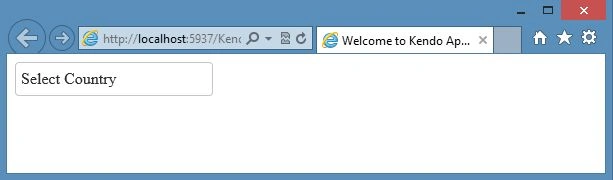
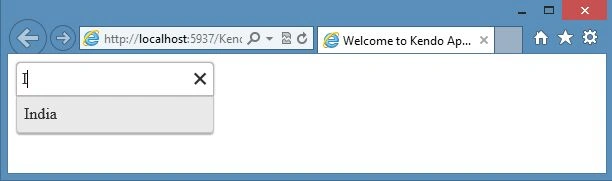
Nimit JoshiPosted Jun 15, 2014, 11:14 PM
Please post comment which is useful. Do not post unnecessary comments here.