

Overview
Some useful links are given below to start programming in Android applications.
- Android Programming - Day One
- Android Programming - Day Two
- How To Display A Dialog Windows In Android
- How To Display A Progress Dialog Window In Android
- Intent In Android
- Return Data Using Intent Object In Android Applications
- Passing Data Using An Intent Object In Android Applications
- Fragments In Android Applications
- Adding Fragments Dynamically In Android Application
- Fragment Life Cycle In Android Application
- Interaction Between Two Fragments
- Calling In Built Functions in Android Application
- Intent Object and Intent Filters in Android Application
- Displaying Notifications in Android Applications
- User Interface in Android Applications
- Orientation, Anchoring, Resizing And Repositioning Of Views In Android Application
- Activity Behavior When Screen Orientation Changes in Android Application
- Persevere with State Information during Changes in Configuration
- Detect Orientation Changes and Controlling the Orientation of the Activity
Introduction
In this article, you will learn about action bar, which is used in Android applications. The action bar displays the application icon together with the activity title. On the right side of the action bar, there are action items.
Implementation
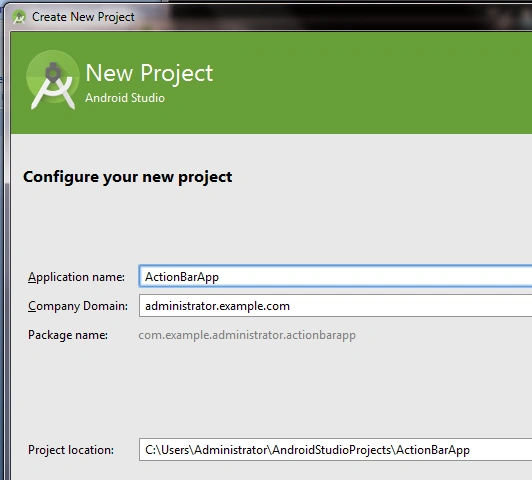
Create a new project by selecting File->New->New Project.
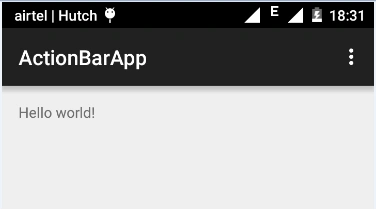
Now, debug the application by pressing F11 on the Android emulator. Action bar located at the top of the screen will appear, which actually contains the application icon and the application name “ActionBarApp”.
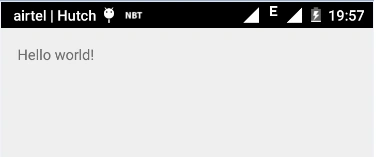
If you want to hide the action bar, you need to add the line display given below in bold in the AndroidManifest.xml file.
- <?xml version="1.0" encoding="utf-8"?>
- <manifest xmlns:android="http://schemas.android.com/apk/res/android"
- package="com.example.administrator.actionbarapp" >
- <application
- android:allowBackup="true"
- android:icon="@mipmap/ic_launcher"
- android:label="@string/app_name"
- android:theme="@style/AppTheme" >
- <activity
- android:name=".MainActivity"
- android:label="@string/app_name"
- android:theme ="@android:style/Theme.Holo.NoActionBar">//line to hide action bar.
- <intent-filter>
- <action android:name="android.intent.action.MAIN" />
- <category android:name="android.intent.category.LAUNCHER" />
- </intent-filter>
- </activity>
- </application>
- </manifest>
Add the code given below in the styles.xml.
- <resources>
- <!-- Base application theme. -->
- <style name="AppTheme" parent="Theme.AppCompat.Light.DarkActionBar">
- <item name="android:windowNoTitle">false</item>
- <item name="android:windowActionBar">true</item>
- <!-- Customize your theme here. -->
- </style>
- </resources>
Modify the code in the onCreate() method to hide the ActionBar.
- protected void onCreate(Bundle savedInstanceState) {
- //getSupportActionBar().setDisplayHomeAsUpEnabled(false);
- super.onCreate(savedInstanceState);
- setContentView(R.layout.activity_main);
- ActionBar actionBar = getActionBar();
- actionBar.hide();
- }
- @Override
- public boolean onCreateOptionsMenu(Menu menu) {
- // Inflate the menu; this adds items to the action bar if it is present.
- getMenuInflater().inflate(R.menu.menu_main, menu);
- return true;
- }
Debug the Application and you will see the result.
Now, we see how to add action items to the action bar. Action items are the shortcut to some of the commonly performed operations in the Application. A student registration application can have some action items such as “Add New Student”, “Update Student Info”, “Delete Student Info” etc.
Modify the noCreateOptionsMenu() method.
- @Override
- public boolean onCreateOptionsMenu(Menu menu) {
- // Inflate the menu; this adds items to the action bar if it is present.
- //getMenuInflater().inflate(R.menu.menu_main, menu);
- super.onCreateOptionsMenu(menu);
- CreateMenu(menu);
- return true;
- }
Create 2 methods CreateMenu() and MenuChoice() to add more options in the menu.
- private void CreateMenu(Menu menu)
- {
- MenuItem menu1=menu.add(0,0,0,"Add New Student");
- {
- menu1.setIcon(R.drawable.ic_launcher);
- menu1.setShowAsAction(MenuItem.SHOW_AS_ACTION_IF_ROOM);
- }
- MenuItem menu2=menu.add(0, 1, 1, "Update Student Info");
- {
- menu2.setIcon(R.drawable.ic_launcher1);
- menu2.setShowAsAction(MenuItem.SHOW_AS_ACTION_IF_ROOM);
- }
- MenuItem menu3=menu.add(0,2,2,"Delete Student Info");
- {
- menu2.setIcon(R.drawable.ic_launcher2);
- menu2.setShowAsAction(MenuItem.SHOW_AS_ACTION_IF_ROOM);
- }
- }
- private boolean MenuChoice(MenuItem opt)
- {
- switch(opt.getItemId()){
- case 0:
- Toast.makeText(this,"You clicked Ist option",Toast.LENGTH_LONG).show();
- return true;
- case 1:
- Toast.makeText(this,"You clicked 2nd option",Toast.LENGTH_LONG).show();
- return true;
- case 2:
- Toast.makeText(this,"You clicked 3rd option",Toast.LENGTH_LONG).show();
- return true;
- }
- return false;
- }
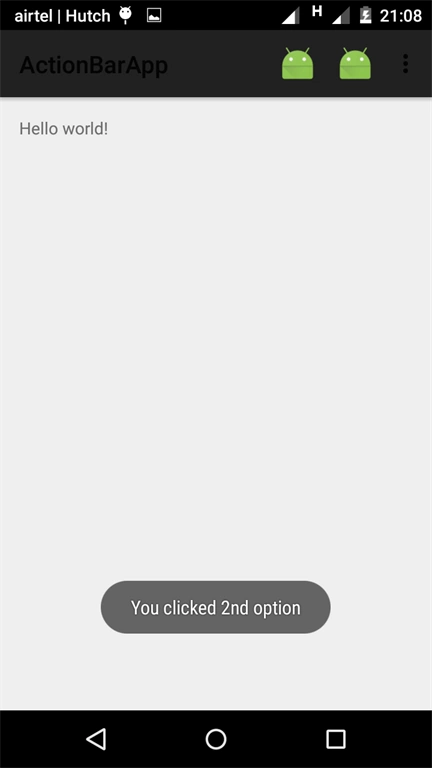
Debug the application by pressing F11 on the Android emulator or the mobile device. You will see the icons on the right side of the action bar and clicking on each menu item will cause the Toast class to display the name of the item selected, as given below.
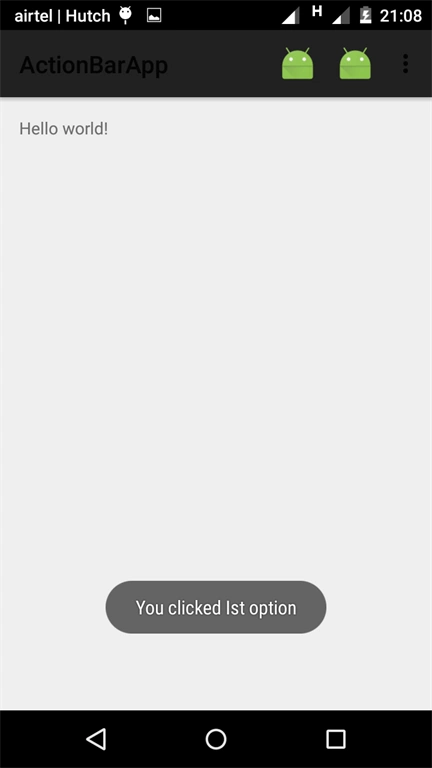
If you click on 2nd option, the result will look, as shown below.
We can also customize the Action Items and application icon.
- private void CreateMenu(Menu menu)
- {
- MenuItem menu1=menu.add(0,0,0,"Add New Student");
- {
- menu1.setIcon(R.drawable.ic_launcher);
- menu1.setShowAsAction(MenuItem.SHOW_AS_ACTION_WITH_TEXT);
- }
- MenuItem menu2=menu.add(0, 1, 1, "Update Student Info");
- {
- menu2.setIcon(R.drawable.ic_launcher1);
- menu2.setShowAsAction(MenuItem.SHOW_AS_ACTION_IF_ROOM);
- }
- MenuItem menu3=menu.add(0,2,2,"Delete Student Info");
- {
- menu2.setIcon(R.drawable.ic_launcher2);
- menu2.setShowAsAction(MenuItem.SHOW_AS_ACTION_IF_ROOM);
- }
- }
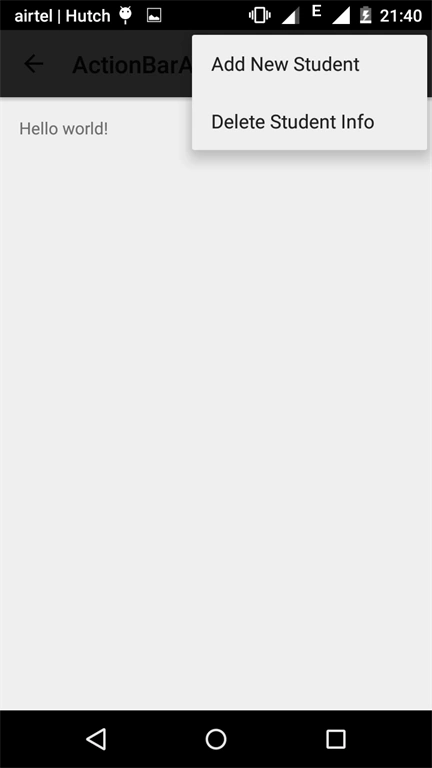
To make the application icon clickable, we will have to add setDisplayHomeAsUpEnabled() method, as shown below.
- protected void onCreate(Bundle savedInstanceState) {
- //getSupportActionBar().setDisplayHomeAsUpEnabled(false);
- super.onCreate(savedInstanceState);
- setContentView(R.layout.activity_main);
- ActionBar actionBar = getActionBar();
- actionBar.setDisplayHomeAsUpEnabled(true);
- //actionBar.hide();
- }
Explanation
The android:theme attributes defined in the AndroidManifest.xml file, enables you to turn off the display of the action bar for the activity. Setting the attribute to “@android:style/Theme.Holo.NoActionBar” hides the action bar. We can do the same thing programmatically during runtime by using the getActionBar() method. If you want to display it, use show() method but if you want to hide it, use hide() method. Here, it is very important that if you use the android:theme attribute to turn off the action bar, calling the getActionBar() method returns a null during the runtime. Hence, it is always good to turn the action bar on/off programmatically, using the ActionBar class.
As far as action items are added into action bar, the action bar populates its action items by calling the onCreateOptionsMenu() method of an activity.
- @Override
- public boolean onCreateOptionsMenu(Menu menu) {
- // Inflate the menu; this adds items to the action bar if it is present.
- //getMenuInflater().inflate(R.menu.menu_main, menu);
- super.onCreateOptionsMenu(menu);
- CreateMenu(menu);
- return true;
- }
In the section given above, we created 2 methods CreateMenu() method to display a list of the menu items.
- private void CreateMenu(Menu menu)
- {
- MenuItem menu1=menu.add(0,0,0,"Add New Student");
- {
- menu1.setIcon(R.drawable.ic_launcher);
- menu1.setShowAsAction(MenuItem.SHOW_AS_ACTION_IF_ROOM);
- }
- MenuItem menu2=menu.add(0, 1, 1, "Update Student Info");
- {
- menu2.setIcon(R.drawable.ic_launcher1);
- menu2.setShowAsAction(MenuItem.SHOW_AS_ACTION_IF_ROOM);
- }
- MenuItem menu3=menu.add(0,2,2,"Delete Student Info");
- {
- menu2.setIcon(R.drawable.ic_launcher2);
- menu2.setShowAsAction(MenuItem.SHOW_AS_ACTION_IF_ROOM);
- }
- }
To make the menu item appear as an action item, we call its setShowAsAction() method, using the SHOW_AS_ACTION_IF_ROOM constant. This actually tells the Android device to display the menu item as an action item, if there is room for it.
Hence, when a menu item is selected by the user, the onOptionsItemSelected() method is called.
- public boolean onOptionsItemSelected(MenuItem item) {
- return MenuChoice(item);
- }
In the method given above, MenuChoice() method is self defined. It is used to check which menu item is clicked and display the message.
- private boolean MenuChoice(MenuItem opt)
- {
- switch(opt.getItemId()){
- case 0:
- Toast.makeText(this,"You clicked Ist option",Toast.LENGTH_LONG).show();
- return true;
- case 1:
- Toast.makeText(this,"You clicked 2nd option",Toast.LENGTH_LONG).show();
- return true;
- case 2:
- Toast.makeText(this,"You clicked 3rd option",Toast.LENGTH_LONG).show();
- return true;
- }
- return false;
- }
Conclusion
In this article, you learned how to utilize the action bar and action items are added into this. In the next article, I will explain about how to create user interface programmatically.
Purushottam RathorePosted Jan 20, 2017, 3:59 AM
Nice article for beginner. how could I start learn android.