

Introduction
Visio Service is not new to SharePoint 2016 as we experienced it in 2013. There is no change in it from previous versions. This service lets the users render their Visio diagram in the browser, without having Visio client installed on their machine. Visio Service also allows rendering of diagram on the mobile devices.
Users can publish Visio diagram directly from their Visio client program into SharePoint 2016. Also, Visio Service supports the multiple data sources, i.e in your diagram, you can connect it to Excel sheet or SharePoint list and publish it on SharePoint. If there is data refresh, Visio service can handle that too.
Compatible Visio Versions
As per the technet, the below mentioned Visio versions are compatible with SharePoint 2016.
- Visio 2010 Professional
- Visio 2010 Premium
- Visio 2013 Professional
- Visio 2013 Premium
- Visio 2016 Professional
- Visio Pro for Office 365
Note - Visio diagrams created in Visio 2010 must be published to a SharePoint site as a Visio Web drawing (*.vdw) file. Standard Visio 2010 diagrams (.vsd files) are not rendered by Visio Services and require Visio 2010 to be viewed.
Support DataSources
As per Technet, the following data connections are supported.
- SQL Server 7.0
- SQL Server 2000
- SQL Server 2005 (32- & 64-bit)
- SQL Server 2008 (32- & 64-bit)
- SQL Server 2008 R2 (32- & 64-bit)
- SQL Server 2012 (32- & 64-bit)
- Sheet information that is stored in Excel workbooks (.xlsx files) published from Office Excel 2007, Excel 2010, Excel 2013, or Excel 2016 hosted on the same SharePoint Server 2016 farm
- SharePoint Server lists that are hosted on the same farm
- External lists exposed in SharePoint Server through Microsoft Business Connectivity Services.
- OLE DB or ODBC
- Custom Data Providers implemented as .NET Framework assemblies
Note - The original data connection must be configured using Visio. Refresh of data through any other mechanism into a Visio diagram is not supported.
Before Start
- You need an account which is part of Farm Administrator group with local admin rights on Server.
- Service Account which will run the app pool of Visio Service.
- Unattend Service Account.
- Secure Store Service created.
Tasks
In this article, we will do the following tasks.
- Secure Store Service (Please follow the link to Create Secure Store Service).
- Create Target Application in Secure Store service.
- Create Visio Service Application
- Add target Application ID
- Test
- Troubleshooting
Create Target Application in SSS
This is an important step. We have to create the target application in the Secure Store Service application.
- Please log on to the Central Admin site with Farm Administrator account with local admin.
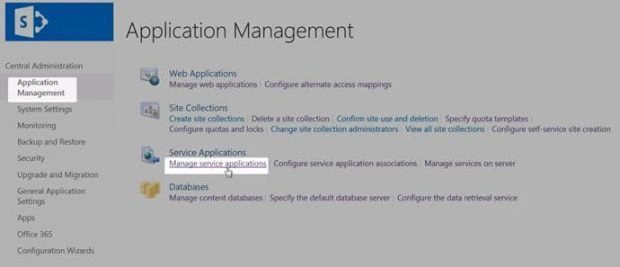
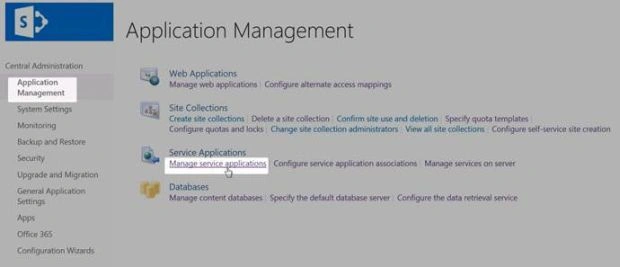
- Click on Application Management.
- Click on "Manage service applications" under Service Applications.
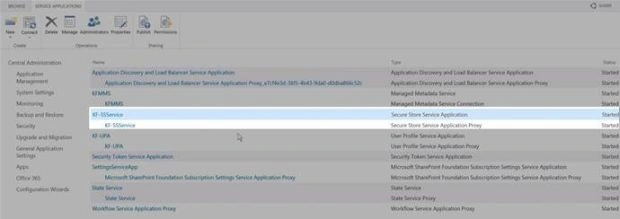
- Click Secure Store Service (KF-SSService).
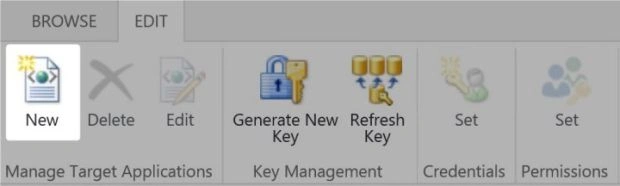
- In the Secure Store Service page, click on the "New" button from ribbon.
- On this page, please enter the following information.
- Name of Application ID
VisioSvc - Display Name
VisioSvc - Email Address
[email protected] - Target Application Type
Group - Target Application Page URL
Use Default page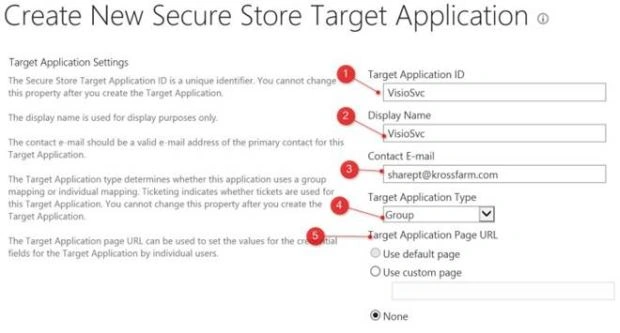
- Click OK.
- Name of Application ID
- On "New SS Target Application" page, use the default values and click "Next".
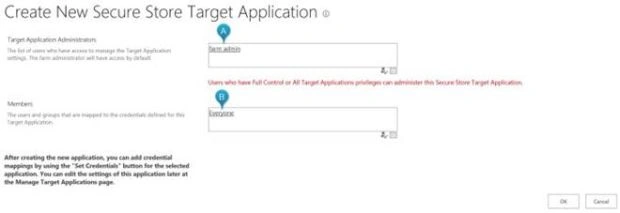
- On next page, please enter the following information.
- Target Application Administrators
Farm Admin - Members
EveryOne - Click OK
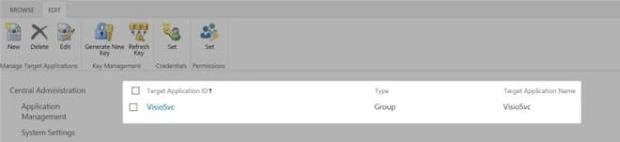
- You will see the "New Target Application" ID is successfully created.
- Target Application Administrators
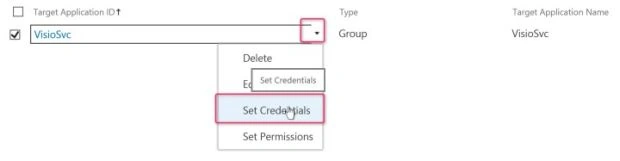
Now, set the credentials.
- Right click on the VisioSvc and in DropDown click on Set Credentials.
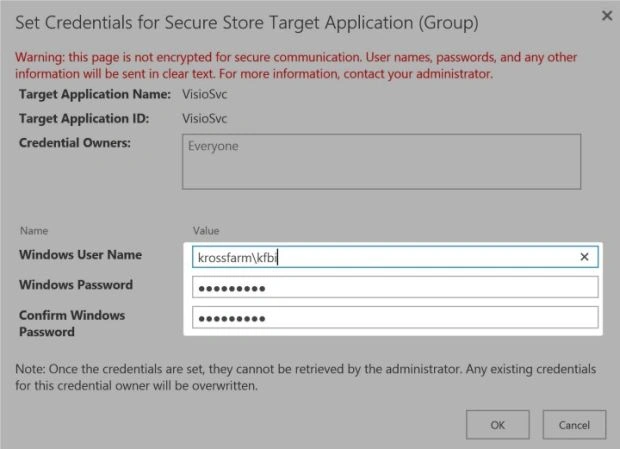
- On this page, enter the User Name and Password and click OK.
This will complete the task.
Create Visio Service
Now, we will create the Visio Service via Central Admin.
- Log on the Central Admin site with Farm Administrator account with local admin.
- Click on Application Management.
- Click on "Manage service applications" under Service Applications.
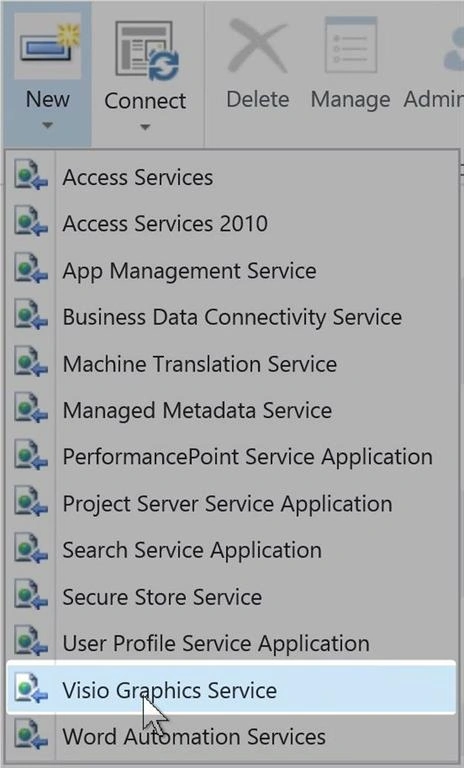
- Click on the "New" (top left) and in dropdown, select Visio Graphic Service.
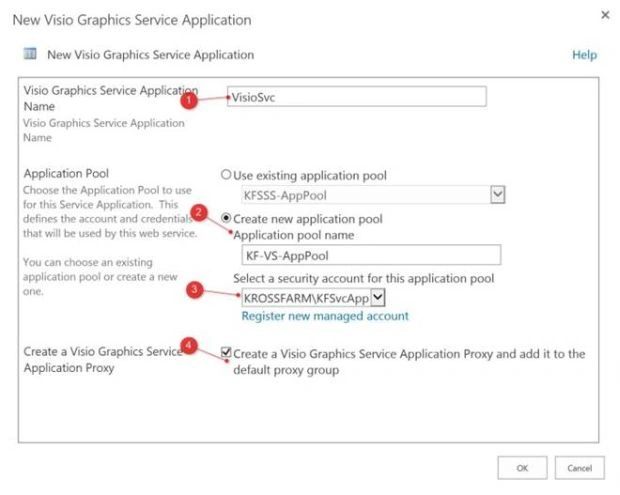
- On “New Visio Graphics Service Application” page, please provide the following information.
- Visio Graphics Service Application Name
VisioSvc - Create New Application Pool
KF-VS-AppPool - Select Security Account
Krossfarm\KFSvcApp - Create a Visio Graphics Service Application Proxy
Check the Box
- Click OK
- Visio Graphics Service Application Name
- Wait for a couple of minutes on “This shouldn’t take long." page.
- You will see the Visio Service.
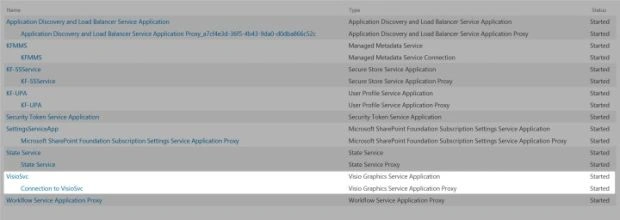
Visio Service is successfully created.
Visio Service Instance
Please make sure, the Visio Service Instance is started on the Server. To check, please follow the below steps.
- Click on "System Settings", then "Manage services on server" under the Servers.
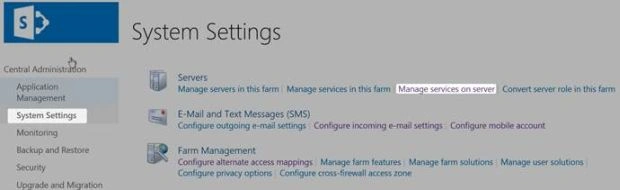
- Click on Service on Server Page.
- Select the Server on which this service should run (As a recommendation, it should run on the Application Server).
- Now, make sure, the Visio Service status is started.

Configure the Global Settings
Now, we need to add the Target Application ID in the Visio Services (which we created in the Secure Store Service). For this, please follow the below steps.
- Click on Application Management.
- Click on "Manage service applications" under Service Applications.
- Click on the Visio Service.
- On this page, click on the Global Settings.
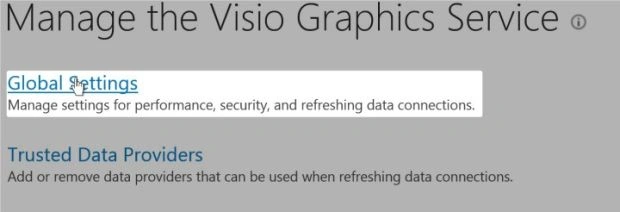
- Enter the Application ID and click OK.
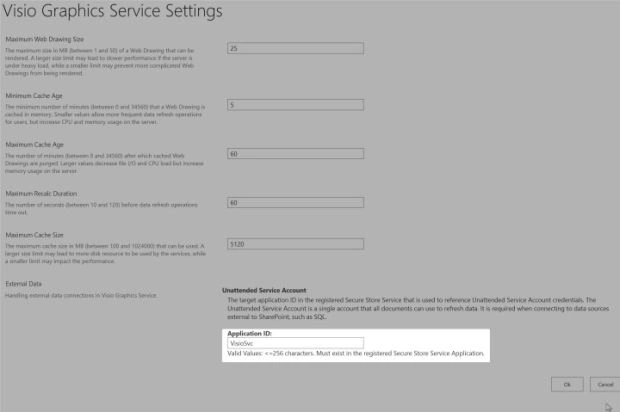
This will complete the creation and configuration of the Visio Service Application. Next step - we will test if we are able to open the Visio files in SharePoint.
Reference
- https://technet.microsoft.com/en-us/library/ee663485(v=office.16).aspx
Join the conversation! Your thoughts help the community grow.