

In this post, we are going to see how easily we can trigger a new build in VSTS from any of our widely used HTTP clients like fiddler or postman.
Prerequisites
- For this, we will require an active VSTS account with administrative privileges.
- Prior knowledge of VSTS build definitions.
- A simple build definition in a team project.
If you are new to VSTS, please check the official documentation here.
I would like to make this post short and to the point so I will not go into details on how to setup team project, upload your code base, and how to create CI CD pipeline for your projects.
If you want to know more and setup CI CD pipeline for ASP.NET Core services, please visit my previous blogs here.
Now, that we have a total setup with Team project and build definitions, let's move towards consuming the VSTS API’s which are exposed by the Team Service.
REST API over VSTS and TFS
VSTS exposes a whole lot of APIs for different sets of operations, such as -
- Account and profile
- Projects and teams
- Work (Agile)
- Build
- Version control
- Security… etc.
There are many more features that are exposed over REST API for VSTS. To find out all the cool features, please visit their official documentation here.
In this post, we will see how to consume the Build API and trigger or queue a build in a few simple steps using any HTTP REST client that is available on your local machine which, in our case, we will be using Fiddler.
Step 1 Generating the authorization token:
In order to invoke the VSTS APIs, we will need some mode of authentication for our account. The easiest way to do that is to create a PAT (Personal Access Token) from the VSTS portal. Though it is easy and effective for small problems and use cases, for proper business scenarios, please check out the official documentation for guideline by VSTS team here.
For this demo, we will proceed with creating a PAT and how to use it for authenticating our API calls.
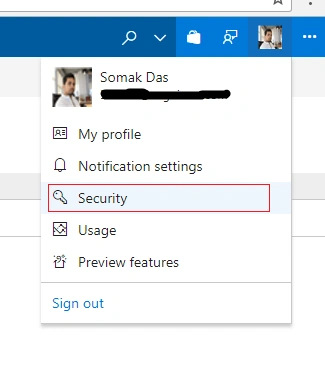
In order to generate a PAT, we need to first login to our VSTS account and then from the top right corner in the profile section, we need to go to Security as shown in the picture below.
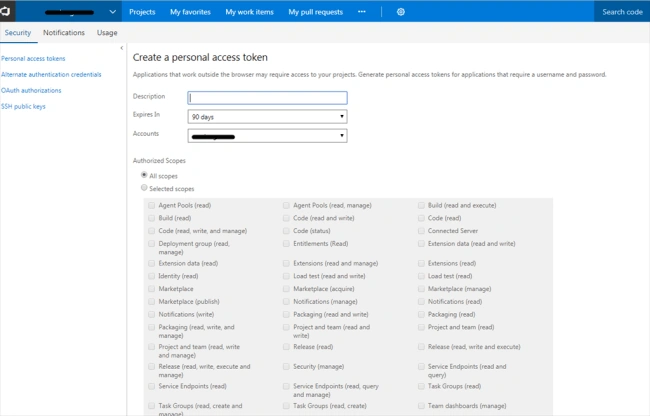
In the Security tab, select Personal access tokens which will display the list of previously created PATs. Now, in order to generate a new token, we need to click on Add and then give our token a description so that it can be identified later, select its expiry date, and select its roles (scopes).
Note
Join the conversation! Your thoughts help the community grow.