

Introduction
In this article I will create a Single View application. Here I use an image view and one button from outlet in the first view. To implement the recorder we add an AVFoundation framework and add a second view from the resource. Finally we test this app in a device. It will successfully record sound and play it back on a device.
To understand how it works we use the following.
Step 1
Here first we add the framework AVFoundation which is required to implement the recorder class.
To import this framework we use the following.
Step 2
Click on the project and select Build Phase.
Step 3
Click on the "+" icon to add the framework.
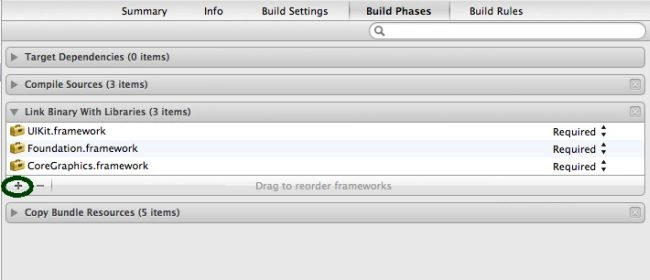
Step 4
Now select the AVFoundation framework and click on the add button.
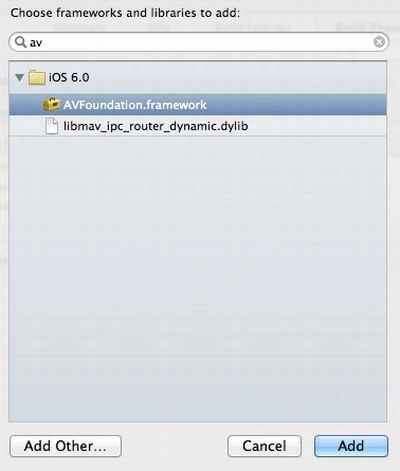
Step 5
Now we add an Objective-C Class of the UIView Controller type.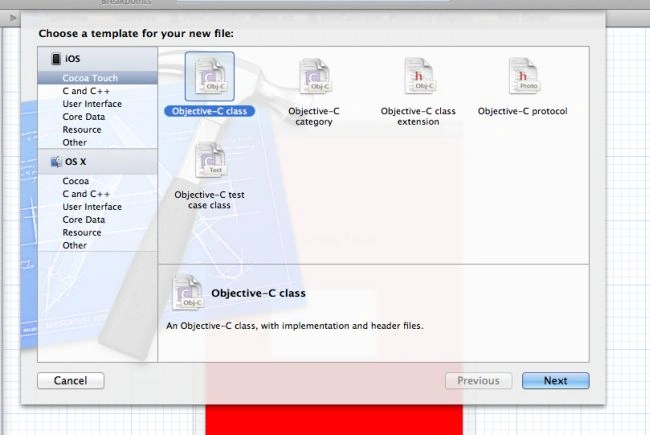
Step 6
Here we use one of the new concept of splash screen; for this we import an image to project and add it to the launch image. In the same way we add an app icon image.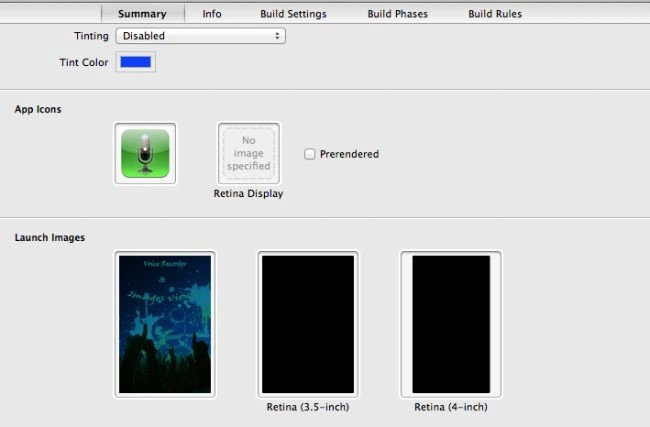
Step 7
Now we write the code for each class.
AppDelegate.h
#import <UIKit/UIKit.h>
@class ViewController;
@interface AppDelegate : UIResponder <UIApplicationDelegate>
@property (strong, nonatomic) UIWindow *window;
@property (strong, nonatomic) ViewController *viewController;
@property (strong,nonatomic) UINavigationController *nav;
@end
AppDelegate.m
#import "AppDelegate.h"
#import "ViewController.h"
@implementation AppDelegate
- (void)dealloc
{
[_window release];
[_viewController release];
[super dealloc];
}
- (BOOL)application:(UIApplication *)application didFinishLaunchingWithOptions:(NSDictionary *)launchOptions
{
self.window = [[[UIWindow alloc] initWithFrame:[[UIScreen mainScreen] bounds]] autorelease];
// Override point for customization after application launch.
sleep(5);
self.viewController = [[[ViewController alloc] initWithNibName:@"ViewController" bundle:nil] autorelease];
self.nav = [[UINavigationController alloc] initWithRootViewController:_viewController];
self.window.rootViewController = self.nav;
[self.window makeKeyAndVisible];
return YES;
}
- (void)applicationWillResignActive:(UIApplication *)application
{
// Sent when the application is about to move from active to inactive state. This can occur for certain types of temporary interruptions (such as an incoming phone call or SMS message) or when the user quits the application and it begins the transition to the background state.
// Use this method to pause ongoing tasks, disable timers, and throttle down OpenGL ES frame rates. Games should use this method to pause the game.
}
- (void)applicationDidEnterBackground:(UIApplication *)application
{
exit(0);
// Use this method to release shared resources, save user data, invalidate timers, and store enough application state information to restore your application to its current state in case it is terminated later.
// If your application supports background execution, this method is called instead of applicationWillTerminate: when the user quits.
}
- (void)applicationWillEnterForeground:(UIApplication *)application
{
// Called as part of the transition from the background to the inactive state; here you can undo many of the changes made on entering the background.
}
- (void)applicationDidBecomeActive:(UIApplication *)application
{
// Restart any tasks that were paused (or not yet started) while the application was inactive. If the application was previously in the background, optionally refresh the user interface.
}
- (void)applicationWillTerminate:(UIApplication *)application
{
// Called when the application is about to terminate. Save data if appropriate. See also applicationDidEnterBackground:.
}
@end
ViewController.h
#import <UIKit/UIKit.h>
@interface ViewController : UIViewController<UINavigationControllerDelegate>
{
IBOutlet UIButton *recordbtn;
}
@property (strong,nonatomic)IBOutlet UIButton *recordbtn;
-(IBAction)click:(id)sender;
@end
ViewController.m
#import "ViewController.h"
#import "recorderview.h"
@interface ViewController ()
@end
@implementation ViewController
@synthesize recordbtn;
- (void)viewDidLoad
{
[super viewDidLoad];
self.title = @"Voice Recorder";
self.navigationController.navigationBar.barStyle = UIBarStyleBlackTranslucent;
}
-(IBAction)click:(id)sender
{
recorderview *rec =[[recorderview alloc]init];
[UIView transitionWithView:self.navigationController.view duration:1
options:UIViewAnimationOptionTransitionCurlUp
animations:^{
[self.navigationController pushViewController:rec animated:NO];
}
completion:^(BOOL completed)
{
}
];
}
- (void)didReceiveMemoryWarning
{
[super didReceiveMemoryWarning];
// Dispose of any resources that can be recreated.
}
@end
ViewController.xib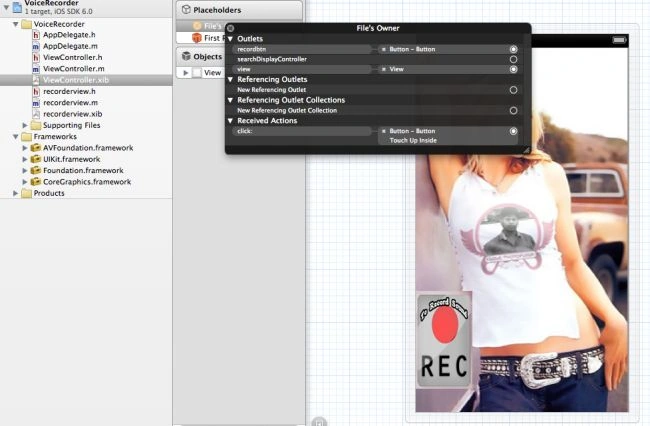
recordview.h
#import <UIKit/UIKit.h>
#import <AVFoundation/AVFoundation.h>
@interface recorderview : UIViewController <AVAudioRecorderDelegate,AVAudioPlayerDelegate>
{
IBOutlet UIButton *playbtn;
IBOutlet UIButton *stopbtn;
IBOutlet UIButton *recordbtn;
IBOutlet UIProgressView *progressview;
IBOutlet UIActivityIndicatorView *indicator;
BOOL toggle;
NSURL * recordedTmpFile;
NSTimer *timer;
AVAudioRecorder *audioRecorder;
AVAudioPlayer *audioPlayer;
}
@property (nonatomic,strong)IBOutlet UIActivityIndicatorView *indicator;
@property (nonatomic,strong)IBOutlet UIButton *playbtn;
@property (nonatomic,strong)IBOutlet UIButton *stopbtn;
@property (nonatomic,strong)IBOutlet UIProgressView *progressview;
@property (nonatomic,strong)IBOutlet UIButton *recordbtn;
@property (strong, nonatomic) AVAudioRecorder *audioRecorder;
@property (strong, nonatomic) AVAudioPlayer *audioPlayer;
- (IBAction) start_click;
- (IBAction) stop_click;
- (IBAction) Play_click;
@end
recordview.m
#import "recorderview.h"
@interface recorderview ()
@end
@implementation recorderview
@synthesize playbtn,stopbtn,recordbtn,progressview,indicator,audioPlayer,audioRecorder;
- (id)initWithNibName:(NSString *)nibNameOrNil bundle:(NSBundle *)nibBundleOrNil
{
self = [super initWithNibName:nibNameOrNil bundle:nibBundleOrNil];
if (self) {
// Custom initialization
}
return self;
}
- (void)viewDidLoad
{
[super viewDidLoad];
//Start the toggle in true mode.
toggle = YES;
playbtn.enabled = NO;
stopbtn.enabled = NO;
NSArray *dirPaths;
NSString *docsDir;
dirPaths = NSSearchPathForDirectoriesInDomains(
NSDocumentDirectory, NSUserDomainMask, YES);
docsDir = [dirPaths objectAtIndex:0];
NSString *soundFilePath = [docsDir
stringByAppendingPathComponent:@"sound.caf"];
NSLog(@"sound == %@",soundFilePath);
NSURL *soundFileURL = [NSURL fileURLWithPath:soundFilePath];
NSDictionary *recordSettings = [NSDictionary
dictionaryWithObjectsAndKeys:
[NSNumber numberWithInt:AVAudioQualityMin],
AVEncoderAudioQualityKey,
[NSNumber numberWithInt:16],
AVEncoderBitRateKey,
[NSNumber numberWithInt: 2],
AVNumberOfChannelsKey,
[NSNumber numberWithFloat:44100.0],
AVSampleRateKey,
nil];
NSError *error = nil;
audioRecorder = [[AVAudioRecorder alloc]
initWithURL:soundFileURL
settings:recordSettings
error:&error];
if (error)
{
NSLog(@"error: %@", [error localizedDescription]);
} else {
[audioRecorder prepareToRecord];
}
}
- (IBAction) start_click
{
NSLog(@"start");
[indicator startAnimating];
if (!audioRecorder.recording)
{
playbtn.enabled = NO;
stopbtn.enabled = YES;
[audioRecorder record];
}
progressview.progress = 0.0;
[audioRecorder recordForDuration:(NSTimeInterval) 2];
timer = [NSTimer scheduledTimerWithTimeInterval:0.2 target:self selector:@selector(handleTimer) userInfo:nil repeats:YES];
}
- (IBAction) stop_click;
{
NSLog(@"stop");
[indicator stopAnimating];
stopbtn.enabled = NO;
playbtn.enabled = YES;
recordbtn.enabled = YES;
if (audioRecorder.recording)
{
[audioRecorder stop];
} else if (audioPlayer.playing) {
[audioPlayer stop];
}
[timer invalidate];
}
- (IBAction) Play_click
{
NSLog(@"Play");
[indicator startAnimating];
if (!audioRecorder.recording)
{
stopbtn.enabled = YES;
recordbtn.enabled = NO;
NSError *error;
audioPlayer = [[AVAudioPlayer alloc]
initWithContentsOfURL:audioRecorder.url
error:&error];
audioPlayer.delegate = self; if (error)
NSLog(@"Error: %@",
[error localizedDescription]);
else
[audioPlayer play];
}
progressview.progress = 0.0;
[audioPlayer playAtTime:(NSTimeInterval) 2];
timer = [NSTimer scheduledTimerWithTimeInterval:0.2 target:self selector:@selector(handleTimer) userInfo:nil repeats:YES];
}
- (void)handleTimer {
// NSLog(@"progress value%f",progressview.progress);
progressview.progress +=0.02;
// NSLog(@"check");
if(progressview.progress==1)
{
[timer invalidate];
}
}
- (void)viewWillAppear:(BOOL)animated
{
[super viewWillAppear:animated];
}
- (void)viewDidAppear:(BOOL)animated
{
[super viewDidAppear:animated];
}
- (void)viewWillDisappear:(BOOL)animated
{
[super viewWillDisappear:animated];
}
- (void)viewDidDisappear:(BOOL)animated
{
[super viewDidDisappear:animated];
}
- (BOOL)shouldAutorotateToInterfaceOrientation:(UIInterfaceOrientation)interfaceOrientation
{
// Return YES for supported orientations
return (interfaceOrientation != UIInterfaceOrientationPortraitUpsideDown);
}
-(void)audioPlayerDidFinishPlaying:
(AVAudioPlayer *)player successfully:(BOOL)flag
{
recordbtn.enabled = YES;
stopbtn.enabled = NO;
}
-(void)audioPlayerDecodeErrorDidOccur:
(AVAudioPlayer *)player
error:(NSError *)error
{
NSLog(@"Decode Error occurred");
}
-(void)audioRecorderDidFinishRecording:
(AVAudioRecorder *)recorder
successfully:(BOOL)flag
{
}
-(void)audioRecorderEncodeErrorDidOccur:
(AVAudioRecorder *)recorder
error:(NSError *)error
{
NSLog(@"Encode Error occurred");
}
- (void)viewDidUnload
{
audioPlayer = nil;
audioRecorder = nil;
stopbtn = nil;
recordbtn = nil;
playbtn = nil;
[super viewDidUnload];
// Release any retained subviews of the main view.
// e.g. self.myOutlet = nil;
}
- (void)dealloc {
[audioPlayer release];
[audioRecorder release];
[stopbtn release];
[playbtn release];
[recordbtn release];
[super dealloc];
}
@end
recordview.xib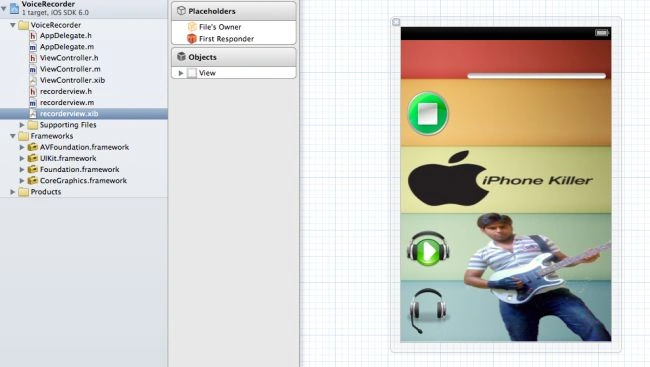
Step 8
Finally we click on the Run button to show the output.
Step 9
After executing one time app we check the app icon; for that we click on the Simulator home button.
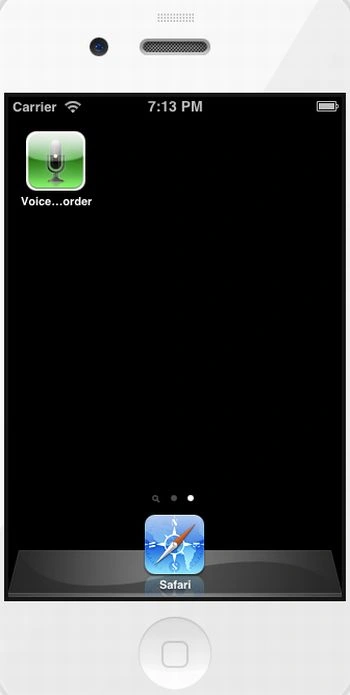
Step 10
Now here we see the output on the simulator and test it on the device.
Output 1 in iPhone:
After executing the project it initially shows the splash screen for 5 minutes because we set it's time to 5 minutes which was highlighted in the appdelegate.m class.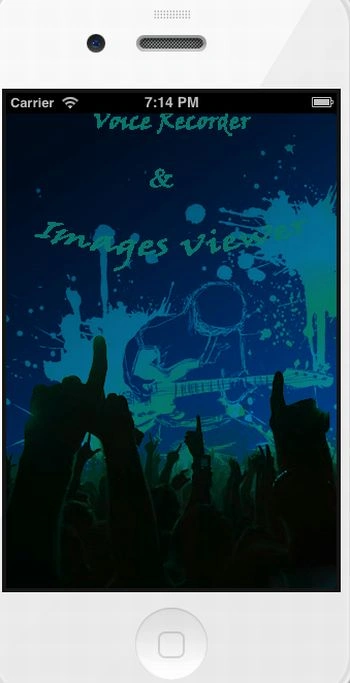
Output 2 in iPhone:
Now we click the record button. When we click on the record button it will move to the first view then to another view.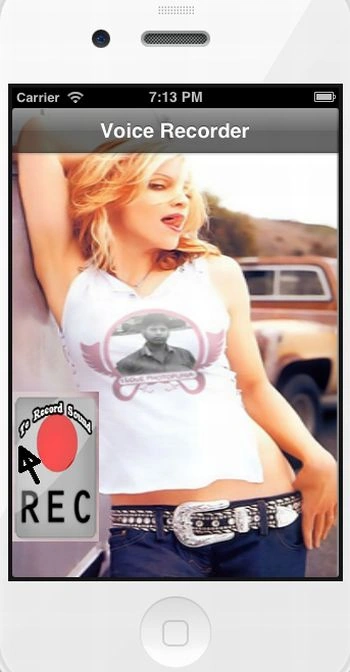
Output 3 in iPhone:
Here we see the recorder view. Now to record sound we click on the record button.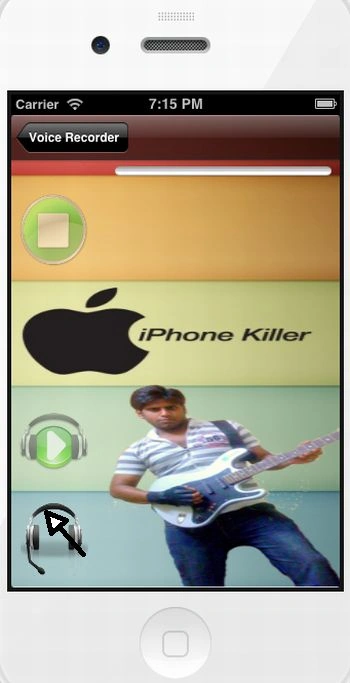
Here we test the app in the console window of xcode. Here the progress bar shows the progress and the indicator indicates the status.
Now we say something into the microphone, such as "mike, it was automatically record in this path....".
Show the output start in the console window which indicates that the recording is started by the user.
Output 4 in iPhone:
To stop the recording we click on the stop button. At that time the sound that was saved in the temporary path is automatically recorded and the indicator or progress bar stops. 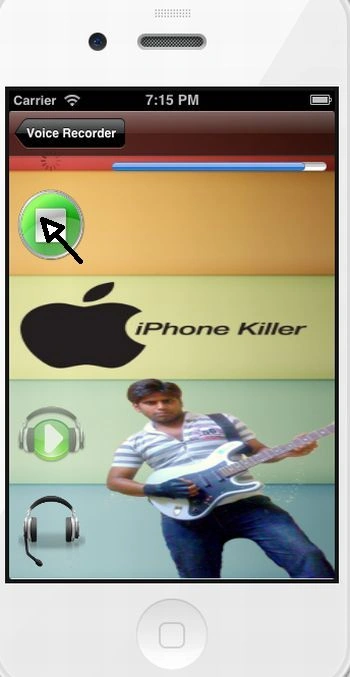
Show output stopped in the console window which indicates that the recording is stopped by the user.
Output 5 in iPhone:
Now to listen to the recording we click on the Play button. At that time the indicator or progress bar again automatically starts working.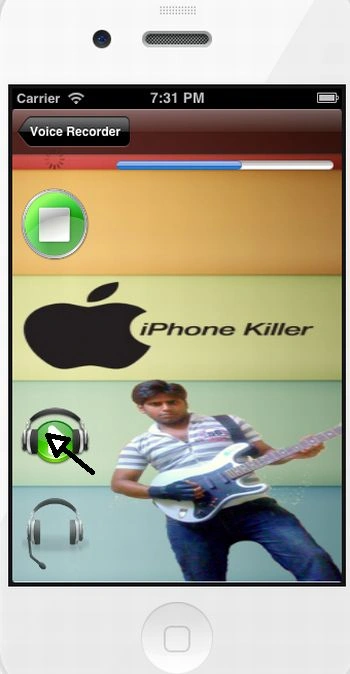
Show output play in the console window which indicates that the recording is in play mode. 
Output 6 in iPhone:
To stop playing we click on the Stop button. At that time the sound that is playing will automatically stop and it's status will be shown on the indicator or progress bar.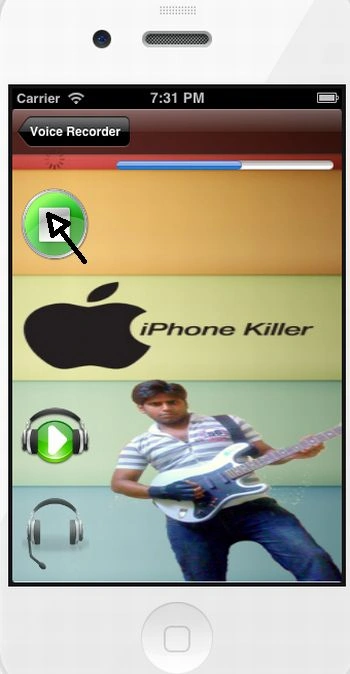
Show output stop in the console window which indicates that the sound that is playing is stopped by the user.

Join the conversation! Your thoughts help the community grow.