

Introduction
and Goal
In this article we will discuss about 3 important
features provided by VS 2010 to ease our deployment task on production and other
environment. We will first start with understanding problems with deployment and
then move ahead by creating packages , one click deploy and web.config
transformation.
Please feel free to download my free 500 question and answer eBook which covers
.NET, ASP.NET, SQL Server, WCF, WPF, WWF@ For more details Click
here .
Problems with deployment
When we talk about deployment it's not just
compiling and shipping DLL's to the production server. It involves lot of other
things like IIS settings, SQL scripts, text file, configuration etc.
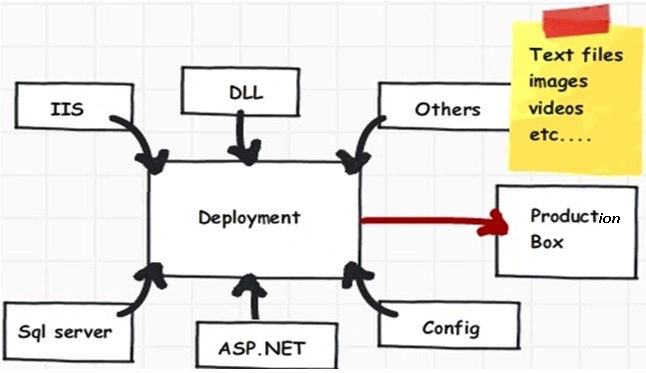
As a developer you would like to give a package to the administrators to install
with all the dependencies or you would like to install the same from your visual
studio IDE itself.
The
Package and "MSDeploy"
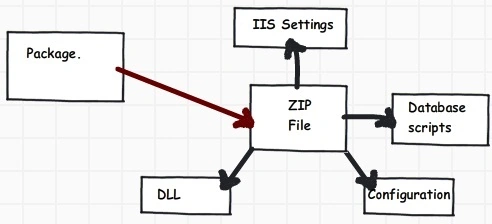
Package is nothing but a ZIP file which has all the
necessary components (DLL, SQL Scripts, configuration files, IIS settings etc)
needed by your application.
Creating the package
To create package, click on project properties tab you will find two tabs 'package/publish web' and 'package / publish SQL'. The first tab has all the IIS and general settings while the SQL tab is for deploying SQL Scripts on production.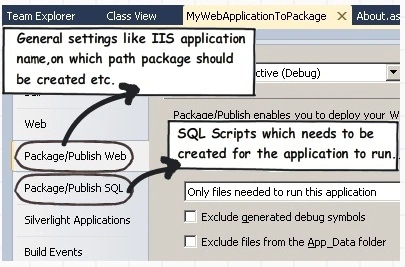
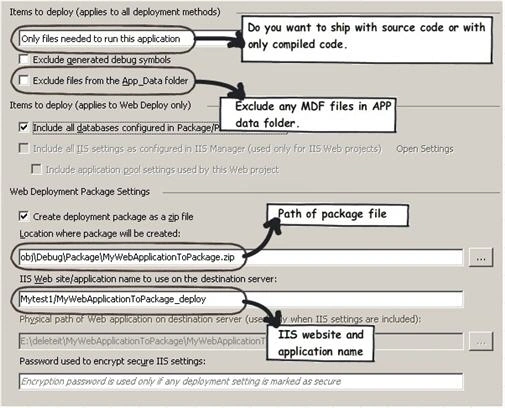
The Package and publish web tab has certain key things which you can define from IIS stand point and what should go in the package. Below figure describes some important key features.
The "Package/Publish SQL" tab helps you to configure everything what is related to SQL Server. The first point is you can import "web.config" file and all the connectionstrings of the web.config is taken to generate the SQL scripts.
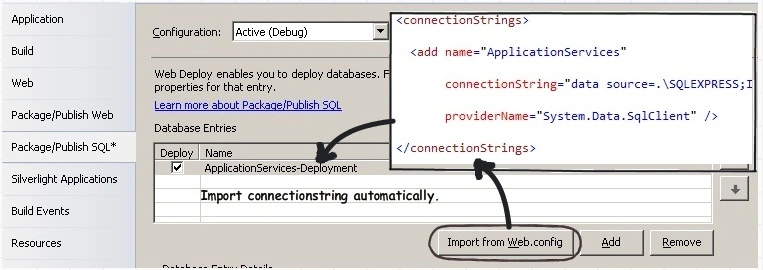
You can also specify source and destination of SQL server for the package. The source destination is imported from the "Web.config" automatically, but you can always go and change it as per your requirements.
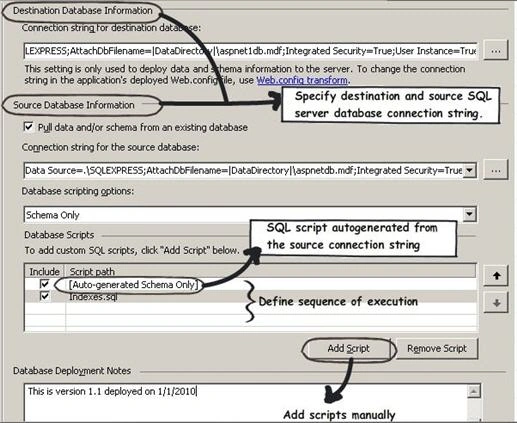
There are three more points in the "Package/Publish SQL" tab:
You can see the auto-generated schema, in other words the schema is generated automatically from specified source SQL Server.
If you want to go and add some scripts manually, like insert dummy data etc, you can always use the 'add script' tab as shown in the figure.
The final thing which I personally love is that you can sequence how the scripts should run. For instance in the below figure first the auto generate schema SQL will run and then 'indexes.sql' script will execute. This is a nice feature to exploit from versioning stand point.
In order to create the package, click on build deployment package menu and you should see the necessary package files in your project package folder.
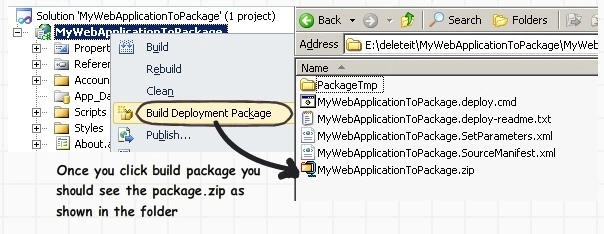
Deploying the package
Ok, now the package is generated, let's understand how we can go and install the same. To install the package we need the Microsoft web deploy software. Microsoft web deploy a.k.a "msdeploy" was created by Microsoft IIS team to migrate from IIS 6 to IIS 7.To leverage its power it's used as a back bone to install the package created by VS 2010.
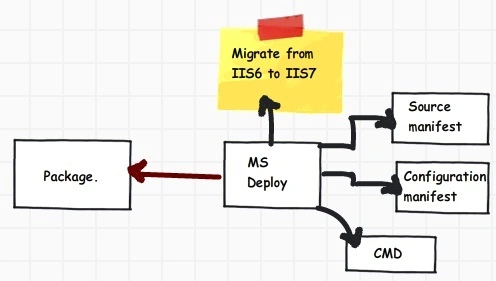
If you remember the package folder created in the first step has some XML files. There are three files which are very important one is the source manifest, destination manifest and a cmd file. The manifest file is read by MS deploy for Meta data and deployment configuration and later these all things are executed via the cmd file.
The first thing you would like to do is check if the package is right and it will execute properly on the environment. To do a trial installation you need to go to "Microsoft Web Deploy" command and execute the cmd file with "/t". This does not actually install but does a brief check of whether there can be any issues while actual installation.
C:\Program Files\IIS\Microsoft Web Deploy>E:\deleteit\MyWebApplicationToPackage\
MyWebApplicationToPackage\obj\Debug\Package\MyWebApplicationToPackage.deploy.cmd
/t
Once you execute the cmd file you should see summary of changes which will take place on your production server as shown in the below figure.
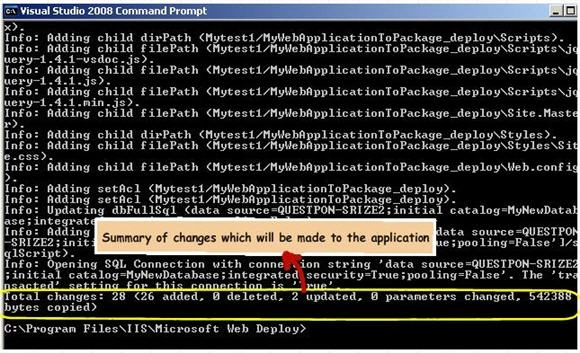
Once you have cross checked, you can deploy the package by using "/y" attribute as shown in the below snippet. If you run your package using the 'y' command it should create the IIS applications as well execute necessary database scripts to create SQL Server objects.
C:\Program Files\IIS\Microsoft Web Deploy>E:\deleteit\MyWebApplicationToPackage\
MyWebApplicationToPackage\obj\Debug\Package\MyWebApplicationToPackage.deploy.cmd
/yHTML clipboard The one click deploy
Many times you would like to install the package from the VS IDE itself rather than giving it to administrators for installing. In order to achieve
the same VS 2010 IDE has something called as 'One click deploy'.
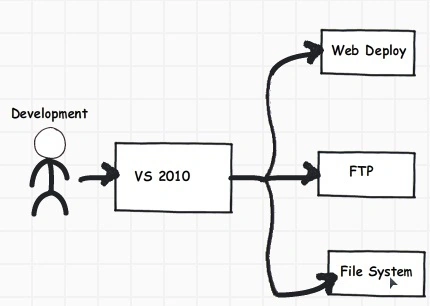
As the name says, you can deploy your package in one click in different modes by clicking on 'Build' and then
'Publish' menu. Below is the screen shot of how the one deploy publish looks like. You can publish on FTP. Web
deploy, file system etc.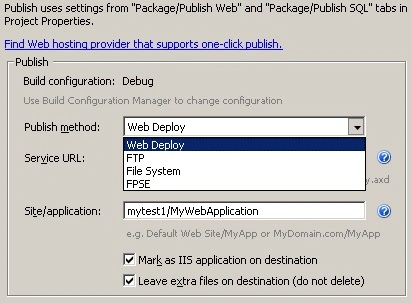
Web.config transformation
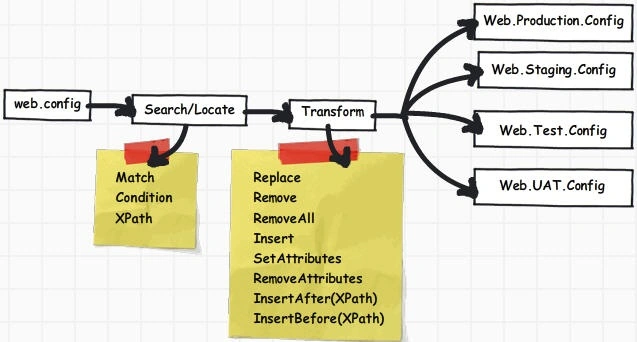
The final feature which is worth discussing is the 'Web.config' transformation. Many times you have different config files for different environments. It causes of lot of confusion when it comes to handling different versions of web.config files.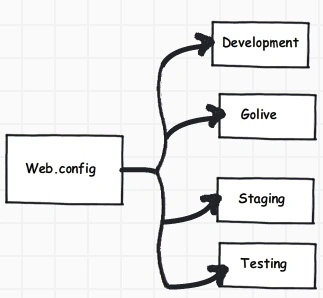
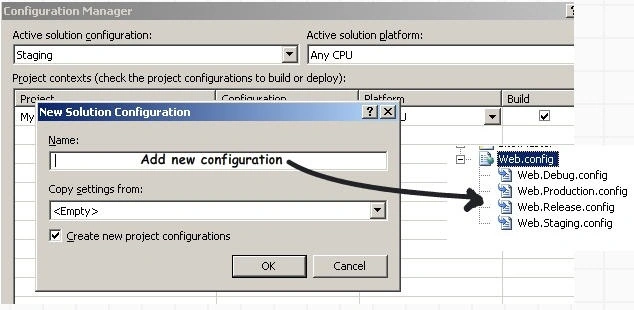
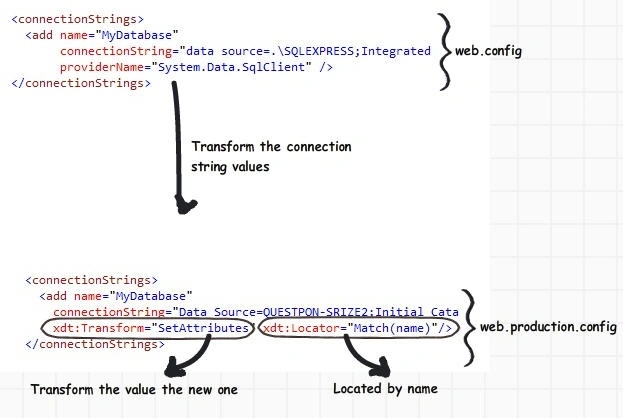
So go to tools Configuration manager and add a new config file as shown in the below figure. You can see that it creates a parent 'Web.config' files which can be overridden by child config files with their own settings.
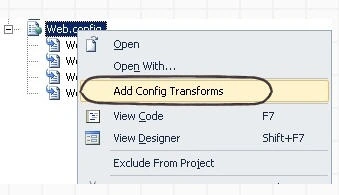
In order to see your newly added configuration you need to right on the web.config file and click 'add config transforms' as shown below.
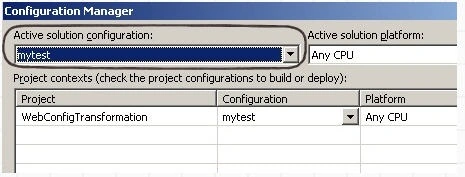
Depending on your active configuration selected the appropriate 'Web.config' will be created for the environment.
Join the conversation! Your thoughts help the community grow.