

In my previous article (ASP.NET Web Optimization Framework) I have described what the ASP.NET Web Optimization Framework is and what are all the classes provided by this framework for its use in web forms, web pages and ASP.NET MVC. So here in this article I will explain how to use this framework in an ASP.NET web page site.
Since in my previous article I have already explained the ASP.NET Web Optimization Framework so without describing anything about it I am directly switching to the implementation. But I will recommend before reading this article that you please go through my previous article (ASP.NET Web Optimization Framework) because that is a prerequisite for this article.
So now let's see how to use this framework in web pages site step-by-step.
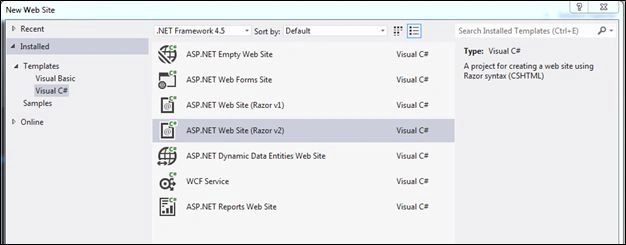
- Create an ASP.NET website (Razor 2) Web Site as in the following:
- Now you can see Solution Explorer like the following:
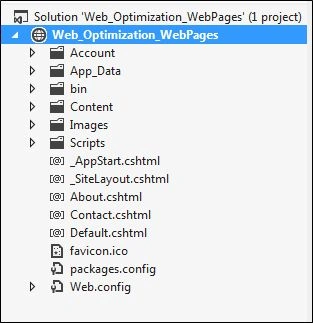
- One important thing here is that this template is already installed with the Web Optimization Framework so you can check in the bin folder that the required DLLs was already added.
- Now you need to create two folders, Scripts and Styles, for keeping scripts and CSS files. Now your Solution Explorer should look like the following:

Here I have added 2 files in the scripts folder and 2 files in Styles for demonstration. You can add as per your requirements.
- Open the _AppStart.cshtml file. You can see that there are already some code present in this file and some code is commented so there is no need to worry about that. We need to write our own code. You need to write the following code inside this file.
Here I am directly creating and adding two bundles into the bundle table. You can define it depending on your classification and use. You can further classify a single bundle into other sub bundles. One more thing you might have noticed here that I am using *.js , because I am adding all the js files into one bundle and the same for CSS. So exactly what I did here is I bundled all the JavaScript files into one bundle, in other words they will load as a single entity, not as multiple files and the same for CSS , I created a single bundle for all CSS files.var bundles = System.Web.Optimization.BundleTable.Bundles; bundles.Add(new System.Web.Optimization.ScriptBundle("~/bundle/js") .Include("~/Scripts/*.js")); bundles.Add(new System.Web.Optimization.ScriptBundle("~/bundle/css") .Include("~/Styles/*.css"));I think you can now understand better in practical terms how this framework optimizes the calls and loading of resources.
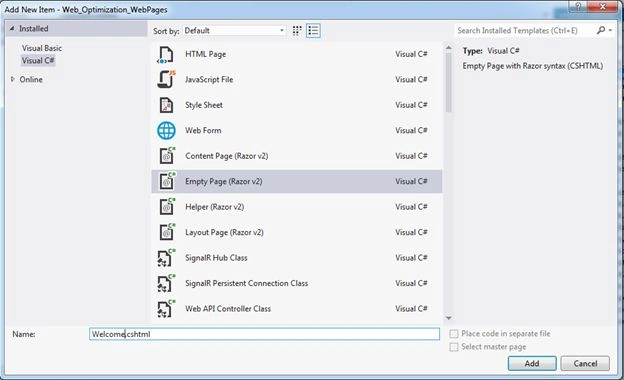
- Add one .cshtml for consuming these bundles. So for adding a cshtml file, right-click on Solution Explorer, click on Add and choose New item, then you will get one dialog box. Now you can choose Empty Page (Razor v2) and name the file Welcome.cshtml.
- Now we are ready with our bundle so the last task is to consume this bundle into our file. That we can do using the Scripts.Render and Styles.Render methods like the following:
@System.Web.Optimization.Scripts.Render("~/bundle/js") @System.Web.Optimization.Styles.Render("~/bundle/css") - Now we are ready with all the implementation. Now the only one task remaining is to enable the bundling and minification. As I described in my previous article, there are two ways to enable it. So you can use either of the ways. Here I am enabling it by setting the web.config file's compilation elements's debug attribute like the following:
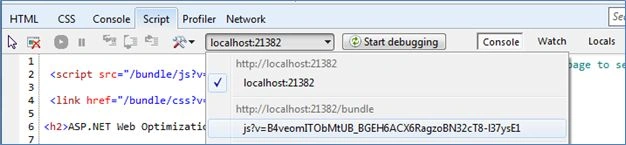
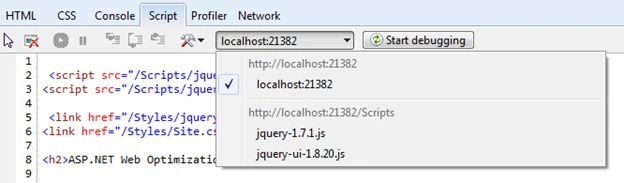
<system.web> <compilation debug="false" /> </system.web> - So it is now time to be happy and test our work. So run the Welcome.chstml page and see you will get the following screen.



Join the conversation! Your thoughts help the community grow.