

In this article I'll explain Custom MediaTypeMappings in the WebApi.
From the ASP.NET Web API perspective, serialization is the process of translating a .NET Common Language Runtime (CLR) type into a format that can be transmitted over HTTP. The default format is either JSON or XML
A media type formatter, which is an object of type MediaTypeFormatter, performs the serialization in the ASP.NET Web API pipeline. Consider a simple action method handling GET in an ApiController:

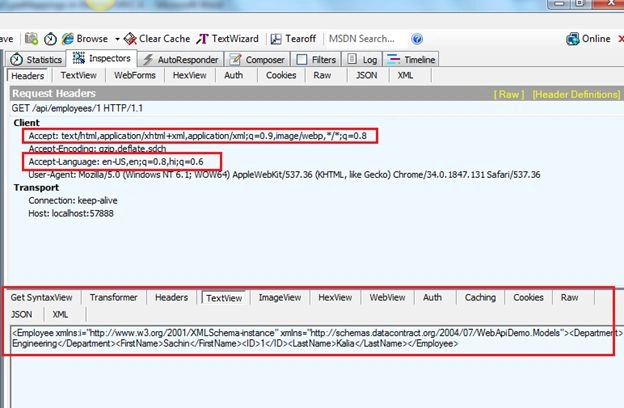
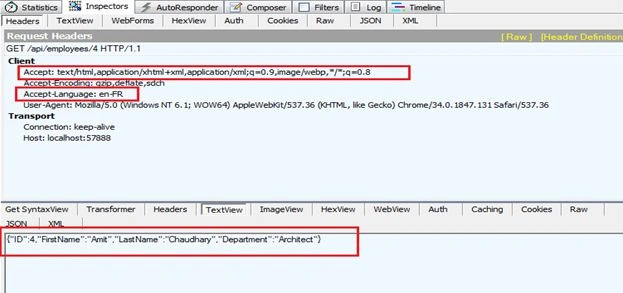
By default the ASP.NET Web API framework supports two media or content types: JSON and XML.If you send a request with Accept: application/json then the response message will be JSON and Content-Type will be application/json. Similarly, if you send a request with Accept: application/xml, the response message will be XML. You can also specify a quality value indicating the relative preference. The range is 0–1, with 0 being unacceptable and 1 being the most preferred. The default value is 1. For example, if you send the request header Accept: application/json; q=0.8, application/xml;q=0.9 then the response message will be XML, because application/xml has a quality value of 0.9, that is higher than the quality value of 0.8 specified for application/json.
Kindly can also visit this series of articles to learn about the WebApi:
- How MediaTypeFormatter and MediaTypeMapping Are Associated With Each Other in Web Api
- WEBAPI: MEDIATYPEFORMATTERS IN WEBAPI
- Demystify WebApi Content negotiation
- WEBAPI: EXECUTION OF RPCSTYLE ACTION METHOD IN WEBAPI USING MVC4
- WEBAPI PATCH UPDATE USING FROMBODY PARAMETER IN WEBAPI USING MVC4 TEMPLATE
- WebApi: Configuration over Convention using MVC4 template
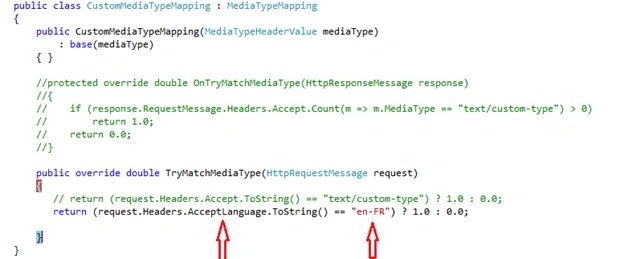
There is one more way by which the Conneg algorithm decides about the Response's media type and formatter. It is called MediaTypeMapping. Every MediaTypeFormatter has a collection of these mappings in it.
MediaTypeMapping provides a way for the user to add some custom logic and decide whether they would want the formatter to take part in writing the Response. This is different from the default way of just matching media type values (like “application/xml”, “application/xml”) present on the Accept and Request Content-Type headers and making decisions.

Let's create a sample application and do this step-by-step.
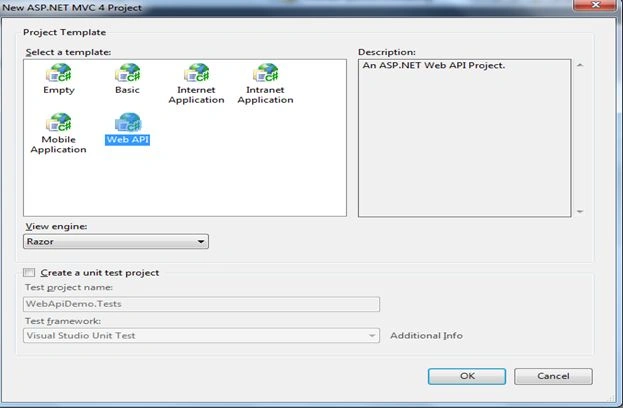
Step 1: Let's first create a sample web application using an ASP.NET MVC 4 Web Application and name it as you choose; I used WebApiDemo as shown in the image below:

Step 2: Click OK and choose the Web API option from the templates shown in the wizard window.
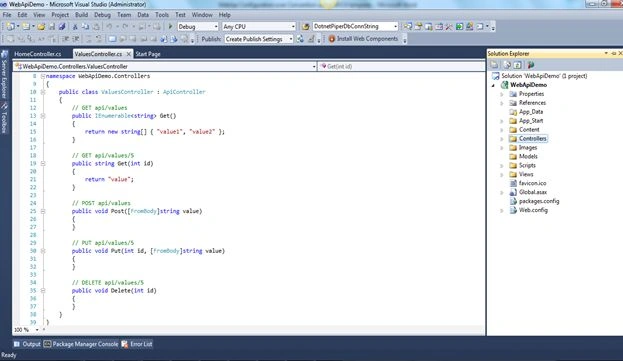
Step 3: You'll find the application structure as shown below at first sight.
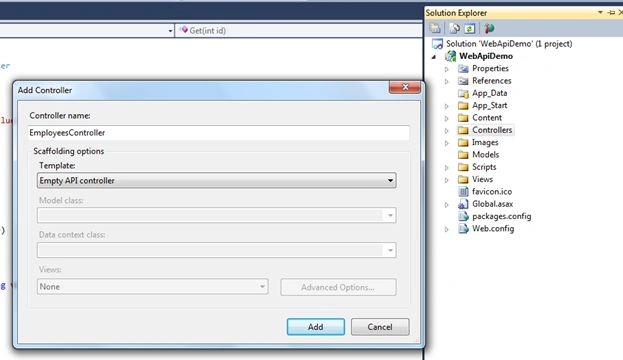
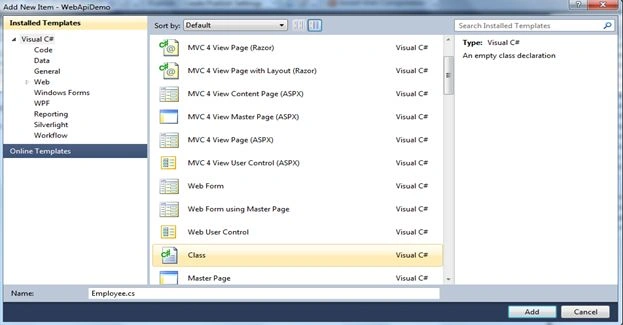
Step 4: Right-click the Controllers folder in the Solution Explorer of Visual Studio. Select "Add" ➤"Controller" and provide a name of EmployeesController for the controller. Leave the option Empty API Controller selected in the Template dropdown and click "Add", as shown in the figure below. Notice that the generated controller class inherits from ApiController, a class that is part of the ASP.NET Web API framework. Kinldy add the following code into the EmployeesController class.





Atul RawatPosted Feb 26, 2015, 11:11 PM
congrats brother Article of the day on ASP.net MS expected more Article from your side.....
Sachin KaliaPosted Feb 26, 2015, 5:13 AM
@Thanks Dinesh bhai....for supporting me always ...
Dinesh BeniwalPosted Feb 26, 2015, 12:44 AM
Congrats Sachin, Article of the day on ASP.NET