
Why we need it
We must add a reference of the Namespace object before using that object in a project. Several references are automatically added in the project by default. The VB.Net "Imports" keyword is used to add a reference of a namespace manually.
Example
- Imports System
- Imports System.Collections
A class in .Net Framework cannot belong to multiple Namespaces. One class should belong to only one Namespace. VB.NET does not allow two classes with the same name to be used in a program.
We can define a Namespace using the "Namespace" keyword. The syntax for declaring a Namespace is:
- Namespace <Namespace_name>
- // Classes and/or structs and/or enums etc.
- End Namespace
Note: All the classes in the .Net Framework belongs to the System Namespace. The "system" Namespace has built-in VB functionality and all other Namespaces are based on this "system" Namespace.
Accessing Members of a Namespace
We can access a member of a Namespace by using a dot(.) operator, also known as the period operator. The members of a Namespace are the variables, procedures and classes that are defined within a Namespace. To access the member of a namespace in a desired location type the name of the namespace followed by the dot or period operator followed by the desired member of the namespace.
Example
MyNamespace.Class1.disp() 'Accessing elements of the MyNamspace
we can access a member of a namespace in various ways. The following program shows accessing the element of a namespace in various ways.
- Imports System
- Namespace Birds 'user defined namespace Bird
- Class Parrot 'Parrot is a class in the namespace Animals
- Public Shared Function fly() 'Fly is a function in this Class
- Console.WriteLine("Parrot can fly")
- End Function
- Public Shared Function color() ' color is another function in parrot class
- Console.WriteLine("normally Parrots are green")
- End Function
- Public Shared Function type()
- Console.WriteLine("Different type of parrot are found around the world")
- End Function
- End Class
- End Namespace
- Module Module1
- Public Function myfunction()
- Dim P As Birds.Parrot
- P = New Birds.Parrot()
- P.type() 'accessing member of the namespace bird
- End Function
- Sub main()
- Console.Clear()
- Birds.Parrot.fly() 'accessing member of the namespace
- ConsoleApplication5.Birds.Parrot.color() 'another way to access member of the namespace
- myfunction()
- End Sub
- End Module
Output
- Namespace MyNamespace 'class with in a namespace
- Public Class Class1
- Public Shared Function disp() 'function declared within the class
- Console.Write("hello" & vbCrLf)
- End Function
- End Class
- End Namespace
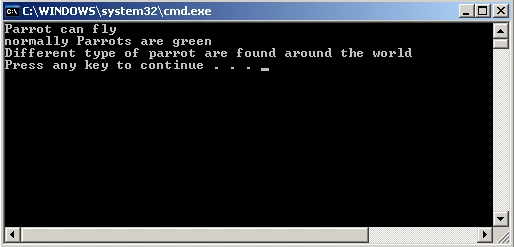
Nesting a Namespace
Nesting a Namespace means create a namespace inside a namespace. A good way to organize namespaces is to put them in a hierarchal order, i.e. general name at the top of the hierarchy and put specific names at the lower level.
Example
- Imports System
- Namespace outer 'declare an outer namespace
- Public Class nameout
- Public Shared Function disp() 'create a function inside a outer namespace
- Console.WriteLine("hi this is outer name space")
- End Function
- End Class
- Namespace inner 'decalre an inner namespace
- Public Class nameinn
- Public Shared Function disp() 'create a function inside the inner namespace
- Console.WriteLine("hi this is inner namespace")
- End Function
- End Class
- End Namespace
- End Namespace
- Module module1
- Sub main()
- Console.Clear()
- outer.nameout.disp() 'accesing function of the outer namespace
- outer.inner.nameinn.disp() 'accessing fucntion of the inner namespace
- End Sub
- End Module
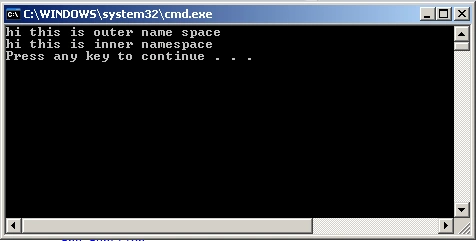
Output
Note: You can not have two classes with the same name in the same scope. In other words, class overloading is not allowed.
Example
- Namespace MyNamespace
- Public Class one 'sample class with in a namespace
- Public Shared Function disp() 'function declared within the class
- Console.Write("hello" & vbCrLf)
- End Function
- End Class
- Public Class one 'this is not allowed
- Public Shared Function disp1()
- Console.Write("hi")
- End Function
- End Class
- End Namespace
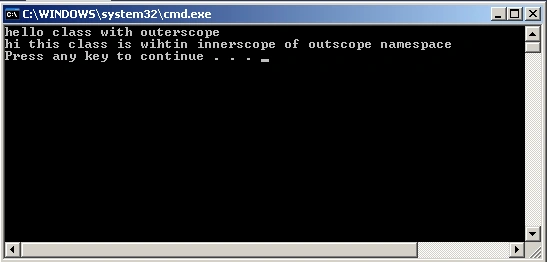
Example
- Namespace outerscope 'sample class with in a namespace
- Public Class one
- Public Shared Function disp() 'function declared within the class
- Console.Write("hello class with outerscope" & vbCrLf)
- End Function
- End Class
- Namespace innerscope
- Public Class one 'same class with different scope
- Public Shared Function disp1()
- Console.Write("hi this class is wihtin innerscope of outscope namespace " & vbCrLf)
- End Function
- End Class
- End Namespace
- End Namespace
- Module module1
- Sub main()
- Console.Clear()
- outerscope.one.disp()
- outerscope.innerscope.one.disp1()
- End Sub
- End Module
Aliases of the Namespaces
Aliases are created when we have nested Namespaces. It is easy to access the members of the namespaces by the alias. An alias is a shortcut for a nested namespace with a shorter label. An alias of a namespace is created with the help of the "imports" keyword. Aliasing is useful when we are working with a large project.
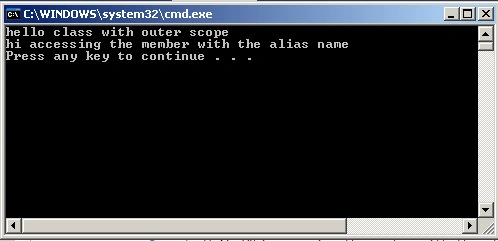
Example
- Imports ally = ConsoleApplication6.outerscope.innerscope 'creating an alias name for inner scope
- Namespace outerscope 'sample class with in a namespace
- Public Class one
- Public Shared Function disp() 'function declared within the class
- Console.Write("hello class with outer scope" & vbCrLf)
- End Function
- End Class
- Namespace innerscope
- Public Class one 'same class with different scope
- Public Shared Function disp1()
- Console.Write("hi accessing the member with the alias name" & vbCrLf)
- End Function
- End Class
- End Namespace
- End Namespace
- Module module1
- Sub main()
- Console.Clear()
- outerscope.one.disp() 'accessing member of the outerscope namespace without alias name
- ally.one.disp1() 'accessing member of the innerscope by alias name
- End Sub
- End Module
Join the conversation! Your thoughts help the community grow.