

Introduction:
In this article we are going to see how to configure and connect a Remote Desktop of ASP.Net Azure Web Role by creating a new Azure web application and initializing the process.Overview:
We normally use a Remote Desktop to get access to the server physically to do some manipulations as per the requirement. Here the same purpose of accessing the role instance on the server for development purposes only and not for running any windows client on the server using the remote session. To enable a Remote session for a Role we need to follow a few steps to first initialize, then configure and later we can connect to the Remote Desktop as we normally do for a server. Lets us see the step by step process of how to create a new role and add the Remote Desktop access and configure it on the server using the Windows Azure Management Portal.Steps:
Open Visual Studio 2010-> File-> New Project and navigate to the Cloud tab at the left and select Windows Azure Project and change the name of the project to RemoteDesktopSample as shown in the screen below.Note - check my previous article for clear steps of how to create a new Azure application and hosting it to the cloud

Now a pop up window opens to select the Role from the list of roles available as shown in the screen below:

Since we are going to create a sample we go with ASP.Net Web Role, select the Role and click on the > button to select the role as shown in the screen below.

Clicking on OK button will open a new project with some inbuilt structures as shown in the screen below. Do some modifications as shown in the screen below to host the application to the cloud and check for the result.

Now we are done with our application to check the application locally. Hit F5 to build and execute the process and we will see the message saying that the build was successful as shown in the screen below.
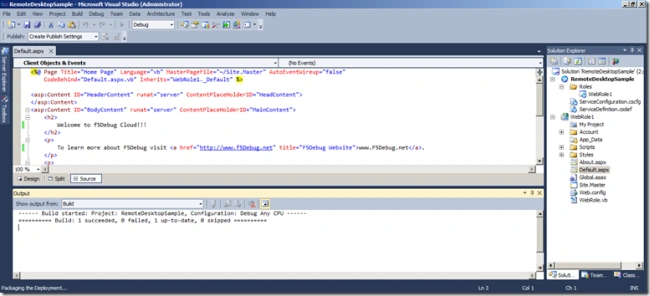
Once the execution is completed with the packaging we will see the application available locally as shown in the screen below.
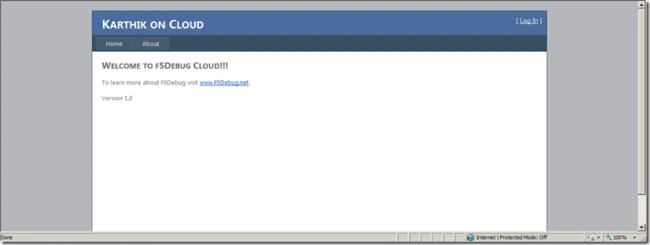
Now in order to activate the Remote Desktop session, right-click the Azure application and click on Publish as shown in the screen below.

We will see a pop up window with the 2 different options (check my previous articles to get indepth knowledge of the options). Click on the "Configure Remote Desktop Connections…" as shown in the screen below:

Click on the "Enable Connections for all roles" check box and select the Create or Select certificate option drop down and select already existing certificate or click on Create as shown in the screen below:

Now we will get a pop up asking for a friendly name; we can give any name for the certificate as per our wish as shown in the screen below. Here we have given it as f5Debug to have it handy:

Clicking on the OK button after giving a desired name, we need to enter a user name and password that will be used for connecting remotely. For the password we need to follow some specific rules; the password should contain a mixture of upper and lower cases, digits and symbols as shown in the screen below.

After providing valid credentials and the Account expiration date your screen looks like the following, click on OK to complete the steps.

Now click on OK to start publishing and we will see the configuration file and package created as shown in the screen below (check my previous articles on the usage of these files in detail):

Now we are done with creating a certificate and publishing files (service and config files). In order to get the certificate we need to follow some steps.
Note - check my previous article on how to create a certificate and export it in details using the link.
To get the certificate, click on Start –> Run and type certmgr.msc as shown in the screen below:

A new window will be opened with the grouped list of certificates installed on the computer as shown in the screen below.

Now select Personal –> Certificates and we will see the list of personal certificates created on the server. Select the certificate which we created for this sample(f5Debug friendly name) as shown in the screen below.

Double-click the certificate; a window will open; navigate to the Details tab and click on Copy to File as shown in the screen below.

A wizard will open to export the certificate as shown in the screen below.

Click on Next to start the wizard and select Yes, export the private key and click on the next button as shown below:

Now select Personal Information Exchange and click on Next button as shown below:

Enter the password for the certificate as shown in the screen below and click on the Next button.

Now it will prompt for the path to save the certificate .pfx file, navigate to a user friendly path and select it as shown in the screen below.

Clicking on next will provide a summary for the export, now click on Finish to complete the process and we will see a message that the export was successful as shown in the screen below.


prabhakar thatikondaPosted Nov 2, 2018, 1:19 PM
I can't see the images/screen shots on this page. i am using chrome browser
Dea SaddlerPosted Jul 15, 2011, 8:09 AM
Best Article....
Dinesh BeniwalPosted Jul 15, 2011, 8:00 AM
Very good and step by step explanation, my vote is 5/5.