

Introduction
This article describes an easy approach to building a simple word processor around an extended version of the Rich Text Box (RTB) control; Microsoft has made available an extended version of the RTB control that greatly eases the requirements for printing the control's text or RTF content. This article and the sample application will use this extended version of the RTF control to demonstrate the following word processor related functions:
- Opening Text, RTF, HTML, or other text files into a RTB control
- Saving Text, RTF, HTML, or other text files from an RTB control
- Implementation of the Page Setup dialog control
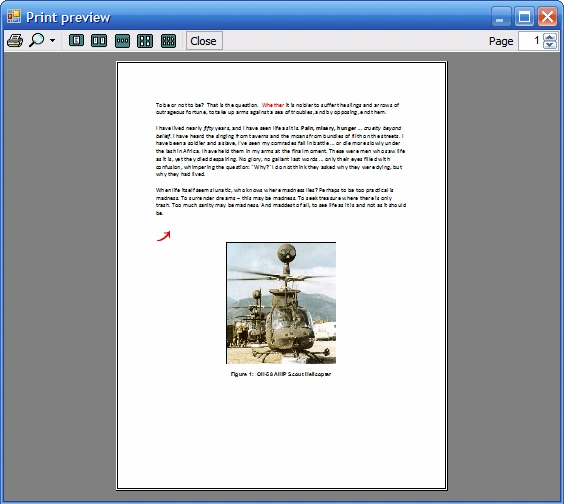
- Implementation of the Print Preview dialog control
- Implementation of the Print dialog control
- Setting font properties on selected text or RTF within the RTB control
- Searching for and highlighting text contained within the RTB control
- Searching for and replacing text contained within the RTB control
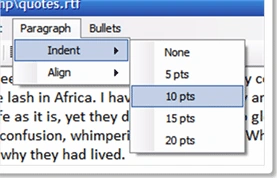
- Adding Indentation to sections of an RTB's content
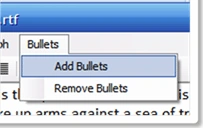
- Adding Bullets to sections of an RTB's content
- Implementing Undo/Redo within an RTB
- Implementing Select All, Cut, Copy, and Paste in an RTB control
- Embedding Images into an RTB control
- Setting page and font colors
- Implementing Alignment options in an RTB control
Whilst this project will not lead you to drop MS Word, it is a decent little word processor and to that end, you may find a use for it. I have always kept one of these on hand and have frequently tailored them to do things like provide a custom tool for viewing reports, error logs, and things of that nature when I wanted to integrate that feature into a product so that I could use it in lieu of doing something like shelling out a text file into Notepad. Doing so allows me to control the appearance of the application, the caption in the title bar of the form, etc.
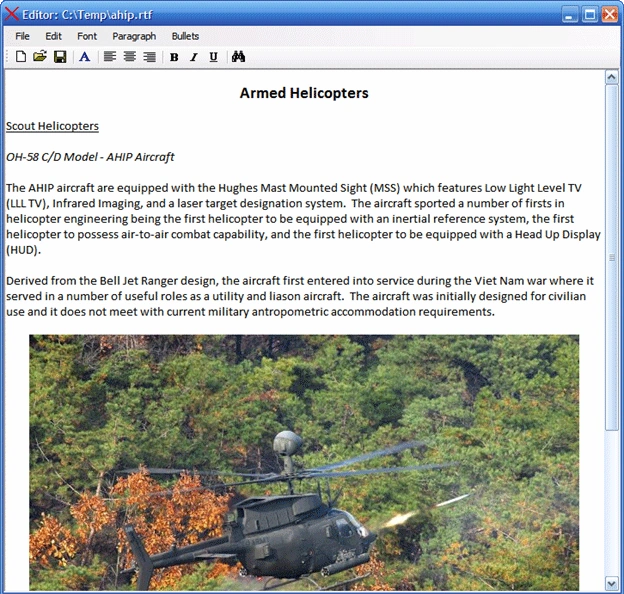
Figure 1: The Editor Application in Use
Getting Started:
In order to get started, unzip the attachment and load the solution into Visual Studio 2005. Examine the solution explorer and note the files contained in the project:
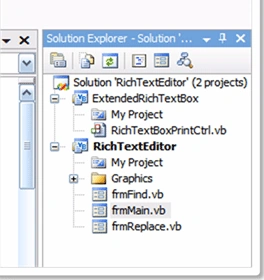
Figure 2: The Solution Explorer Showing the Project Files
First note that there are two separate projects contained in the solution. The first project is a class library entitled, "ExtendedRichTextBox", that library contains a single control class, "RichTextBoxPrintCtrl.vb". This control class was provided by Microsoft as an alternative to the basic Rich Text Box control; the class inherits from the RichTextBox control class but adds to that base class additional support for printing the control's content. The approach provided by the control is far simpler than the traditional approach used as based upon the manipulation of the graphic context of the control.
The second solution is the editor application itself (RichTextEditor). This application uses the extended rich text box control and then to that adds in all of the normal document manipulation techniques (such as font selection, indentation, and file IO support). Aside from the main application's form (frmMain.vb), this project also includes two additional forms, one to search for a string within the RTB's content, and one to search for and replace strings within the RTB. These forms are frmFind.vb and frmReplace.vb.
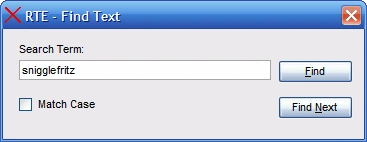
Figure 3: Editor Application Find Dialog
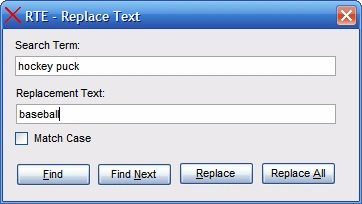
Figure 4: Editor Application Find and Replace Dialog
In addition to the form classes mentioned, the solution also contains a folder entitled, "Graphics"; this folder contains all of the image files used to support the application's menus and toolbar.
Project References.
Aside from the default references, there are a couple of additional references added. Most notably, the extended rich text box control library is added to allow for the use of the extended rich text box control. Figure 2 shows the references as they exist in the project.
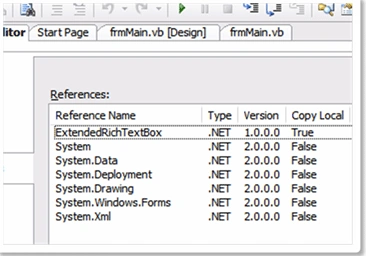
Figure 5: Project References
The Code: Main Form Class.
The main form class (frmMain.vb) is pretty easy to follow. It begins with a couple of import statements followed by the class declaration. The code is divided by purpose into four separate regions which are:
- Declarations
- Menu Methods
- Toolbar Methods
- Printing
The imports and class declaration sections of code looks like this:
Imports System.Drawing
Imports System.Drawing.Image
Public Class frmMain
The class declaration is plain enough and does not inherit from or implement any base class or interface. I would emphasis here again that making use of Microsoft's extended rich text box control greater reduces the amount of code necessary to support all of the methods used within this application.
The declarations section is also very simple; the section contains both of the variables used throughout the application. The content is as follows:
#Region "Declarations"
Private currentFile As String
Private checkPrint As Integer
#End Region
The "currentFile" variable is used to keep track of the path and file name of the file loaded into the extended rich text box control; it is updated whenever the user opens a file, creates and saves a file, or saves a file with a new name and/or file extension.
The "checkPrint" variable is used by the streamlined printing process recommended by Microsoft in the article describing the use of the extended rich text box control. It is used to determine if additional pages exist when the document is sent to the printer (in support of multi-page printing).
The next section of code is the primary block of code used by this application, the "Menu Methods" region contains all of the subroutines evoked in response to the selection of a menu option. The "Toolbar Methods" region follows the "Menu Methods" region, but all of the subroutines in the toolbar control section call the subroutines defined in the "Menu Methods" region of the code unless the code was so trivial (one line) that it was just as simple to make the call directly as it was to call menu related subroutine; for that reason, this document will not describe the content of the "Toolbar Methods" region specifically.
The first block of code in the menu region is used to create a new file:
Private Sub NewToolStripMenuItem_Click(ByVal sender As System.Object,
ByVal e As System.EventArgs) Handles NewToolStripMenuItem.Click
If rtbDoc.Modified Then
Dim answer As Integer
answer = MessageBox.Show("The current document has not been
saved, would you like to continue without saving?", "Unsaved
Document", MessageBoxButtons.YesNo, MessageBoxIcon.Question)
If answer = Windows.Forms.DialogResult.Yes Then
rtbDoc.Clear()
Else
Exit Sub
End If
Else
rtbDoc.Clear()
End If
currentFile = ""
Me.Text = "Editor: New Document"
End Sub
In this subroutine, prior to clearing the current document, the status of the current document is checked by means using the controls "Modified" test; if the document has been modified while it has been open, the test will return true. If the document has been modified, the user is queried with a message box to determine whether or not they want to save (or loose) the modifications made to the current file prior to clearing the file. If they choose to save the changes, the subroutine is exited; else, the document is cleared, and the changes are lost. If the document has not been modified, the subroutine will clear the document without notifying the user. Whenever the document is cleared, the title of the control is updated to indicate that a new (unsaved) document is the current document, and the "currentFile" variable is set to contain an empty string.
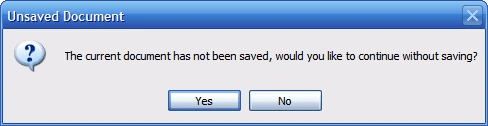
Figure 6: Confirmation Dialog show after user requests new document with saving changes.
The next subroutine is used to open an existing file into the rich text box control:
Private Sub OpenToolStripMenuItem_Click(ByVal sender As System.Object,
ByVal e As System.EventArgs) Handles OpenToolStripMenuItem.Click
If rtbDoc.Modified Then
Dim answer As Integer
answer = MessageBox.Show("The current document has not been
saved, would you like to continue without saving?", "Unsaved
Document", MessageBoxButtons.YesNo, MessageBoxIcon.Question)
If answer = Windows.Forms.DialogResult.No Then
Exit Sub
Else
OpenFile()
End If
Else
OpenFile()
End If
End Sub
This subroutine works in a manner similar to the "new" subroutine discussed in the previous section. If the file has not been modified or if the user decides not to save the current modifications, the subroutine calls an Open File subroutine which in turn exposes a File Open dialog used to allow the user to navigate to the file they wish to open. The Open File subroutine is next and contains this code:
Private Sub OpenFile()
OpenFileDialog1.Title = "RTE - Open File"
OpenFileDialog1.DefaultExt = "rtf"
OpenFileDialog1.Filter = "Rich Text Files|*.rtf|Text Files|*.txt|HTML
Files|*.htm|All Files|*.*"
OpenFileDialog1.FilterIndex = 1
OpenFileDialog1.ShowDialog()
If OpenFileDialog1.FileName = "" Then Exit Sub
Dim strExt As String
strExt = System.IO.Path.GetExtension(OpenFileDialog1.FileName)
strExt = strExt.ToUpper()
Select Case strExt
Case ".RTF"
rtbDoc.LoadFile(OpenFileDialog1.FileName,
RichTextBoxStreamType.RichText)
Case Else
Dim txtReader As System.IO.StreamReader
txtReader = New
System.IO.StreamReader(OpenFileDialog1.FileName)
rtbDoc.Text = txtReader.ReadToEnd
txtReader.Close()
txtReader = Nothing
rtbDoc.SelectionStart = 0
rtbDoc.SelectionLength = 0
End Select
currentFile = OpenFileDialog1.FileName
rtbDoc.Modified = False
Me.Text = "Editor: " & currentFile.ToString()
End Sub
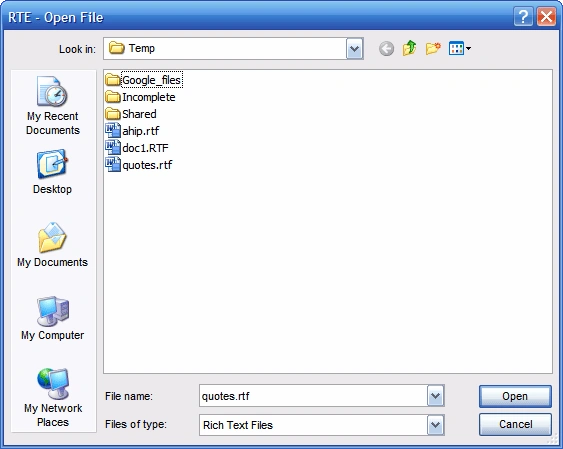
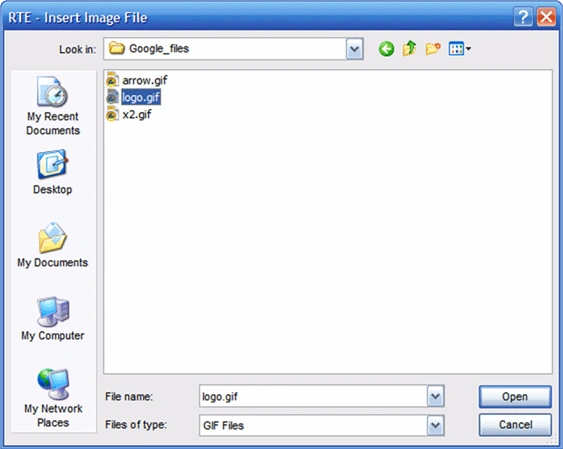
Figure 7: Open File Dialog
The first part of the File Open subroutine is used to configure and display the Open File Dialog box; this code sets up the filters for the files types (rich text, text, or html), sets the dialog box title, and a selects an extension filter (rtf). Once this is done, the dialog box is displayed, if the user Okays the dialog box without specifying a file name, the subroutine will exit. If a file name exists, the code extracts the file extension from the file name, places the extension in a local string variable, converts it to upper case and does a select case statement on the string variable. If the file selected by the user is an RTF file, the subroutine calls the control's Load File method and passes it the file name and format. If the file is not an RTF file, a stream reader is instanced and passed the path to the file, the control is then fed the content of the file by means of the stream reader's read to end method. The reader is then closed and disposed of and the cursor is moved to the beginning of the document and the selection length is set to zero (if you do not do this, the whole document will initialize as entirely selected). After the file is loaded, the "currentFile" variable is updated to contain the current file path and name, the modified property of the control is set to false, and the caption bar is updated to show the name of the file currently under edit in the rich text box control.
The next item up is the "Save" menu option; it contains the following code:
Private Sub SaveToolStripMenuItem_Click(ByVal sender As System.Object,
ByVal e As System.EventArgs) Handles SaveToolStripMenuItem.Click
If currentFile = "" Then
SaveAsToolStripMenuItem_Click(Me, e)
Exit Sub
End If
Dim strExt As String
strExt = System.IO.Path.GetExtension(currentFile)
strExt = strExt.ToUpper()
Select Case strExt
Case ".RTF"
rtbDoc.SaveFile(currentFile)
Case Else
' to save as plain text
Dim txtWriter As System.IO.StreamWriter
txtWriter = New System.IO.StreamWriter(currentFile)
txtWriter.Write(rtbDoc.Text)
txtWriter.Close()
txtWriter = Nothing
rtbDoc.SelectionStart = 0
rtbDoc.SelectionLength = 0
rtbDoc.Modified = False
End Select
Me.Text = "Editor: " & currentFile.ToString()
End Sub
The "Save" function first checks to see if the "currentFile" variable is empty; if it is, the content of the rich text box control has not been saved previously and the subroutine will call the "Save As" menu option to provide the user with an interface to define a file name and storage location for the current unnamed file. If the file is named (and has a current storage location), the subroutine will check the file extension and, by means of a Select Case statement, determine the appropriate method for storing the file and will then save the content to the file location. This all works very similarly to the approach used to open the file however instead of opening a file, the approach is used to call the rich text box control's Save File method if the file is a rich text file, or to instance a stream writer and write the file content out as text to the file location if the file is plain text or html.
With both the file open and file save methods used, if the file is anything other than a rich text file, the application will attempt to open or save it with a stream reader or stream writer; this will allow the application to work with any text file, not just rtf, txt, or html extension files. That would permit you to use it with custom file types or other things such as license files or error log files.
The next subroutine addresses the "Save As" menu option; its code is as follows:
Private Sub SaveAsToolStripMenuItem_Click(ByVal sender As System.Object,
ByVal e As System.EventArgs) Handles SaveAsToolStripMenuItem.Click
SaveFileDialog1.Title = "RTE - Save File"
SaveFileDialog1.DefaultExt = "rtf"
SaveFileDialog1.Filter = "Rich Text Files|*.rtf|Text Files|*.txt|HTML
Files|*.htm|All Files|*.*"
SaveFileDialog1.FilterIndex = 1
SaveFileDialog1.ShowDialog()
If SaveFileDialog1.FileName = "" Then Exit Sub
Dim strExt As String
strExt = System.IO.Path.GetExtension(SaveFileDialog1.FileName)
strExt = strExt.ToUpper()
Select Case strExt
Case ".RTF"
rtbDoc.SaveFile(SaveFileDialog1.FileName,
RichTextBoxStreamType.RichText)
Case Else
Dim txtWriter As System.IO.StreamWriter
txtWriter = New
System.IO.StreamWriter(SaveFileDialog1.FileName)
txtWriter.Write(rtbDoc.Text)
txtWriter.Close()
txtWriter = Nothing
rtbDoc.SelectionStart = 0
rtbDoc.SelectionLength = 0
End Select
currentFile = SaveFileDialog1.FileName
rtbDoc.Modified = False
Me.Text = "Editor: " & currentFile.ToString()
End Sub
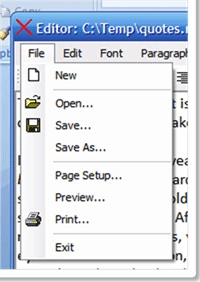
Figure 8: File Menu Options
By now this should look pretty familiar; in the code, a save as file dialog box is configured and displayed to the user. The dialog will permit the user to save the file as rtf, txt, or html. If the user saves the file as rtf, the control's save file method is used to store the contents of the file whilst preserving the rtf formatting. If the user selects another option, the file will be saved as plain text using a text writer. In either case, after the file is saved, the "currentFile" variable is updated, the application's title bar is updated, and the document's modified property is set to false.
The next item in the code is the menu's Exit call. It is used to terminate the application. Prior to closing the application, this subroutine checks to see if the current document has been modified and, if it has, it alerts the user and asks whether or not the document should be saved prior to closing it and the application. The code is as follows:
Private Sub ExitToolStripMenuItem_Click(ByVal sender As System.Object,
ByVal e As System.EventArgs) Handles ExitToolStripMenuItem.Click
If rtbDoc.Modified Then
Dim answer As Integer
answer = MessageBox.Show("The current document has not been
saved, would you like to continue without saving?", "Unsaved
Document", MessageBoxButtons.YesNo, MessageBoxIcon.Question)
If answer = Windows.Forms.DialogResult.No Then
Exit Sub
Else
Application.Exit()
End If
Else
Application.Exit()
End If
End Sub
The next menu option addressed is the edit menu's "Select All" function. Select All is a method embedded in the rich text box control and therefore it may be called directly without writing any additional code to make the select all happen; to use it, just call it as follows:
Private Sub SelectAllToolStripMenuItem_Click(ByVal sender As System.Object, ByVal e As System.EventArgs) Handles SelectAllToolStripMenuItem.Click
Try
rtbDoc.SelectAll()
Catch exc As Exception
MessageBox.Show("Unable to select all document content.", "RTE-
Select", MessageBoxButtons.OK, MessageBoxIcon.Error)
End Try
End Sub
Following the edit menu's "Select All" function, we have the cut, copy, and paste subroutines. Just as the Select All method exists within the rich text box control, so do these and so you can call them directly in a manner similar to that used in Select All, for that reason, I am not going to show them here but you can see the calls made in the example application if you'd care to take a look at them.
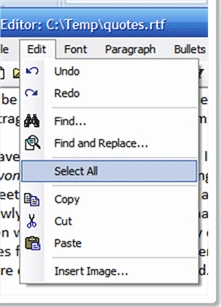
Figure 9: Edit Menu Options
Next up is the menu option used to select the current font. This code merely uses a standard font dialog box to set the rich text box control's selection font property to the font selected by the user through the font dialog. The code used to do this is as follows:
Private Sub SelectFontToolStripMenuItem_Click(ByVal sender As
System.Object, ByVal e As System.EventArgs) Handles
SelectFontToolStripMenuItem.Click
If Not rtbDoc.SelectionFont Is Nothing Then
FontDialog1.Font = rtbDoc.SelectionFont
Else
FontDialog1.Font = Nothing
End If
FontDialog1.ShowApply = True
If FontDialog1.ShowDialog() = Windows.Forms.DialogResult.OK Then
rtbDoc.SelectionFont = FontDialog1.Font
End If
End Sub
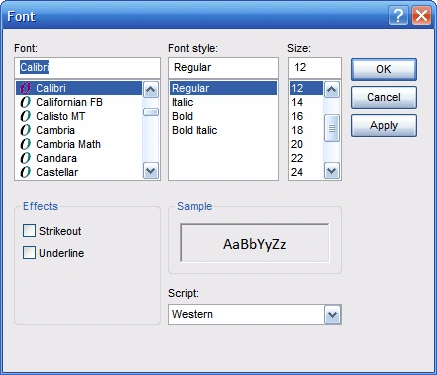
Figure 10: Font Dialog in Use
manoj hirekarPosted Jan 26, 2022, 1:07 PM
One think is option for spelling checker
johncho kathaPosted Dec 12, 2015, 6:37 AM
thanks.
huong tranPosted Oct 23, 2013, 12:06 AM
thanks very much
ToniPosted Dec 26, 2012, 1:15 PM
Thank you! I used this information for adding full rtf on my project. Without your help I was unable to show rtf files on the screen with colors and different font sizes etc.