

Introduction to Azure Storage Service
Azure Storage is Microsoft's modern storage solution. If you compare the previous storage techniques with Azure Storage Services, you will find a lot of differences in security, availability, and accessibility.
Here, we will discuss all these Azure Storage benefits and will work on Blob Storage service.
Here, we will discuss all these Azure Storage benefits and will work on Blob Storage service.
- Durable and Highly Available
Your data in Azure service is distributed over geographical data center and will be available to the users in case of any system, software or hardware Failure. This redundancy ensures that the data is safe and can be accessible even in case of disaster. - Secure
All the data written to the Azure Storage is encrypted by services. - Highly Scalable
You can scale up horizontally or vertically as per your requirement. - Accessible
Data in Azure storage can be accessible from everywhere in the world using HTTP or HTTPS protocol. Microsoft provides SDKs for Azure Storage in various languages.
- BLOB
- Table
- Queues
- File storage
- Blob storage is mainly for storing a massive amount of unstructured data such as text or binary data.
- Blob storage is ideally for Images, audio, video, etc.
- Its also used for stream Audio and Video.
- You can also store backup files.
- Objects in the blob can be accessed from anywhere in the world using HTTP or HTTPS protocol.
- Blob data is stored in a container, so we can use a large number of containers for storing a large number of the blob data. A container provides the security from the outer world to protect our data.
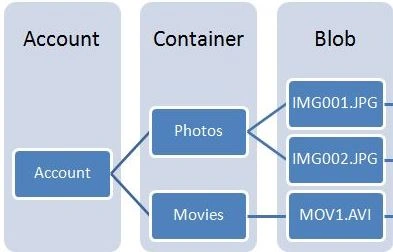
Now, let's start working with a Azure Blob storage. To start working with Blob, we need to create a storage account like this, - First, go to your Azure Portal and log in with your credentials.
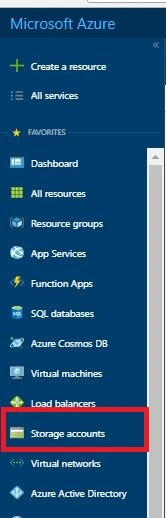
- Search for Storage Account in the portal.Now, create a storage account as shown below.
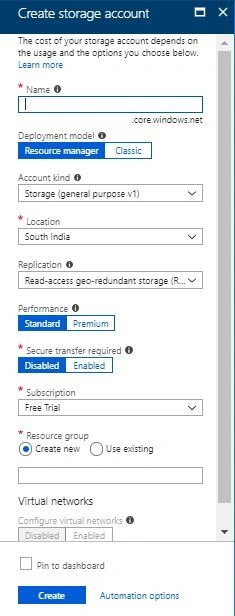
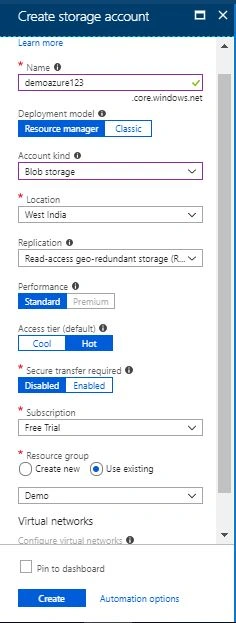
Here, to create the account, we need the following details. - Name
The name should be unique and always in small letters. - DeploymentModel
For resources model always choose Resource Manager (for new applications). - Account Kind
- General Purpose V1(GPV1)
GPV1 account provides access to all Azure storage services but may not have the latest features.
Ex
Cool storage is not supported in GPV1. - General Purpose V2(GPV2)
It supports all the latest features of BLOB, FILE, QUEUE and Tables, it supports all APIs supported in GPV1.I and it supports hot and cool accounts. - BLOB
It supports all block blob features as does GPV2. - Replication
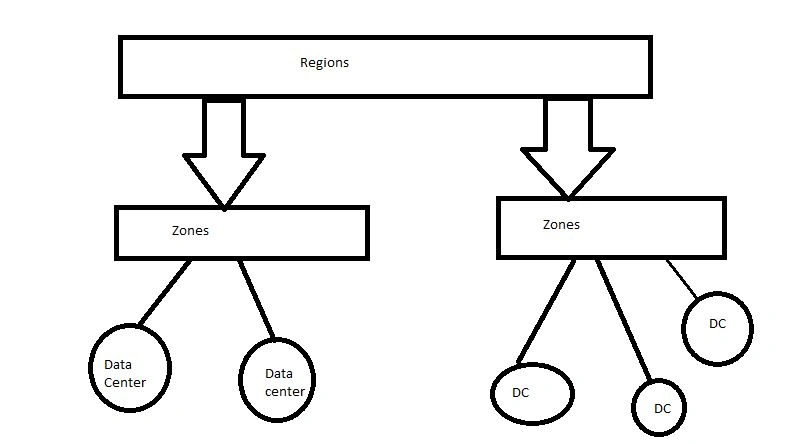
We have LRS\ZRS\GRS - The hierarchy will be like this.
- LOCAL REDUNDANT STORAGE(LRS)
- Replicated 3 times within a single data center in a single region where storage account is created.
- It protects your data from server hardware failure.
- This is only available in a premium storage account.
- ZONE REDUNDANT STORAGE(ZRS)
- Replicate 3 copies of your data across 2-3 across 2-3 Zones.
- ZRS is added in Azure after 2014.
- GEO-REDUNDENT STORGE(GRS)
- GRS maintain 6 copies of your data and the data is replicated over zones.
- Hot: Hot storage has higher storage costs than cool storage, but the lowest access costs.
- Cool:Cool storage tier has lower storage costs and higher access costs compared to hot storage.
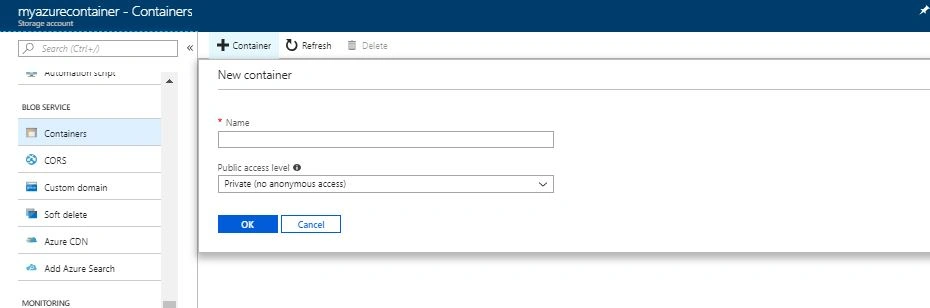
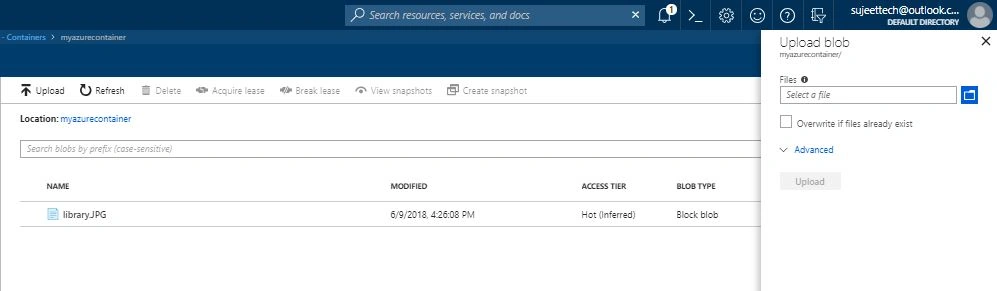
Once the container is ready, you can upload your files as blob.
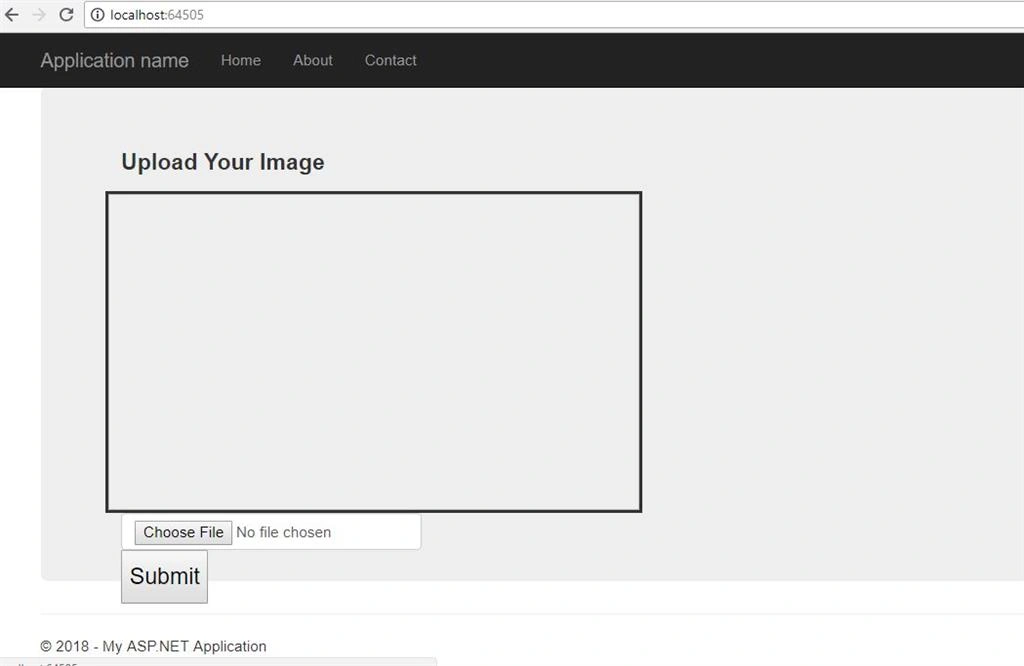
Now let's create an MVC application and save image files to Blob.
Here is my MVC view,
- @{
- ViewBag.Title = "Home Page";
- }
- <script src="~/Scripts/jquery-1.10.2.min.js"></script>
- <script type="text/javascript">
- function show(input) {
- if (input.files && input.files[0]) {
- var filerdr = new FileReader();
- filerdr.onload = function (e) {
- $('#user_img').attr('src', e.target.result);
- }
- filerdr.readAsDataURL(input.files[0]);
- }
- }
- </script>
- <div class="jumbotron">
- @using (Html.BeginForm("Index", "Home", FormMethod.Post, new
- {
- enctype = "multipart/form-data"
- }))
- {
- <div class="form-group">
- <div class="col-md-10">
- <label>Upload Your Image</label>
- </div>
- <br />
- <img id = "user_img" height = "300" width = "500" style = "border:solid" / >
- <br />
- <div class="col-md-10">
- <input type="file" name="image" accept="image/*" class="form-control fileupload" onchange="show(this)" />
- </div>
- <div class="col-md-10">
- <input type="submit" title="save" />
- </div>
- </div>
- <div>
- </div>
- }
- </div>
Now go to the portal container and copy the connection string and paste in web.config as follow.

Now copy the connection string and paste in the Web.config as follow.
- <connectionStrings>
- <add name="StorageConnectionString" connectionString="DefaultEndpointsProtocol=https;AccountName=myazurecontainer;AccountKey=cc1tX3yX9KrlyflrsZDzd4OGSrELk7D+aJP6ntaJokUPD6v1xAIw==;EndpointSuffix=core.windows.net" />
- </connectionStrings>
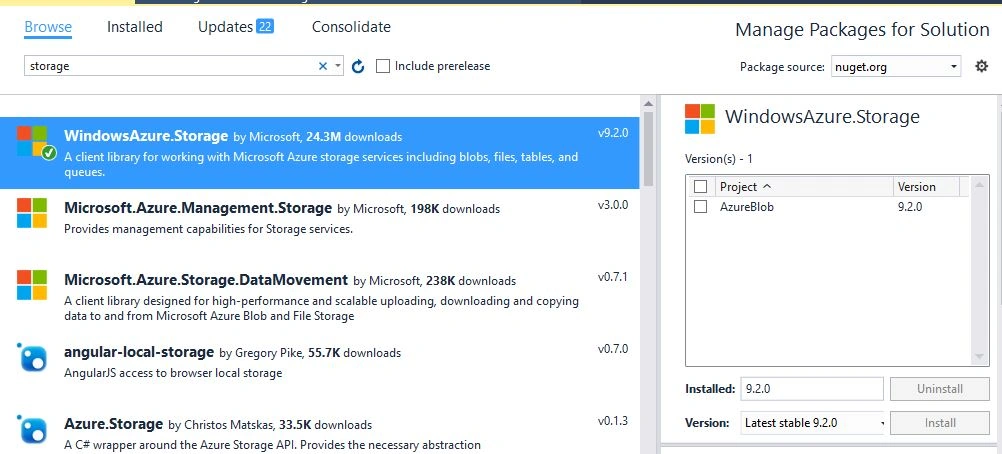
Now here is the code in controller to save the file in Blob.The below code will read the connection string from config file.
- CloudStorageAccount storageAccount = CloudStorageAccount.Parse(ConfigurationManager.ConnectionStrings["StorageConnectionString"].ToString());
- [HttpPost]
- public ActionResult Index(HttpPostedFileBase image)
- {
- if (image.ContentLength>0)
- {
- CloudBlobClient client = storageAccount.CreateCloudBlobClient();
- CloudBlobContainer container = client.GetContainerReference("myazurecontainer");
- //container.CreateIfNotExists();
- container.SetPermissions(new BlobContainerPermissions
- {
- PublicAccess = BlobContainerPublicAccessType.Blob
- });
- //upload image to blob
- CloudBlockBlob blob = container.GetBlockBlobReference(image.FileName);
- blob.UploadFromStream(image.InputStream);
- }
- return View();
- }
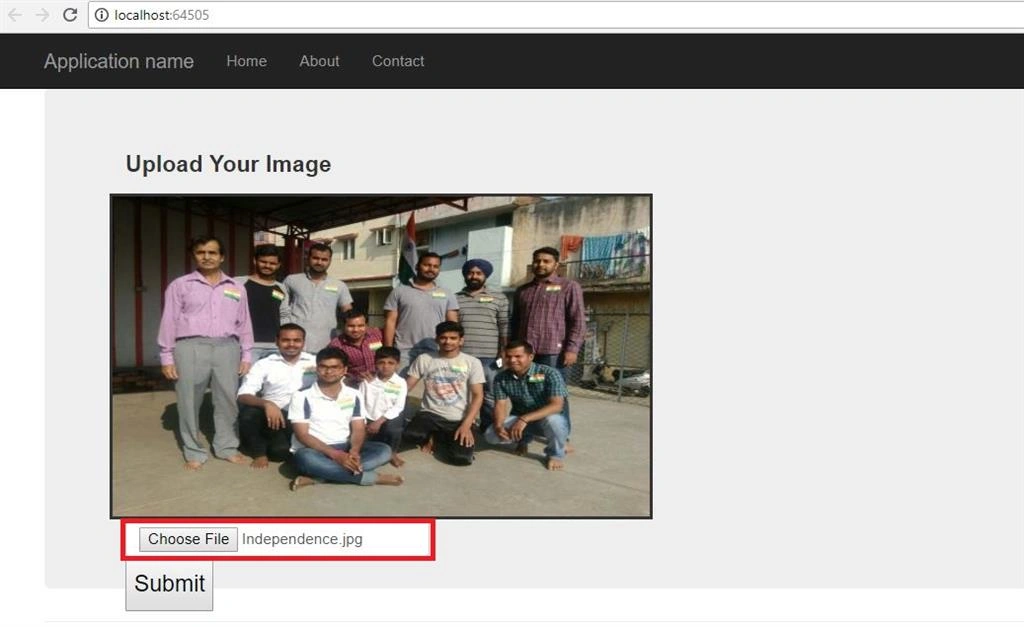
Now click submit to save the file in Azure Blob.You can find the file in blob as shown below.
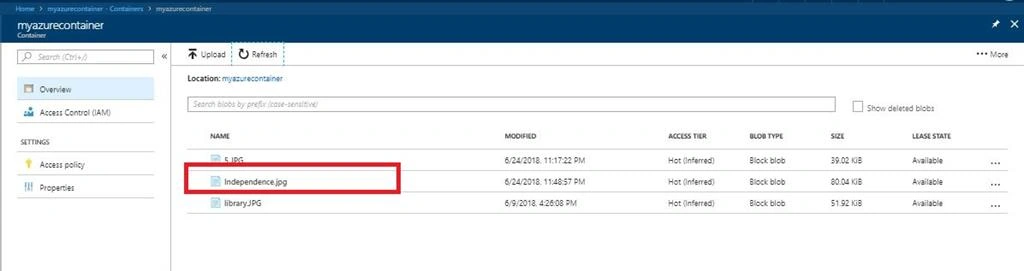
So in this way we can upload files in Azure Blob storage.
Join the conversation! Your thoughts help the community grow.