
Step 1: Here we continue the previous article in which we add and show the data in the ListBox like this: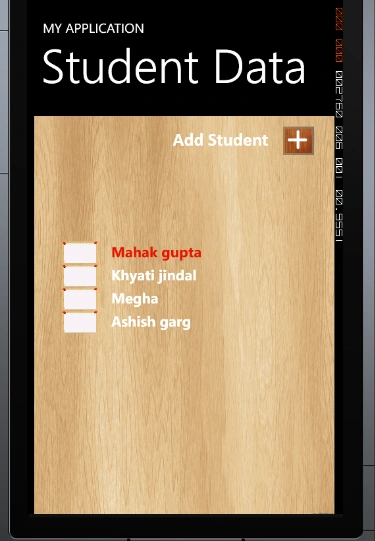
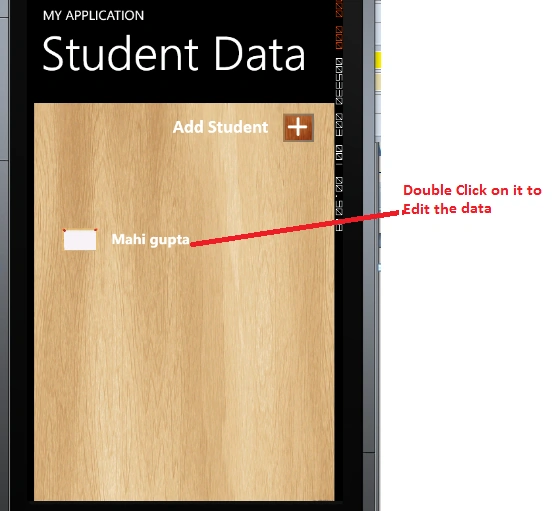
Step2: First we write the code to edit the Student Data. To do that we can use the DoubleTap Event of the ListBox (lstStudentName). So when we double-click on the Student Name of the ListBox the following code will be executed:
private void lstStudentname_DoubleTap(object sender, GestureEventArgs e)
{
NavigationService.Navigate(new Uri(string.Format("/StudentDetails.xaml?parameter={0}&action={1}", a.ToString(), "Edit"), UriKind.Relative));
}
Here we send the QueryString in which we send the student name and another value to edit. To fetch the Student Name from the ListBox we will write the following code:
var listBoxItem = lstStudentname.ItemContainerGenerator.ContainerFromIndex(lstStudentname.SelectedIndex) as ListBoxItem;
var txtBlk = FindVisualChildByType<TextBlock>(listBoxItem, "txtBlkExtra");
a = txtBlk.Text;
After that:
T FindVisualChildByType<T>(DependencyObject element, String name) where T : class
{
if (element is T && (element as FrameworkElement).Name == name)
return element as T;
int childcount = VisualTreeHelper.GetChildrenCount(element);
for (int i = 0; i < childcount; i++)
{
T childElement = FindVisualChildByType<T>(VisualTreeHelper.GetChild(element, i), name);
if (childElement != null)
return childElement;
}
return null;
}
Step 3: After that we write the following code in the StudenDetails.cs Page, to fetch the QueryString data:
private const string strConnectionString = @"isostore:/StudentDB.sdf";
public string parameterValue;
public string Action;
public string id;
public StudentDetails()
{
InitializeComponent();
using (StudentdataContext context = new StudentdataContext(strConnectionString))
{
if (!context.DatabaseExists())
{
context.CreateDatabase();
}
}
}
protected override void OnNavigatedTo(System.Windows.Navigation.NavigationEventArgs e)
{
base.OnNavigatedTo(e);
parameterValue = NavigationContext.QueryString["parameter"];
Action = NavigationContext.QueryString["action"];
using (StudentdataContext StudentDB = new StudentdataContext(strConnectionString))
{
var a = from b in StudentDB.GetTable<StudentInfo>() where b.Extra == parameterValue.ToString() select b;
foreach (var x in a)
{
txtfname.Text = x.FirstName;
txtlastName.Text = x.LastName;
txtMobile.Text = x.Mobile;
txtTelephone.Text = x.Telephone;
txtEmail.Text = x.Email;
}
if (Action == "EditData")
{
btnAdd.Content = "Edit";
}
if (Action == "Edit")
{
btnAdd.Content = "Edit Data";
}
}
}
Here we use the OnNavigatedTo Event to fetch the QueryString Data.
Step 4: Now we will write the following code in the Add Button. When we double-click on the listBox it will act as in the Edit Button:
private void btnAdd_Click(object sender, RoutedEventArgs e)
{
using ( StudentdataContext StudentDB = new StudentdataContext(strConnectionString))
{
if (Action == "Edit" || Action == "EditData")
{
var Student = (from i in StudentDB.GetTable<StudentInfo>()
where i.Extra == parameterValue.ToString()
select i).Single();
Student.FirstName = txtfname.Text.ToString();
Student.LastName = txtlastName.Text.ToString();
Student.Extra = txtfname.Text.ToString() + " " + txtlastName.Text.ToString();
Student.Mobile = txtMobile.Text.ToString();
Student.Telephone = txtTelephone.Text.ToString();
Student.Email = txtEmail.Text.ToString();
StudentDB.SubmitChanges();
}
else
{
StudentInfo newStudent = new StudentInfo
{
Extra = txtfname.Text.ToString() + " " + txtlastName.Text.ToString(),
FirstName = txtfname.Text.ToString(),
LastName = txtlastName.Text.ToString(),
Mobile = txtMobile.Text.ToString(),
Telephone = txtTelephone.Text.ToString(),
Email = txtEmail.Text.ToString()
};
var a = from b in StudentDB.GetTable<StudentInfo>() select b;
foreach (var x in a)
{
if (x.Extra == txtfname.Text.ToString() + " " + txtlastName.Text.ToString())
{
MessageBox.Show("This Name is already Exists");
txtfname.Text = "";
txtlastName.Text = "";
txtMobile.Text = "";
txtTelephone.Text = "";
txtEmail.Text = "";
id = x.Id;
}
}
if (txtfname.Text != "")
{
StudentDB.Students.InsertOnSubmit(newStudent);
StudentDB.SubmitChanges();
MessageBox.Show("Add the Student");
}
}
txtfname.Text = "";
txtlastName.Text = "";
txtMobile.Text = "";
txtTelephone.Text = "";
txtEmail.Text = "";
}
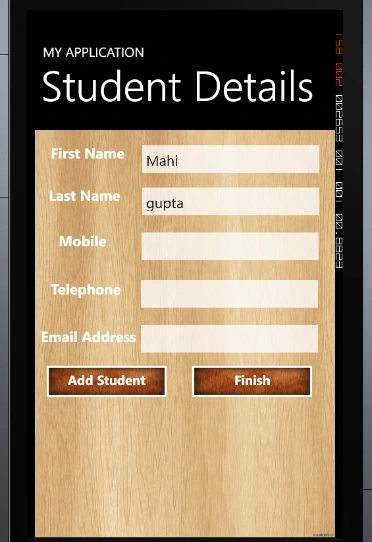
Now we add the Student:
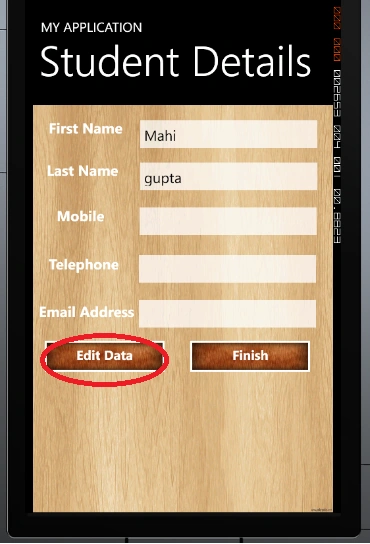

Working With ListBox In Windows Phone (Edit Data In the ListBox) : Part 2
Join the conversation! Your thoughts help the community grow.
Sign in to leave a comment
It is the same account you read, post and publish with — and you will come straight back to this page.
revathi soundarPosted Jul 18, 2014, 8:28 AM
Nice Article. Really helped a lot. Thank you so much.
praveen mariappaneditedPosted May 7, 2013, 8:25 AMEdited May 7, 2013, 8:28 AM
thank you so much for giving this great tutorial. I was took the appliation did some modification. When using the wp7 toolkit call option is not getting enabled. Im not able to solve the pblm. can you please help me to find a solution for it. I have made a post in the forum regarding this issue. Thanks in advance. Link to my post : http://www.c-sharpcorner.com/Forums/Thread/209124/getting-error-when-using-calling-option-with-wp7-toolkit.aspx
Ibrahim ErsoyPosted Apr 14, 2013, 11:26 AM
Thank you so much for the article.Helped me with Listbox Datatemplates.