

Introduction
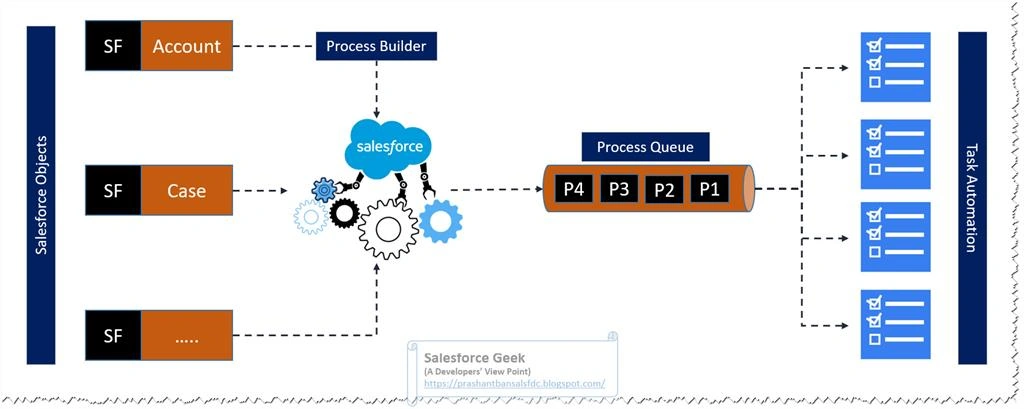
Process Builder is a point and click automation tool available with the Salesforce Platform. Salesforce documentation covers all the details and I recommend that you go through the details by using the following URL before continuing with this demo.
In this demo, we will explore the Process Builder tool by developing a process targeting a specific business problem. It is more focused on understanding and implementation of Process Type, Trigger, Criteria, and Actions involved as a part of the solution to this problem.
Problem Statement
Here is a simple but effective problem statement to solve using Process Automation.
Whenever a new Account is introduced, create a follow-up to the task and assign it to the Account Owner. If the Annual Revenue for an Account is greater than or equal to $100K and if the Account Type is equal to “Technology Partner”.
Analysis of the Problem Statement
In the real-world as developers, we should always look into the problem statement carefully to identify the best approach to solve it, so adopt this as a thumb rule.
Salesforce offers many tools & approaches to solve the same set of problems and it is our responsibility to take the best possible approach based on the problem statement.
So let’s try to break down the problem statement and map it with Process Builder Implementation.
From the problem statement we have:
- Trigger - New Account Record added
- Criteria - (Annual Revenue >= $100K) And (Account Type = “Technology Partner”)
- Action - Create Task and assign to Account Owner
Once we have a clear understanding of the Problem Statement, we can start developing the process automation and map this required with it.
Launch the Org and search for “Process Builder” in Setup Navigation, on the left as shown below:
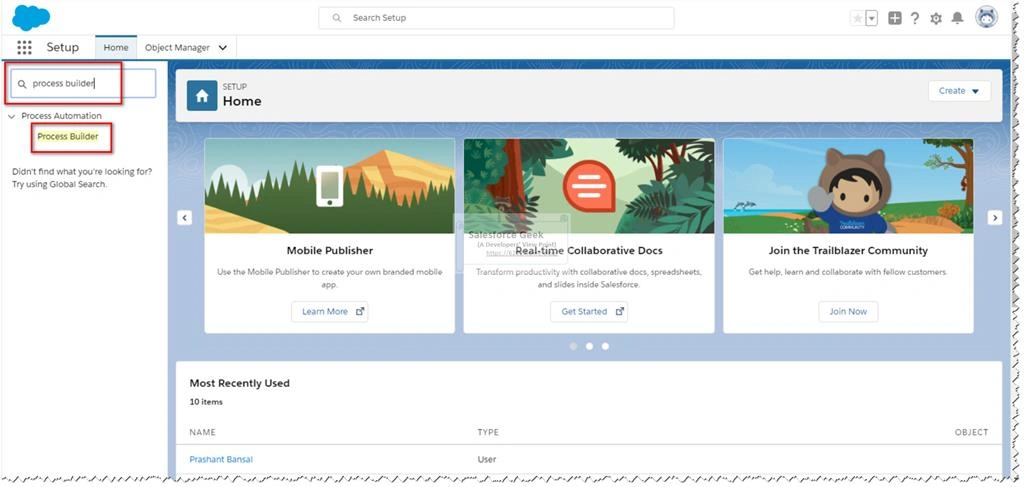
This will launch the “View All Processes” screen where we can view the list of all the process created earlier.
Click on the “New” button
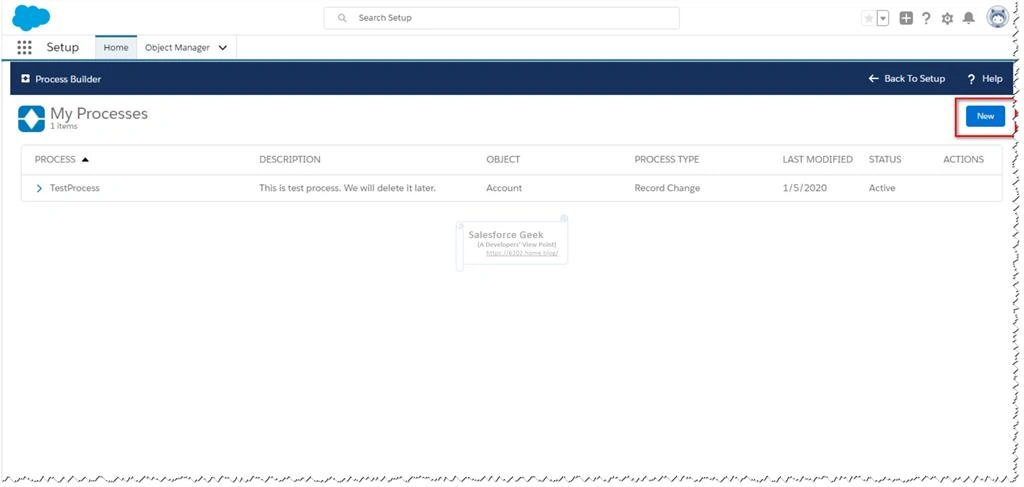
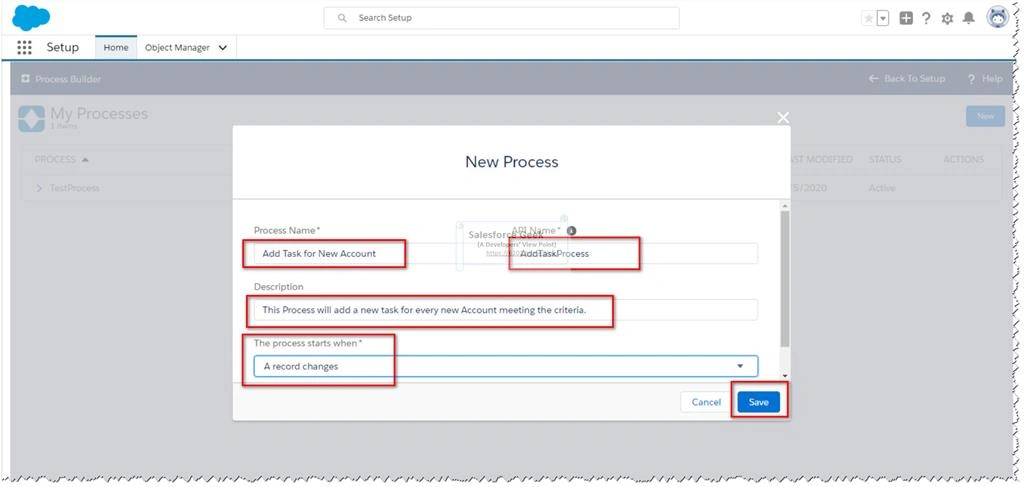
This will launch the New Process Configuration dialog box.
Specify the details “Name, API Name, Description and Process Type” for the new process, here it is worth to pay attention to the Process Type drop-down.
In this drop-down, we have three options that will decide on how this process will be initiated.
- Record Change
This allows the process to execute when any record level changes made (Insert or Update for the record)
- Invocable
This allows the process to execute when it is invoked by any other process, this type is helpful for processes participating in Process Chaining (when one process is calling another process)
- Platform Event
This is a special implementation that allows a process to execute when a platform event occurs. Platform events are those events that are not generated based on database changes but generated by external devices associated with the platform.
For example - a printer may publish a day end notification for Salesforce say to notify about the low paper quantity in the tray. This notification may include the details about a printer (Serial Number, Port Number, Physical Location, and so on). We can develop process automation that will be triggered based on this event and create a task for admin to replenish the paper in the printer tray.
Once you have specified the details click “Save” to save the changes.
As soon as the process information is saved we should be able to see the Process Builder Design Canvas where we can start the design process.
This canvas contains the following moving parts:
- Action Toolbar
The action toolbar will help to manage the canvas by providing quick access to multiple features like “Edit Properties” that can be used to edit the properties of the Process.
- Start
Represents the start of the process
- Add Object
Represents the trigger for the process, allows you to choose for the trigger target object (Salesforce Objects) & trigger event (Record Added, Record Modified or Both)
- Decision Box
Represents the criteria to meet for the process to execute
- Actions Box
Represents the list of actions to be taken if criteria meet. Actions could be “Adding a Task”, “Send Email Notifications”, “Updating Fields” and so on.
- Scheduled Actions Box
Represents the action that we would like to perform at a specific interval of time (Date, Day, Hour). For example, you could perform an action based after (process trigger date + certain number of days)
- Stop
Represents the termination of the process
Enough of the theory, it is time to see some action.
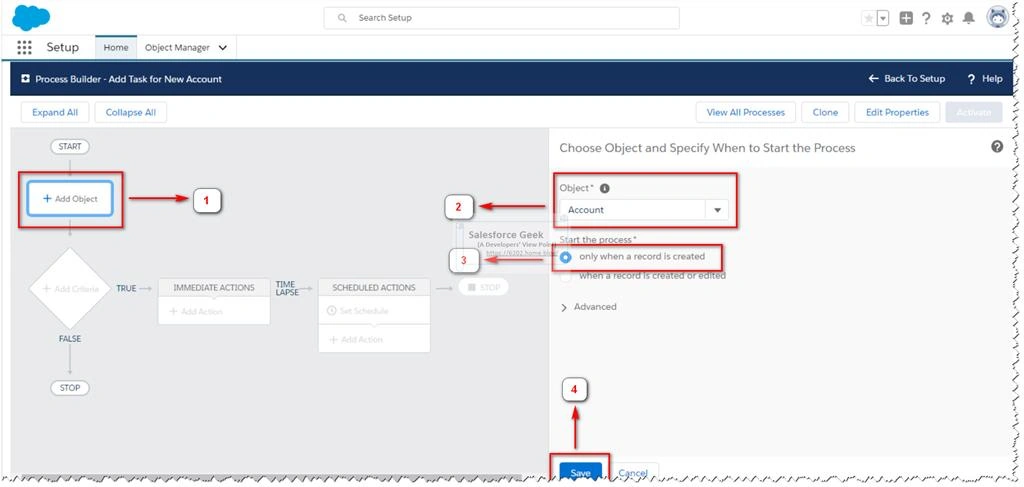
To add the trigger for the Process click on “Add Object”
Click "Add Object"
- Select the trigger target as any desired Object from Object Dropdown, I choose the Account Object based on the problem statement
- Select the trigger condition as when do you like to initiate the process. I choose “only when a record is created” based on the problem statement
- Click “Save” to persist the changes
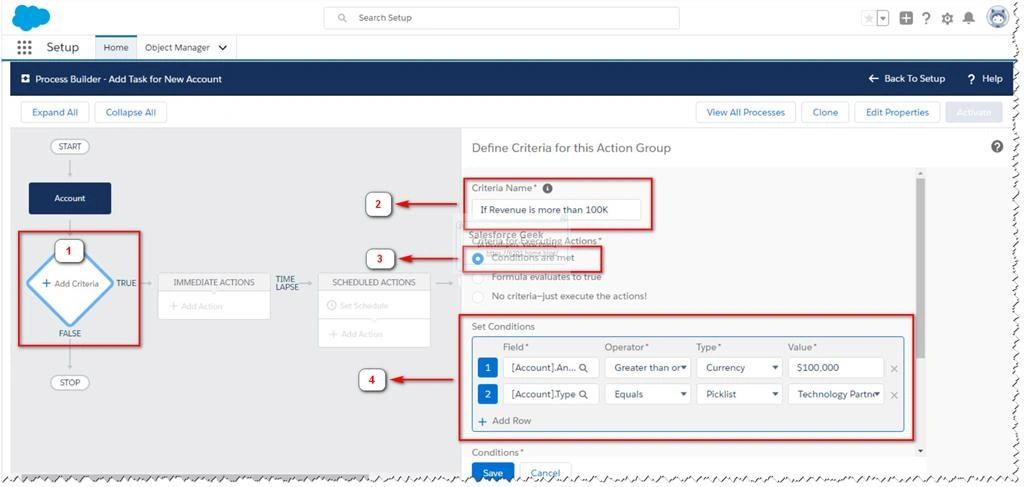
To add the criteria click on “Add Criteria”
- Click "Add Criteria"
- Enter the name of the criteria to uniquely identifies the criteria by its function
- Select applicable conditions to execute actions
- Configure the condition based on your problem statement:
-
- Account.Annual Revenue >= 100K
- Account.Type == “Technology Partner”
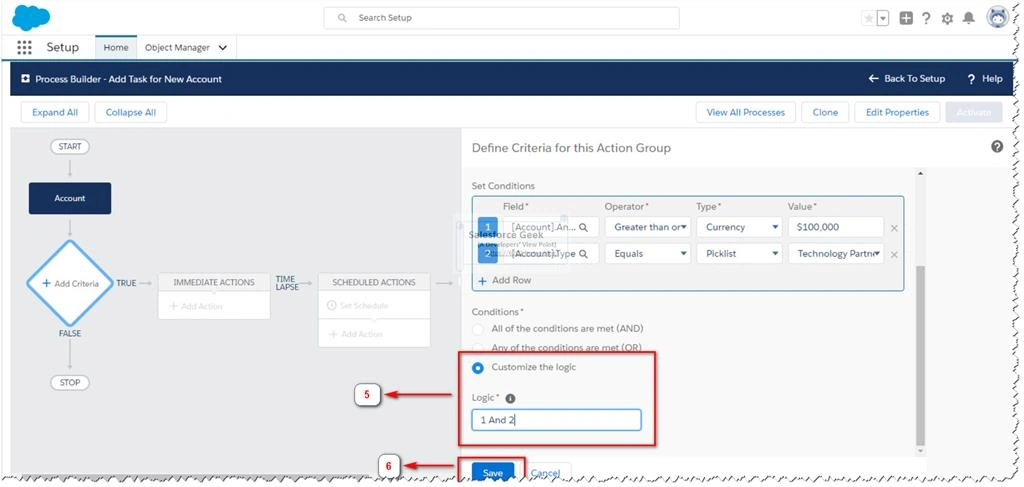
Evaluate the conditional logic to merge the conditions using logical operators. It follows the format: Condition 1 <logical operator> Condition 2
“Customize my logic” is my preferred option since it gives me maximum flexibility to place conditions more logically in whatever way best suited the requirement.
Here I have mentioned “1 And 2”, which mean both conditions 1 & 2 must be evaluated to True to success these criteria
Click “Save” to save the changes.
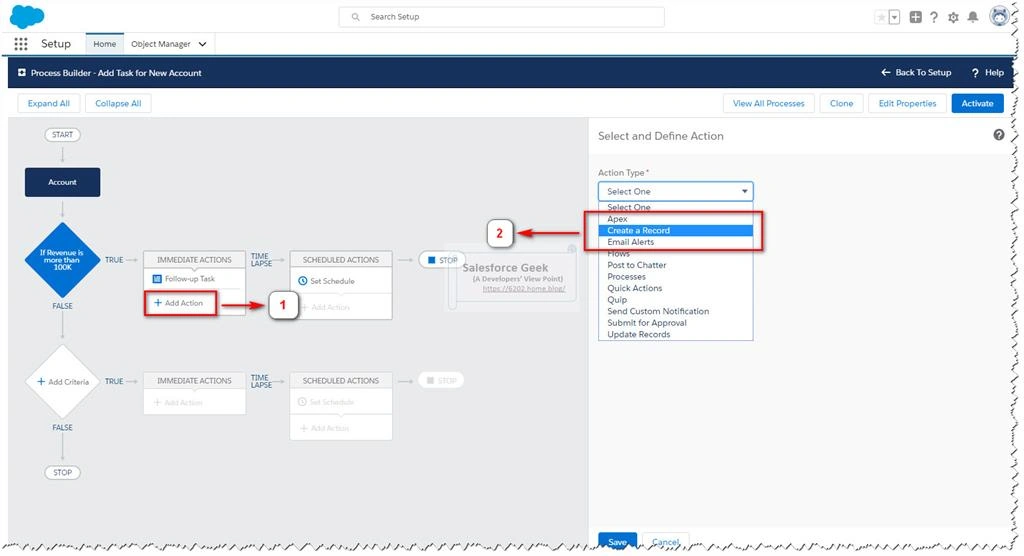
To add the actions click on “Add Actions”
- Click "Add Action"
- As per the business requirements, we need to add a task, so I am selecting “Create a Record” as the Action Type.
- Specify the name to uniquely identifies the action, lets’ call it “Follow-up Task”
- Since we are expecting to create a task so we need to select the sObject accordingly. In our case, we will choose “Task” as Record Type
- Select all the required fields to add the task. It is worth taking note of how we specified the Field Type.
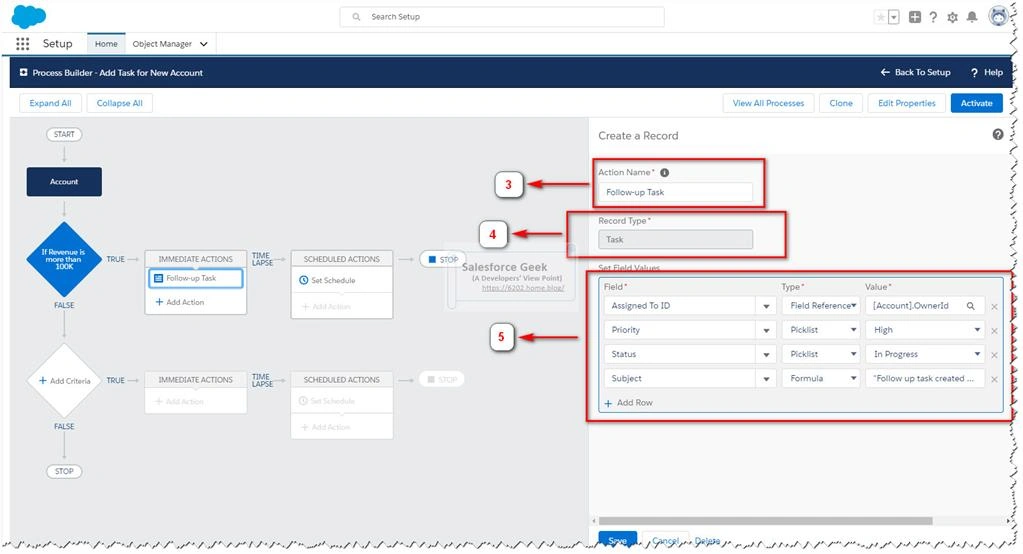
Assigned to ID
We have set it to the reference of the Owner ID Field in the Account object.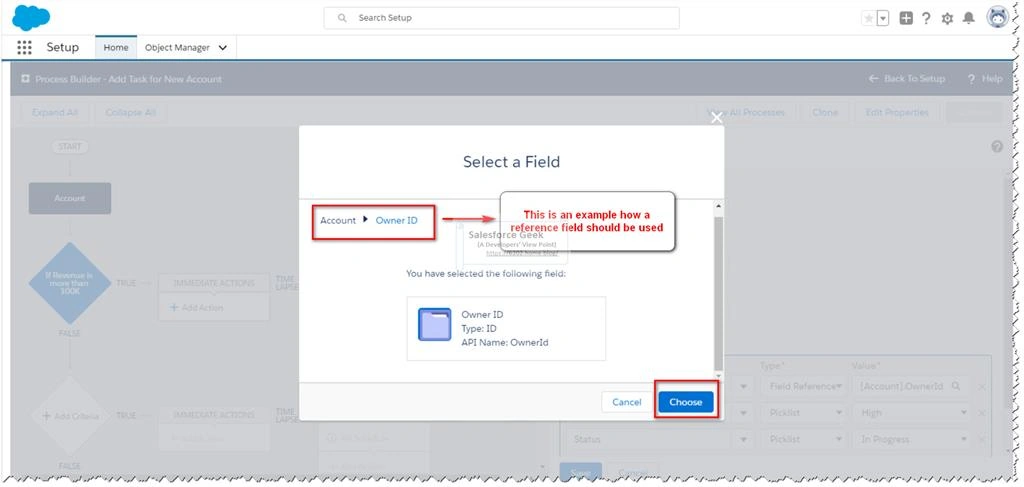
Priority & Status
We have set it to the respective Pick Lists for each of them
Subject
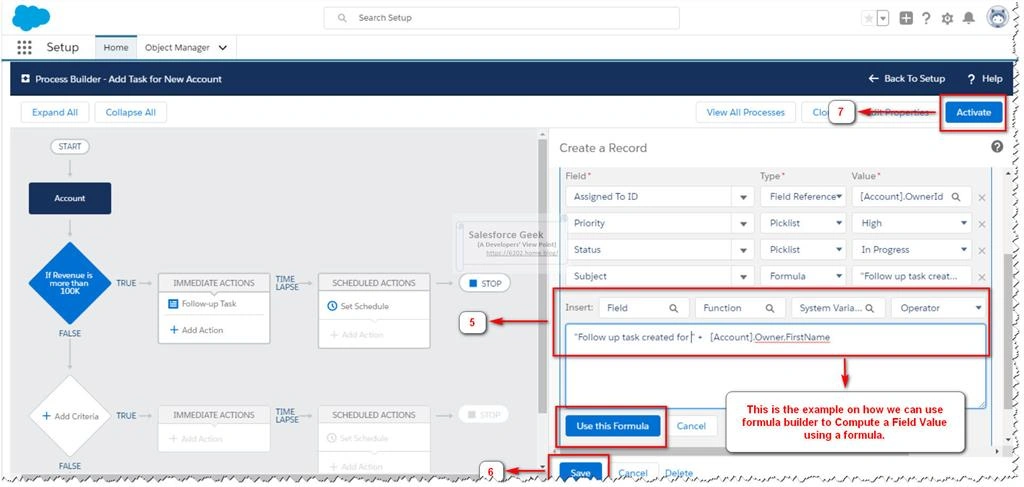
We have the ability to construct the field values using Formula, it is a really powerful feature that allows us to compute field values dynamically. Here, is it important to mention that you should pay attention to how we define the formula as closely as possible, as formulas are necessary elements for declarative programming tools & technologies.
Once you are done with defining the necessary formula, don’t forget to click on the “Use this Formula” button to apply the formula as the basis of the computed field value. - Click “Save” to save the changes.
We are not planning to demonstrate the Scheduled Actions in this demo, moreover, it is not required as per the problem statement. But I will cover this topic with more details and a demo in one of my future articles.
With this, we are all set to go for activation of this Process.
To activate the Process click the “Activate” button as shown in "Step 7" in the top toolbar, as shown below. This action will prompt a confirmation box confirming if you really wish to activate this version of the Process.
Click “Confirm” to activate this Process.
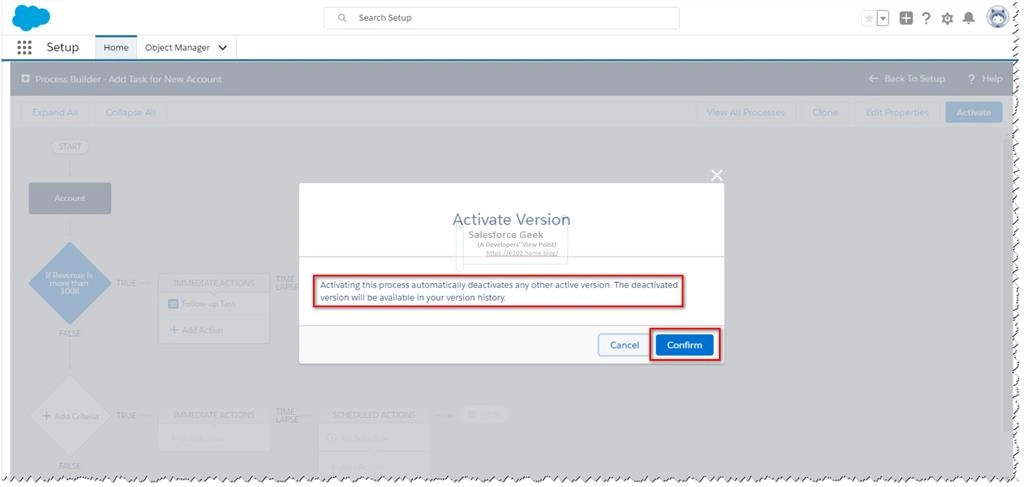
It is important to note here that Salesforce can maintain multiple versions of the same Process at the same time, but only one version will remain active.
We can deactivate the active version anytime (as shown below) and can activate any other version as required.
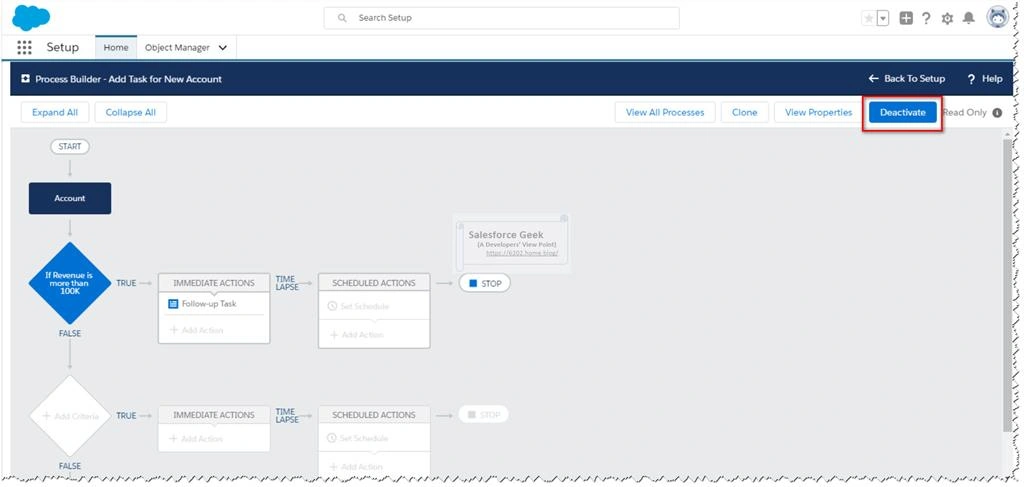
It is really a good approach from a development standpoint, this gives us the flexibility to test a Process with different logic if required while maintaining all the versions for references as shown below. In the screenshot below, we can see that this Process has Version-3.
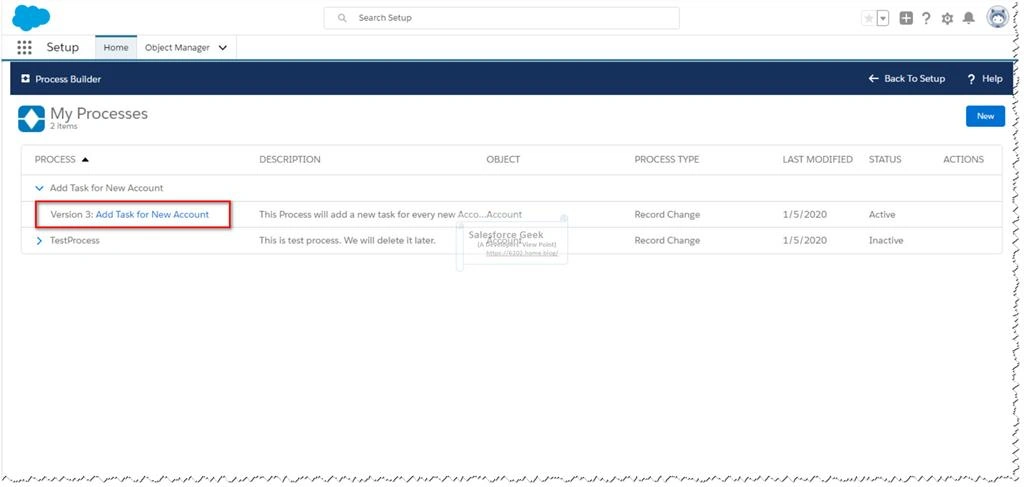
Since we have already activated the latest version of the process, it now the time to test it.
Here is the test plan to validate the working of this process:
Positive Test
I am demonstrating a positive test in this demo that will satisfy the criteria of the Process and let it creates the task as expected.
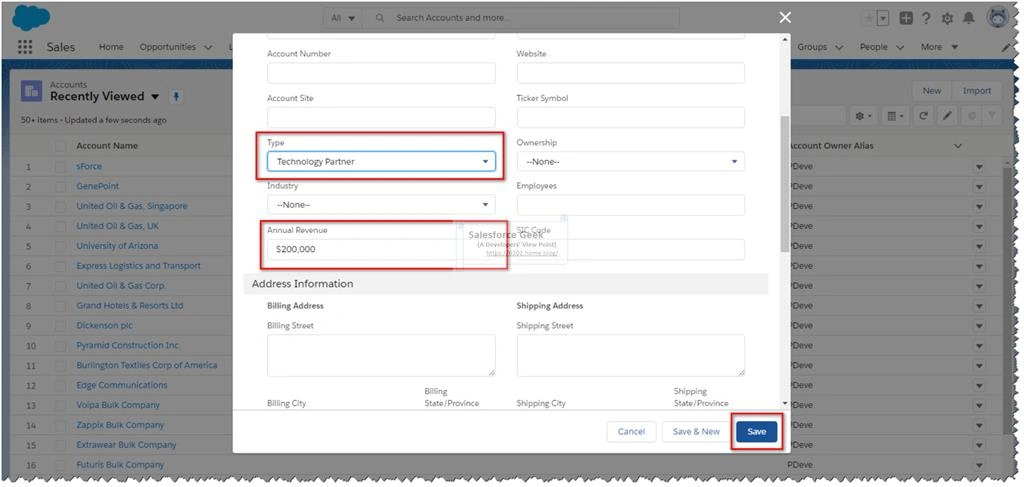
- Launch Account Object list view
- Click on “New” button on the toolbar to add a new Account
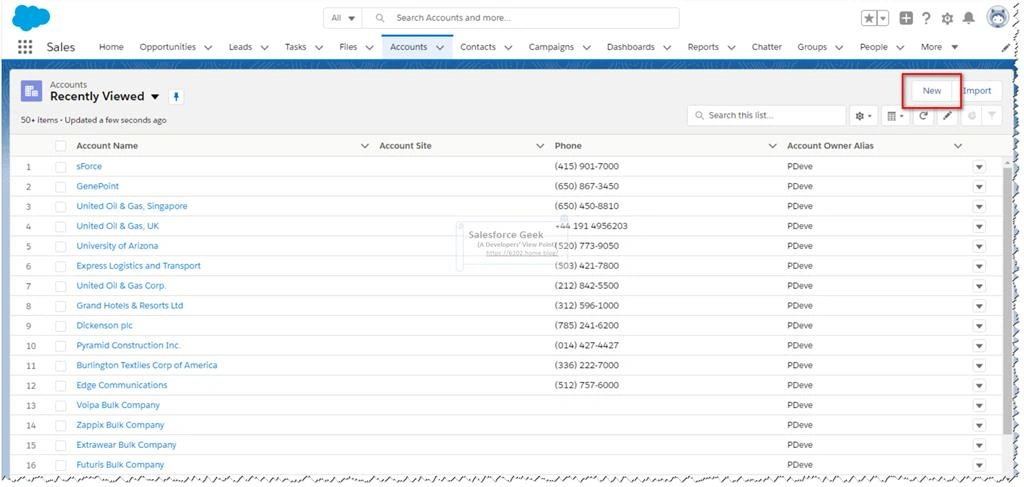
- Fill out the following details:
a. Account Name: Specify a suitable account name, I have specified “NewAccount01”
b. Type: Select “Technology Partner” from the dropdown list (Since it a positive test, we need to meet the criteria)
c. Annual Revenue: $200,000
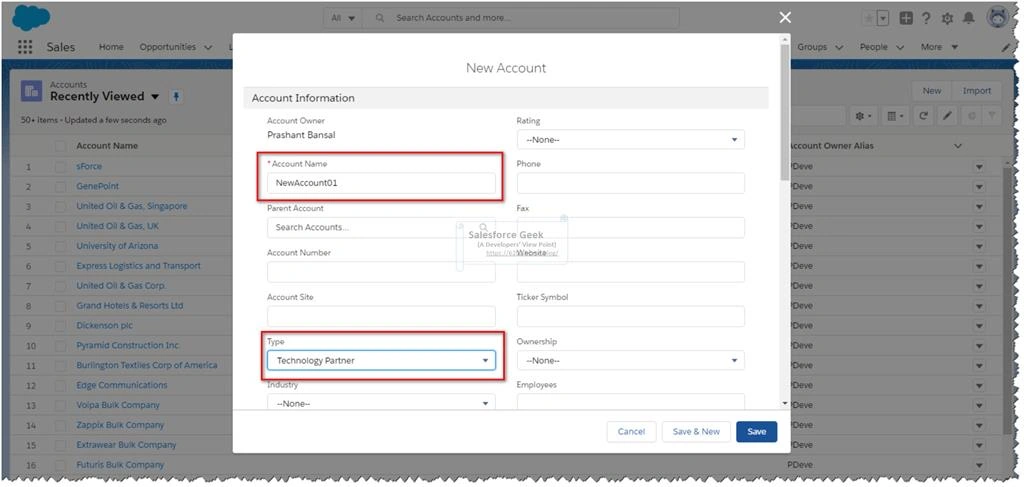
- Click “Save” to add the account.
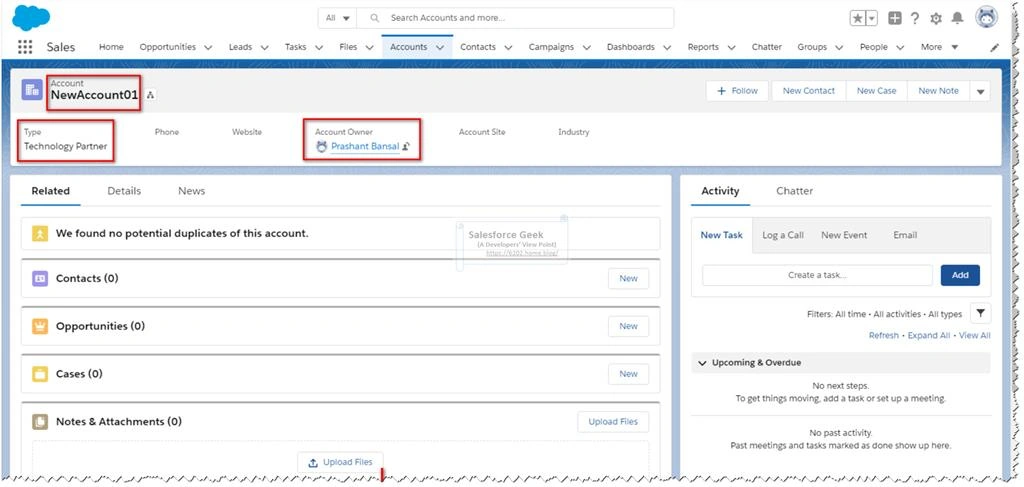
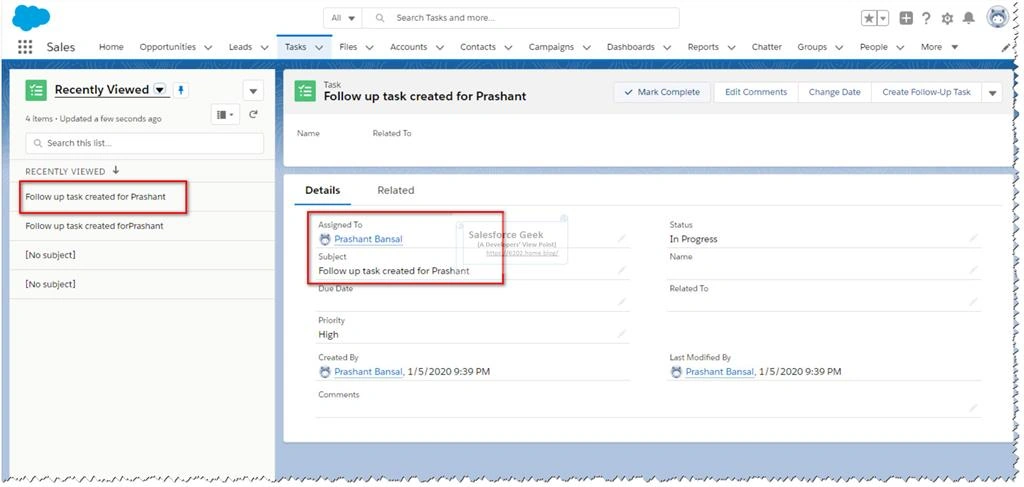
- Once the account is created successfully, we need to launch the “Task” Object list view.
- Look for the recently added tasks that match the subject line, as per the formula we used to compute the value.
- It is worth taking note of how Subject text is computed using the formula.
Negative Test
I would love to leave it for you as an exercise, and if you follow along with this article, it will not be difficult for you anymore.
I hope you enjoyed this article. Please leave your comments to let me know how you liked the content, and how you find it helpful to learn.
Contunue with part 2
Join the conversation! Your thoughts help the community grow.