

In this article we will create two site collection level retention policies and associate these polices with two site collection content types. Then review various ways to view retention policies that affect an item or list.
- Open your site. Hopefully we have a document library with enough documents.
- Click Safety Reports in the Quick Launch control located in the left-hand column.
Create Retention Policies
- Open Site Settings by clicking on Site Actions | Site Settings.
- Click the Site collection policies link located in the Site Collection Administration section.
- Click the Add link.

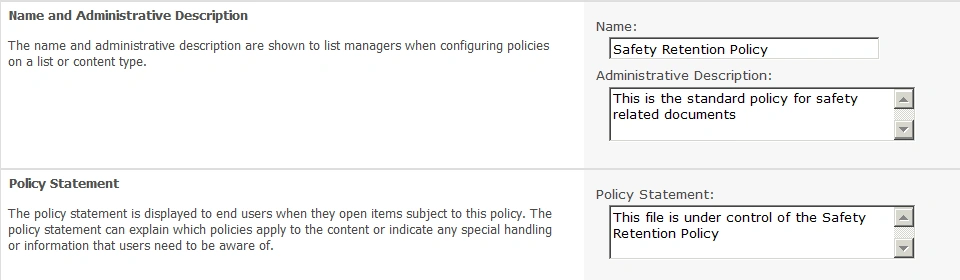
- Enter the Name, Administrative Description, and Policy Statement shown in Figure 2.
- Select Enable Retention.
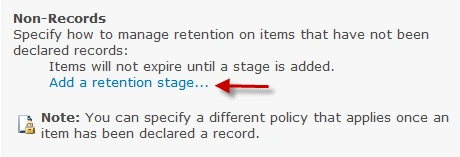
- Click the Add a retention stage... link located in the Non-Records section. See Figure 3.
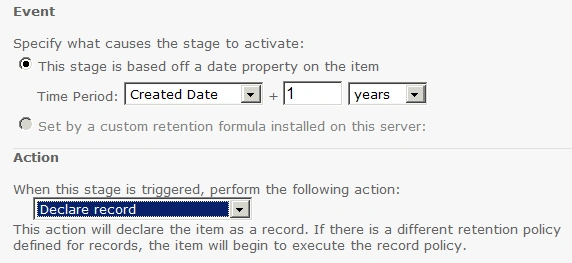
- Set the Time Period to Created Date + 1years in the Event section.
- Set the action to Declare a record. See Figure 4.
- Click OK to save the retention stage.
- Scroll to the bottom of the page and click OK to save the policy.
- Click the Add link.

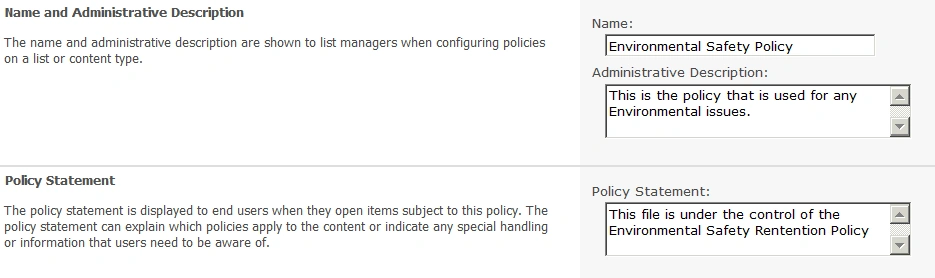
- Enter the Name, Administrative Description, and Policy Statement shown in Figure 6.
- Select Enable Retention.
- Click the Add a retention stage... link located in the Non-Records section.
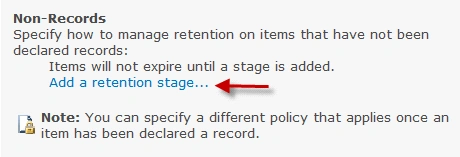
- Set the Time Period to Created Date + 1 year in the Event section.
- Set the action to Declare a record. See Figure 8.
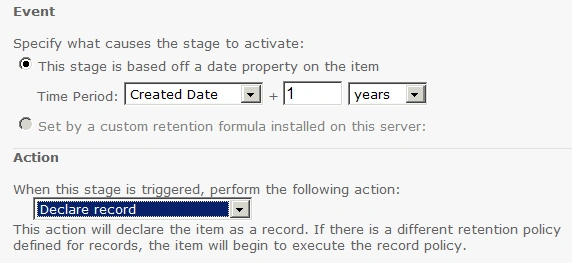
- Click the OK button to save the retention stage.
- Select the "Define different retention stages for records" option and then click the Add a retention stage... link located in the Records section.
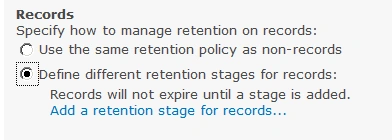
- Set the Time Period to Declared Record+7 years in the Event section.
- Select Permanently Delete as the Action.
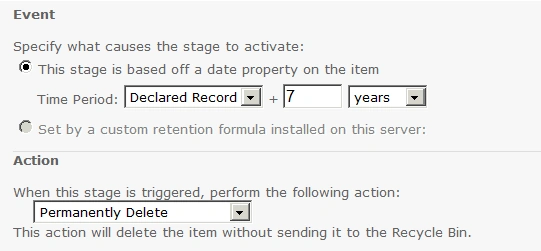
- Click OK to save the retention stage.
- Scroll to the bottom of the page and click the OK button to save the policy.


Join the conversation! Your thoughts help the community grow.