

Prerequisites-
- Visual Studio 2015
Now, let's get started with the steps, given below-
Step 1 - Create Windows Universal Project
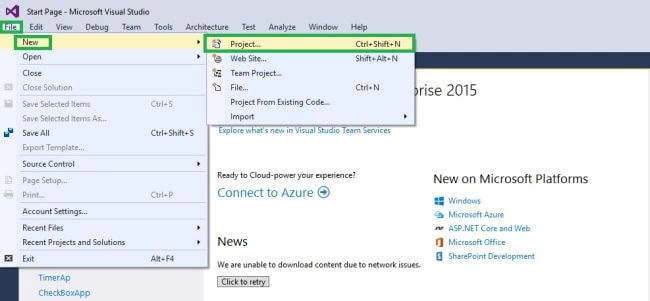
Open Visual Studio 2015 and click File -> New -> Project Option for New Universal app.
Step 2 - Giving the Project Name
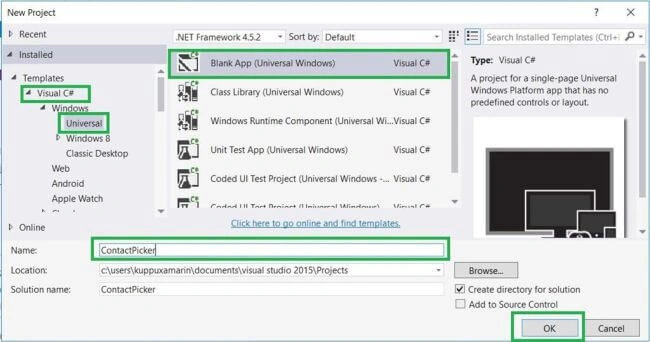
New Project Window will open. You can select an Installed -> Template -> Visual C# -> Windows -> Universal and select a Blank app (Universal Windows).
Type Project Name ContactPicker and click OK button.
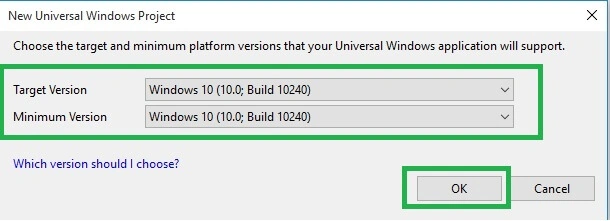
Here, we choose the Target Version, Minimum Version for our Universal Windows Application and click OK button.
Step 3 - Choose Designer Window
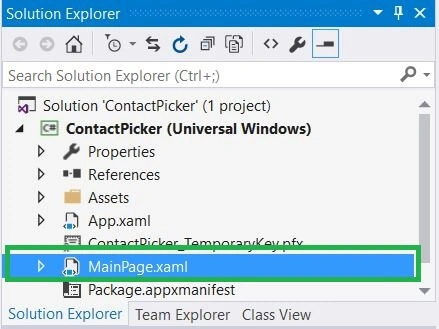
Now, we go to the Solution Explorer and select MainPage.xaml.
Step 4 - Designing the App
Drag the button from the tool box and change the name to pick a contact in the Property Window.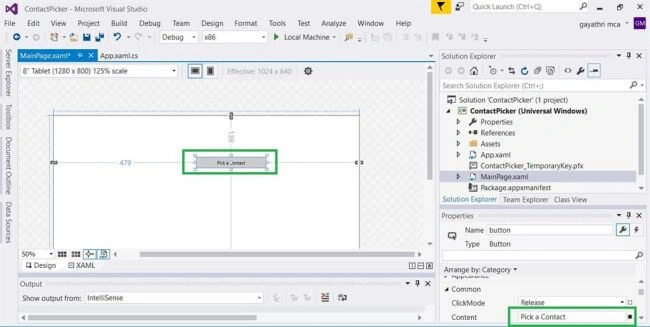
Next, add Textblock from the tool box and change the text property value to empty in the Property Window.
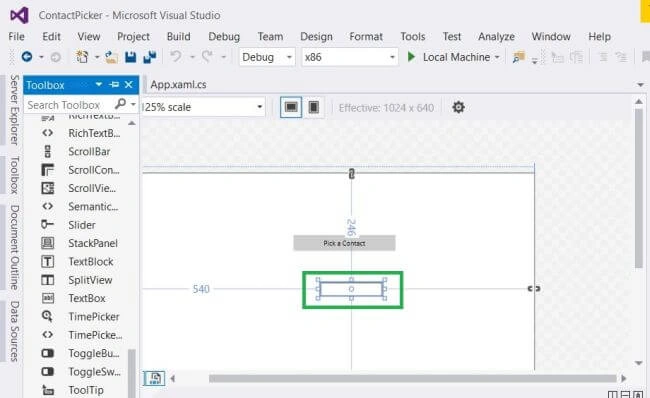
Step 5 - Add the Coding
Next, add the namespaces, given below, to our project, which is required in the further process.
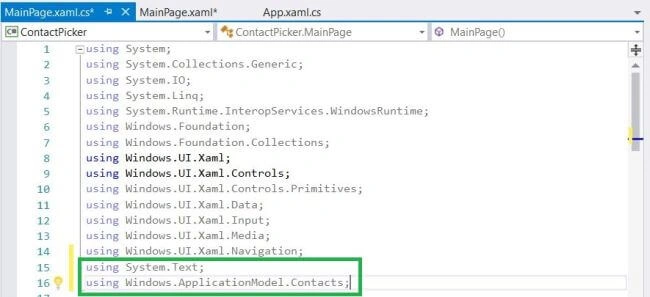
- using System.Text;
- using Windows.ApplicationModel.Contacts;
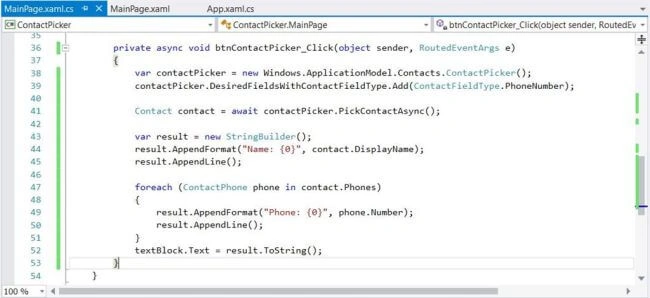
- private async void btnContactPicker_Click(object sender, RoutedEventArgs e)
- {
- var contactPicker = new Windows.ApplicationModel.Contacts.ContactPicker();
- contactPicker.DesiredFieldsWithContactFieldType.Add(ContactFieldType.PhoneNumber);
- Contact contact = await contactPicker.PickContactAsync();
- var result = new StringBuilder();
- result.AppendFormat("Name: {0}", contact.DisplayName);
- result.AppendLine();
- foreach(ContactPhone phone in contact.Phones) {
- result.AppendFormat("Phone: {0}", phone.Number);
- result.AppendLine();
- }
- textBlock.Text = result.ToString();
- }
Now, we are ready to run our project. Thus, click the Local Machine to run the Application.
Output
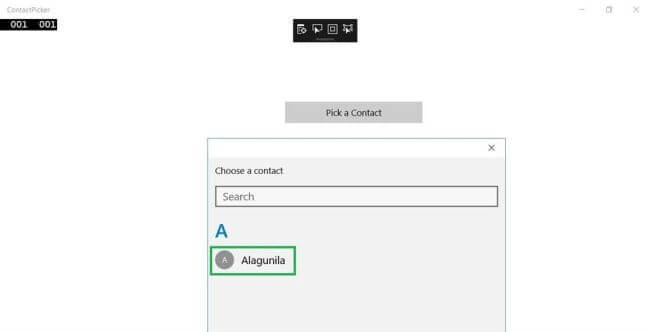
Now, we can select the contact from Contact Picker Control.

Conclusion
I hope you understood Contact Picker Control in Universal Window and how to run it.
Lokesh VarmanPosted Sep 24, 2016, 9:33 AM
Awe mam...
Vignesh ManiPosted Sep 12, 2016, 8:42 AM
Good one