

Introduction
Android apps run on many different devices, each device has a wide variety of resolutions, screen sizes and screen densities. Hence, specify the screen sizes, which your application supports and enable screen compatibility mode for screens which are larger than what your application supports. It's important that you always use this element in your application to specify the screen sizes your application supports. For more detail, kindly Click .
Declare the screen size the application supports
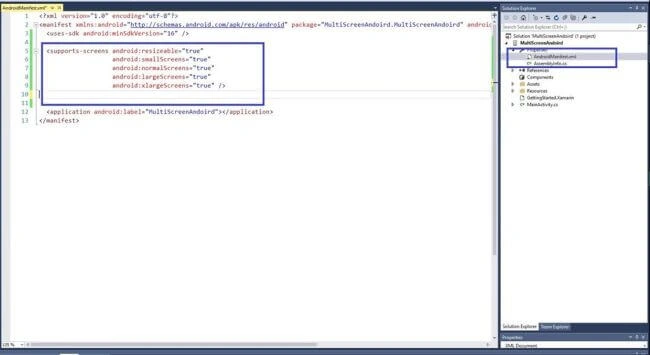
We need to enable the app screen sizes properties, so open App->AndroidManifest.xml will be added in the code given below.
- <supports-screens android:resizeable="true" android:smallScreens="true" android:normalScreens="true" android:largeScreens="true" android:xlargeScreens="true" />
Layouts for different screen sizes
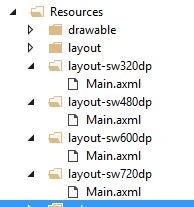
For Applications that target API levels up to 12 (Android 3.1), the layouts should go in directories that use the qualifiers small/ normal/ large/ xlarge.
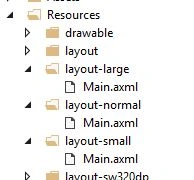
Let’s start,
Step 1
Open Visual Studio->New Project->Templates->Visual C#->Android->Blank app
Select Blank app. Now, give Project name and Project location.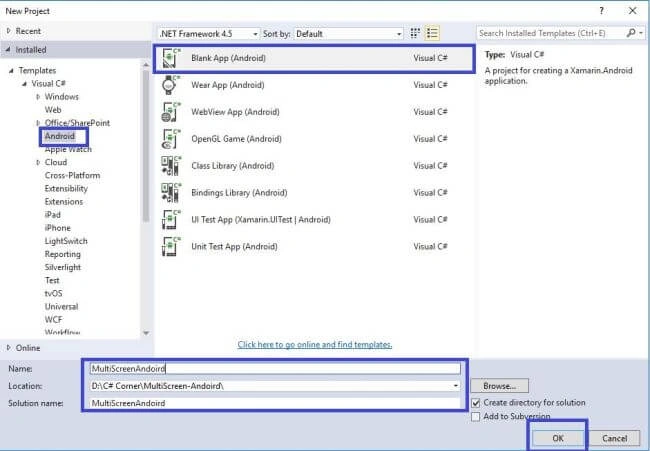
Step 2
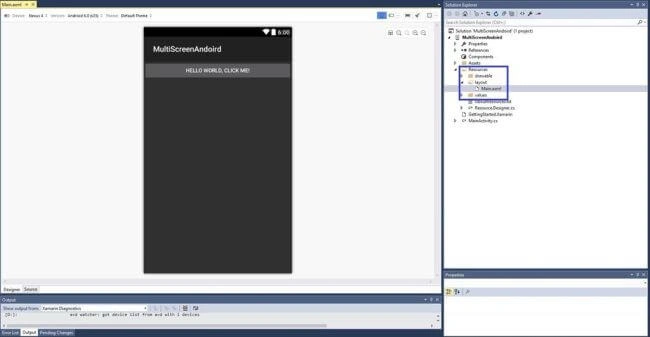
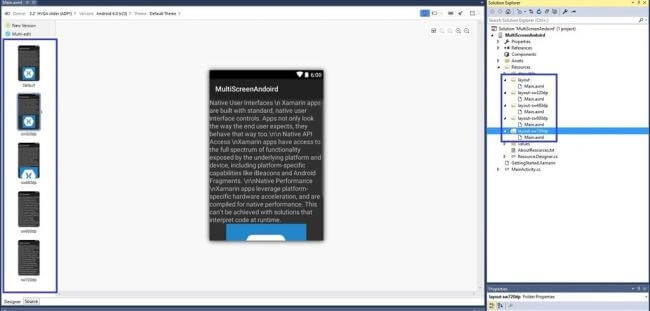
Open Solution Explorer-> Project Name-> Resources. Create layout folder for the varoius density sizes.
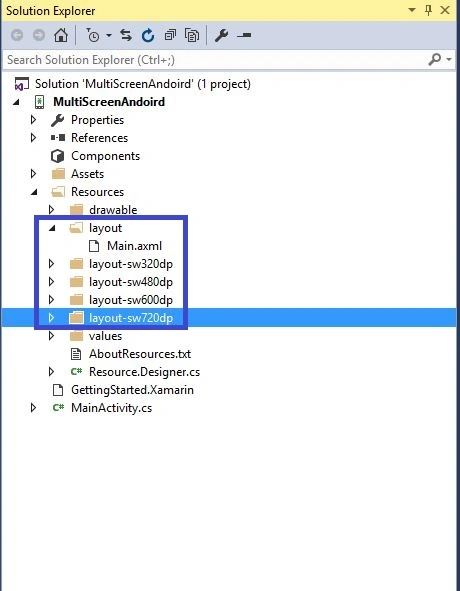
Step 3
We need to design a single page, so open Resources->Layout->Main.axml page. Afterwards, in main.axml copy, paste all the created layout folders.
Open Solution Explorer-> Properties->-> AndroidManifest.xml. Give the permission for all the screen sizes.
XML code
- <supports-screens android:resizeable="true" android:smallScreens="true" android:normalScreens="true" android:largeScreens="true" android:xlargeScreens="true" />
Step 5
Press F5 or build and run the Application.
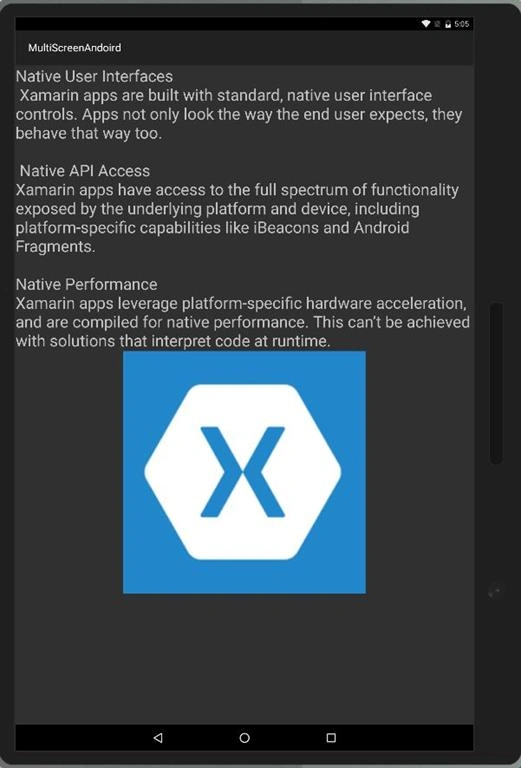
Output 1
10.1 inch tab size.
Output 2
Normal size is 5.5 Inch.

Finally, we successfully created Xamarin Android app for supporting multiple screens.
Anu VPosted Feb 20, 2017, 11:50 PM
Nice article.. Thanks for sharing..