

Let’s start.
Step 1: Open Visual Studio ->New Project ->Templates ->Visual C# ->Android ->Blank App.
Select Blank App and give the Project Name and Project Location.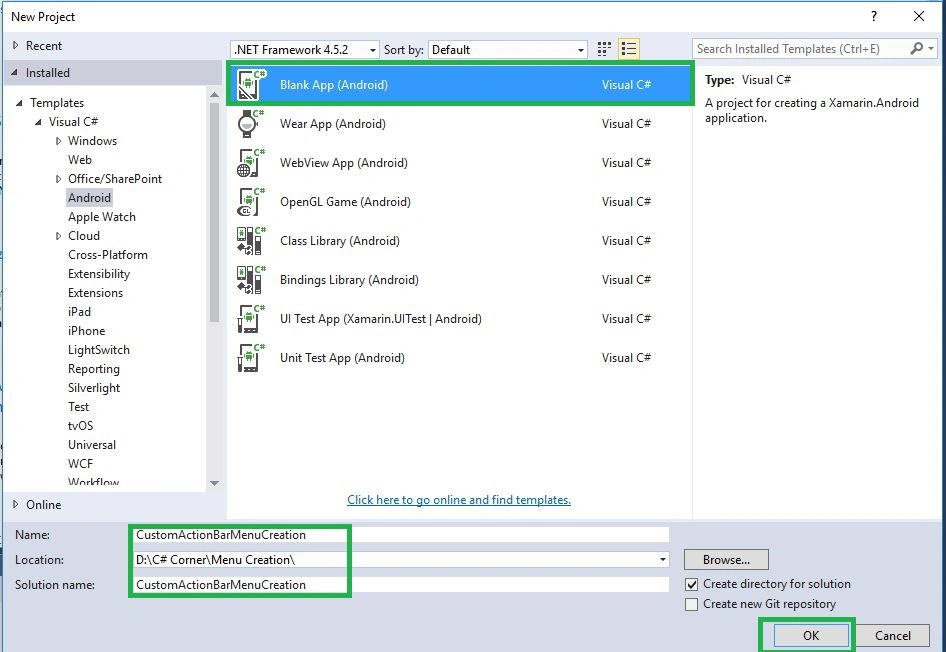
CUSTOM ACTION BAR MENU
Step 2: Next, create options_menu.xml file. Go to Solution Explorer -> Project Name ->Resources ->values. Then, right click and go to Add->New Item. This opens a new dialog box. Select XML File and give it a name, as option_menu.xml.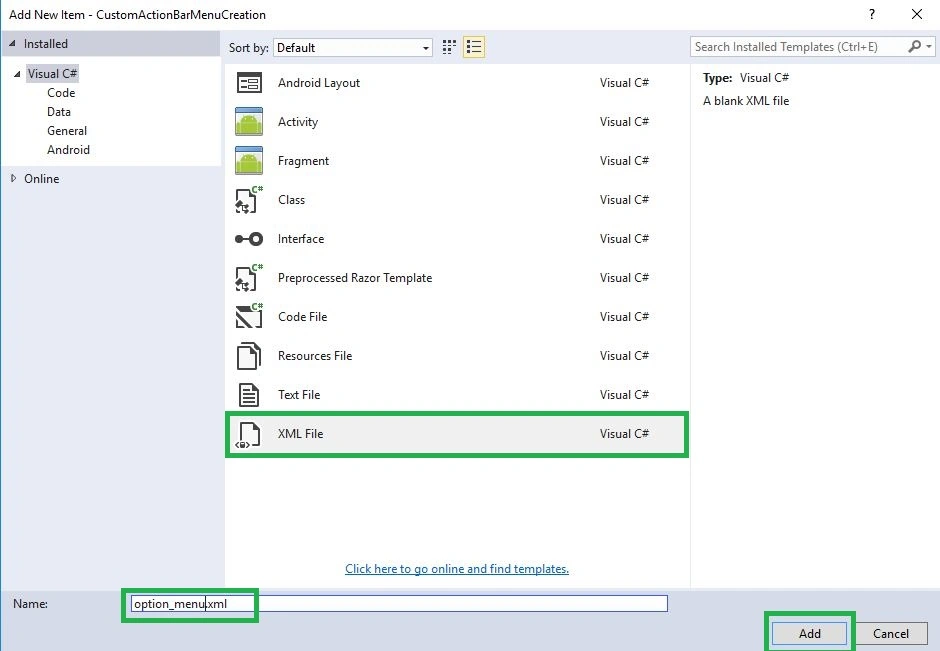
Step 3: The next step is to open the Solution Explorer -> Project Name ->Resources ->values ->options_menu.xml. Click on Open Design View and then, give the following code in it.
- <?xml version="1.0" encoding="utf-8" ?>
- <menu xmlns:android="http://schemas.android.com/apk/res/android" xmlns:app="http://schemas.android.com/apk/res-auto">
- <!--///showAsAction="always" ///-->
- <item android:id="@+id/action_settings" android:title="Share" showAsAction="always" />
- <item android:id="@+id/action_settings1" android:title="Bluetooth" showAsAction="always" />
- <item android:id="@+id/action_settings2" android:title="Exit" showAsAction="always" />
- <!--/android:showAsAction="ifRoom"/-->
- <item android:id="@+id/action_settings3" android:title="Share" android:showAsAction="ifRoom" />
- <item android:id="@+id/action_settings4" android:title="Bluetooth" android:showAsAction="ifRoom" />
- </menu>
Step 4: Next, open Solution Explorer -> Project Name ->MainActivity.cs. Create OnCreateOptionsMenu() after Oncreate() method.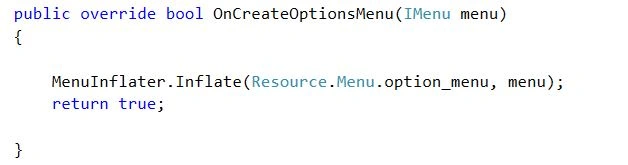
- public override bool OnCreateOptionsMenu(IMenu menu)
- {
- MenuInflater.Inflate(Resource.Menu.option_menu, menu);
- return true;
- }
POPUP MENU CREATION
Step 5: Now, create another xml file as options_popup.xml file. For this, go to Solution Explorer -> Project Name ->Resources ->values. Right click and Add ->New Item. Then, open new dialog box. Then, select XML File and give it the name as popup_menu.xml.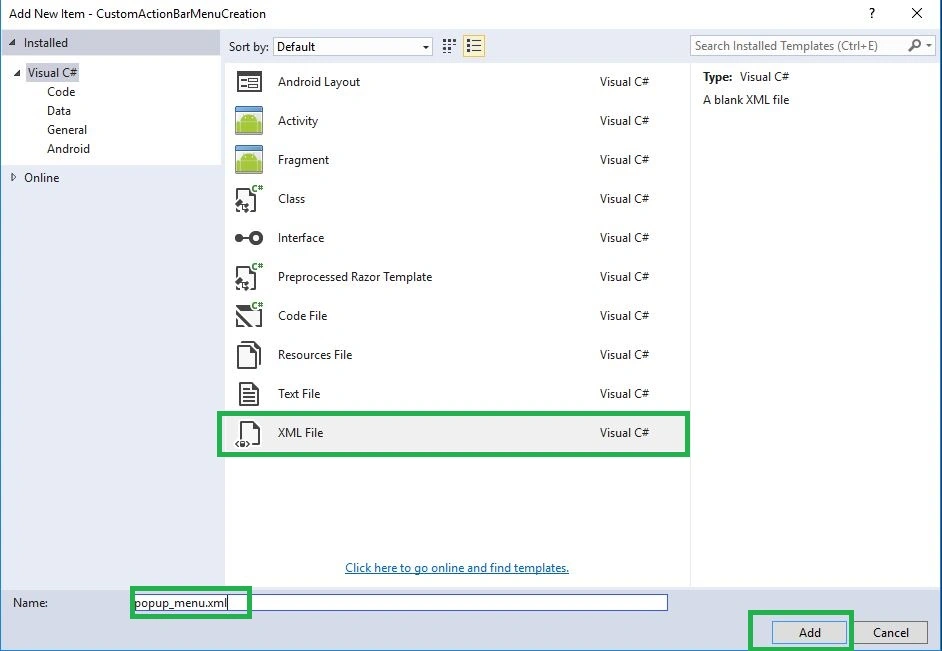
Step 6: Next, open the Solution Explorer -> Project Name ->Resources ->values -> popup_menu.xml. Click on Open Design View. Then, give the following code:
- <?xml version="1.0" encoding="utf-8" ?>
- <menu xmlns:android="http://schemas.android.com/apk/res/android" xmlns:app="http://schemas.android.com/apk/res-auto">
- <item android:id="@+id/action_setting1" android:title="Share" showAsAction="always" />
- <item android:id="@+id/action_settings2" android:title="Bluetooth" showAsAction="always" />
- <item android:id="@+id/action_settings3" android:title="Exit" showAsAction="always" />
- </menu>
Step 7: Next step is to open the Solution Explorer -> Project Name ->Resources ->Layout ->Main.axml. Then, give the following code.
- <?xml version="1.0" encoding="utf-8"?>
- <LinearLayout xmlns:android="http://schemas.android.com/apk/res/android" android:orientation="vertical" android:layout_width="match_parent" android:layout_height="match_parent">
- <Button android:id="@+id/btnpopupmenu" android:layout_width="match_parent" android:layout_height="wrap_content" android:text="POPUP MENU" />
- </LinearLayout>
Step 8: Now, open Solution Explorer -> Project Name -> MainActivity.cs. Then, give the following code: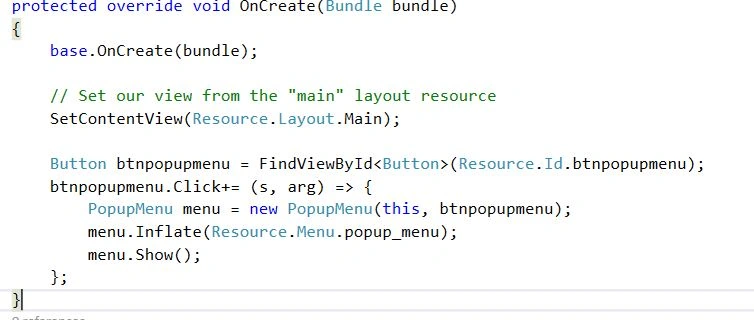
- protected override void OnCreate(Bundle bundle)
- {
- base.OnCreate(bundle);
- // Set our view from the "main" layout resource
- SetContentView(Resource.Layout.Main);
- Button btnpopupmenu = FindViewById < Button > (Resource.Id.btnpopupmenu);
- btnpopupmenu.Click += (s, arg) =>
- {
- PopupMenu menu = new PopupMenu(this, btnpopupmenu);
- menu.Inflate(Resource.Menu.popup_menu);
- menu.Show();
- };
- }
Step 9: Press F5 or Build and Run the Application.
Finally, we have successfully created the Xamarin Android Custom Action Bar Menu and created the Popup Menu.
aaa kkkPosted Sep 20, 2017, 10:38 AM
How can I write code for my menu pop-ups items?
paresh sukhiyaPosted Sep 12, 2017, 4:08 AM
When I'm Trying to Build the Project I'm getting the error Invalid Start Tag menu in the option_menu.xml file
David HayzenPosted Aug 31, 2017, 6:31 AM
Thanks for the example.
Syed SalmanPosted Nov 23, 2016, 2:07 AM
It's Awesome. Its working great. Actually you need to create popup_menu.xml and options_menu.xml In Resource Folder Create One folder called Menu on there you need to create this two files.............. I'm Telling to guys who are watching the steps... For better You guys can Download and check the Source File Thanks to Anbu Mani
Bhavik PatelPosted Jul 14, 2016, 12:31 PM
Nice share
Arvind ChourasiyaPosted Jul 14, 2016, 1:56 AM
Awesome bro very usefull
Anu VPosted Jul 14, 2016, 1:50 AM
Nice
kalu singh raoPosted Jul 14, 2016, 1:38 AM
Nice...
Abhijeet SinghPosted Jul 14, 2016, 1:07 AM
Nice.