

Introduction
Xamarin.Forms code runs on multiple platforms - each of which has its own filesystem. This means that reading and writing files is most easily done using the native file APIs on each platform. Alternatively, embedded resources are a simpler solution to distribute data files with an app.
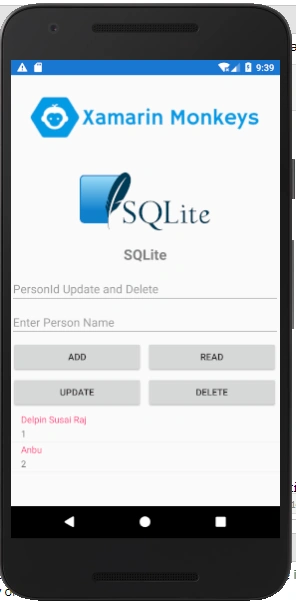
SQLite

SQLite is a lightweight database that implements a small, fast, self-contained, high-reliability, full-featured, SQL database engine.
SQLite is the most used database in the world. It is built into all mobile phones.
Prerequisites
- Visual Studio 2017 or Later(Windows or Mac)
Setting up a Xamarin.Forms Project
Start by creating a new Xamarin.Forms project. You’ll learn more by going through the steps yourself or download the source from here.
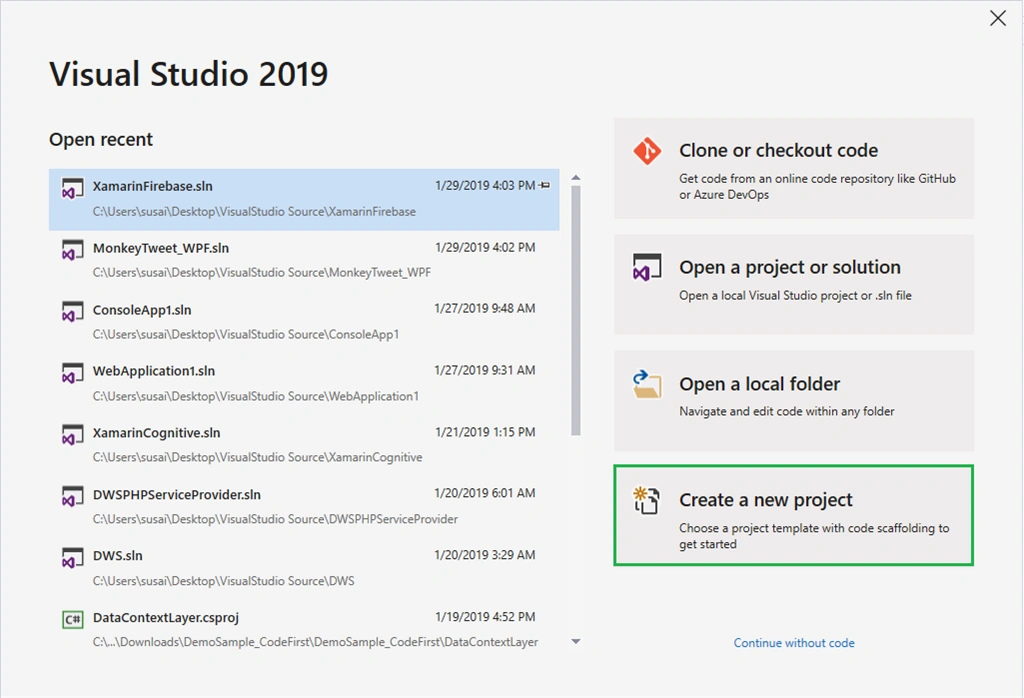
Visual Studio 2019 has more options in the opening window. Clone or check out the code from any repository or open a project or solution for your computer.
Now, you need to click "Create a new project".
Now, filter by Project Type: Mobile
Choose the Mobile App (Xamarin. forms) project under C# and Mobile.
Name your app. You probably want your project and solution to use the same name as your app. Put it on your preferred location for projects and click "Create".
Select the blank app and target platforms - Android, iOS and Windows (UWP).
Subsequently, go to the solution. In there, you get all the files and sources of your project (.NET Standard). Now, select XAML page and
double-click to open the MainPage.Xaml page.
You now have a basic Xamarin.Forms app. Click the "Play" button to try it out.
Setting up the User Interface
Go to MainPage.Xaml and write the following code.
MainPage.xaml
- <?xml version="1.0" encoding="utf-8" ?>
- <ContentPage xmlns="http://xamarin.com/schemas/2014/forms"
- xmlns:x="http://schemas.microsoft.com/winfx/2009/xaml"
- xmlns:local="clr-namespace:XamarinSQLite"
- x:Class="XamarinSQLite.MainPage">
- <StackLayout>
- <StackLayout>
- <StackLayout HorizontalOptions="Center" VerticalOptions="Start">
- <Image x:Name="imgBanner" Source="banner.png" ></Image>
- <Image Margin="0,0,0,10" HeightRequest="100" Source="SQLite.png" ></Image>
- <Label Margin="0,0,0,10" Text="SQLite" FontAttributes="Bold" FontSize="Large" TextColor="Gray" HorizontalTextAlignment="Center" ></Label>
- <Entry x:Name="txtPersonId" Placeholder="PersonId Update and Delete"></Entry>
- <Entry x:Name="txtName" Placeholder="Enter Person Name"></Entry>
- <StackLayout HorizontalOptions="CenterAndExpand" Orientation="Horizontal">
- <Button x:Name="btnAdd" WidthRequest="200" Text="Add" Clicked="BtnAdd_Clicked" />
- <Button x:Name="btnRead" WidthRequest="200" Text="Read" Clicked="BtnRead_Clicked" />
- </StackLayout>
- <StackLayout HorizontalOptions="CenterAndExpand" Orientation="Horizontal">
- <Button x:Name="btnUpdate" WidthRequest="200" Text="Update" Clicked="BtnUpdate_Clicked"/>
- <Button x:Name="btnDelete" WidthRequest="200" Text="Delete" Clicked="BtnDelete_Clicked" />
- </StackLayout>
- <ListView x:Name="lstPersons">
- <ListView.ItemTemplate>
- <DataTemplate>
- <TextCell Text="{Binding Name}" Detail="{Binding PersonID}"></TextCell>
- </DataTemplate>
- </ListView.ItemTemplate>
- </ListView>
- </StackLayout>
- </StackLayout>
- </StackLayout>
- </ContentPage>
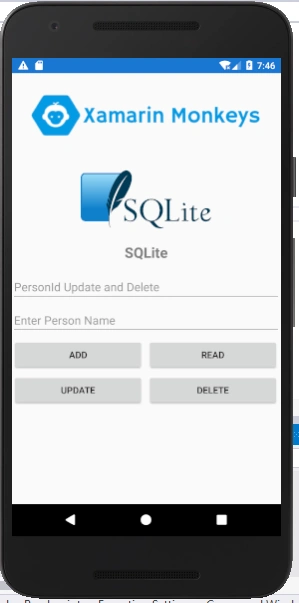
Click the "Play" button to try it out.
NuGet Packages
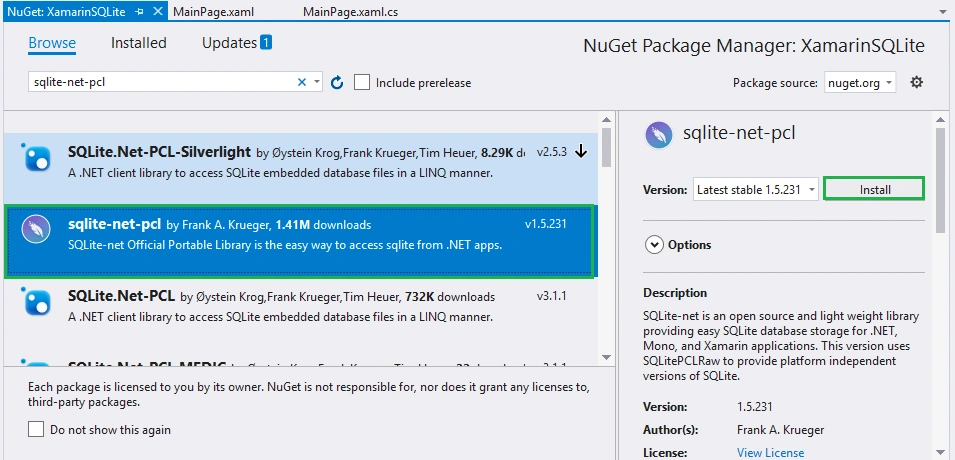
Now, add the following NuGet Packages.
- sqlite-net-pc
Add sqlite-net-pc NuGet
Go to Solution Explorer and select your solution. Right-click and select "Manage NuGet Packages for Solution". Search "sqlite-net-pc" and add Package. Remember to install it for each project (.NET Standard, Android, iO, and UWP).
Create a Model
In this step, you can create a model for deserializing your response.
Person.cs
- using SQLite;
- namespace XamarinSQLite
- {
- public class Person
- {
- [PrimaryKey, AutoIncrement]
- public int PersonID { get; set; }
- public string Name { get; set; }
- }
- }
Get Local File Path
Write the following code to get local file path for storing the database in App.xaml.cs
App.xaml.cs
- static SQLiteHelper db;
- public static SQLiteHelper SQLiteDb
- {
- get
- {
- if (db == null)
- {
- db = new SQLiteHelper(Path.Combine(Environment.GetFolderPath(Environment.SpecialFolder.LocalApplicationData), "XamarinSQLite.db3"));
- }
- return db;
- }
- }
Create a Table
In this step, write the following code to create an SQLite Connection and create the table in SQLiteHelper.cs constructor.
SQLiteHelper.cs
- SQLiteAsyncConnection db;
- public SQLiteHelper(string dbPath)
- {
- db = new SQLiteAsyncConnection(dbPath);
- db.CreateTableAsync<Person>().Wait();
- }
Read All
Now, write the code to read all data from the SQLite Database.
SQLiteHelper.cs
- //Read All Items
- public Task<List<Person>> GetItemsAsync()
- {
- return db.Table<Person>().ToListAsync();
- }
MainPage.Xaml.cs
- protected async override void OnAppearing()
- {
- base.OnAppearing();
- //Get All Persons
- var personList = await App.SQLiteDb.GetItemsAsync();
- if(personList!=null)
- {
- lstPersons.ItemsSource = personList;
- }
- }
Click the "Play" button to try it out.
Insert
Now, write the following code to insert data into SQLite Database.
- //Insert and Update new record
- public Task<int> SaveItemAsync(Person person)
- {
- if (person.PersonID != 0)
- {
- return db.UpdateAsync(person);
- }
- else
- {
- return db.InsertAsync(person);
- }
- }
- private async void BtnAdd_Clicked(object sender, EventArgs e)
- {
- if (!string.IsNullOrEmpty(txtName.Text))
- {
- Person person = new Person()
- {
- Name = txtName.Text
- };
- //Add New Person
- await App.SQLiteDb.SaveItemAsync(person);
- txtName.Text = string.Empty;
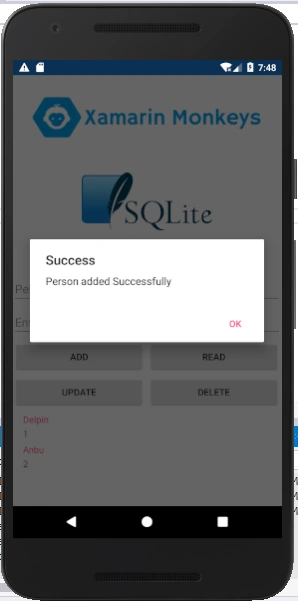
- await DisplayAlert("Success", "Person added Successfully", "OK");
- //Get All Persons
- var personList = await App.SQLiteDb.GetItemsAsync();
- if (personList != null)
- {
- lstPersons.ItemsSource = personList;
- }
- }
- else
- {
- await DisplayAlert("Required", "Please Enter name!", "OK");
- }
- }
Click the "Play" button to try it out.
Read
Now, write the following code to read data from the SQLite Database.
- //Read Item
- public Task<Person> GetItemAsync(int personId)
- {
- return db.Table<Person>().Where(i => i.PersonID == personId).FirstOrDefaultAsync();
- }
- private async void BtnRead_Clicked(object sender, EventArgs e)
- {
- if (!string.IsNullOrEmpty(txtPersonId.Text))
- {
- //Get Person
- var person = await App.SQLiteDb.GetItemAsync(Convert.ToInt32(txtPersonId.Text));
- if(person!=null)
- {
- txtName.Text = person.Name;
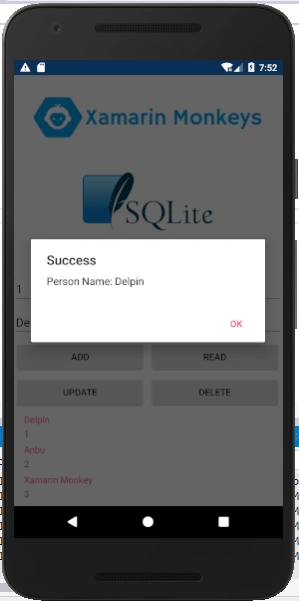
- await DisplayAlert("Success","Person Name: "+ person.Name, "OK");
- }
- }
- else
- {
- await DisplayAlert("Required", "Please Enter PersonID", "OK");
- }
- }
Click the "Play" button to try it out.
Update
Now, write the following code to update the data in the SQLite Database.
- //Insert and Update new record
- public Task<int> SaveItemAsync(Person person)
- {
- if (person.PersonID != 0)
- {
- return db.UpdateAsync(person);
- }
- else
- {
- return db.InsertAsync(person);
- }
- }
- private async void BtnUpdate_Clicked(object sender, EventArgs e)
- {
- if (!string.IsNullOrEmpty(txtPersonId.Text))
- {
- Person person = new Person()
- {
- PersonID=Convert.ToInt32(txtPersonId.Text),
- Name = txtName.Text
- };
- //Update Person
- await App.SQLiteDb.SaveItemAsync(person);
- txtPersonId.Text = string.Empty;
- txtName.Text = string.Empty;
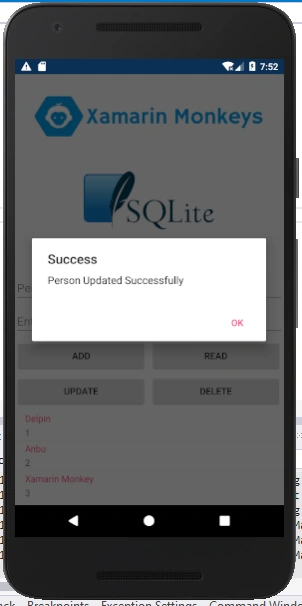
- await DisplayAlert("Success", "Person Updated Successfully", "OK");
- //Get All Persons
- var personList = await App.SQLiteDb.GetItemsAsync();
- if (personList != null)
- {
- lstPersons.ItemsSource = personList;
- }
- }
- else
- {
- await DisplayAlert("Required", "Please Enter PersonID", "OK");
- }
- }
Click the "Play" button to try it out.
Delete
Now, write the following code to delete data from SQLite Database.
- //Delete
- public Task<int> DeleteItemAsync(Person person)
- {
- return db.DeleteAsync(person);
- }
- private async void BtnDelete_Clicked(object sender, EventArgs e)
- {
- if (!string.IsNullOrEmpty(txtPersonId.Text))
- {
- //Get Person
- var person = await App.SQLiteDb.GetItemAsync(Convert.ToInt32(txtPersonId.Text));
- if (person != null)
- {
- //Delete Person
- await App.SQLiteDb.DeleteItemAsync(person);
- txtPersonId.Text = string.Empty;
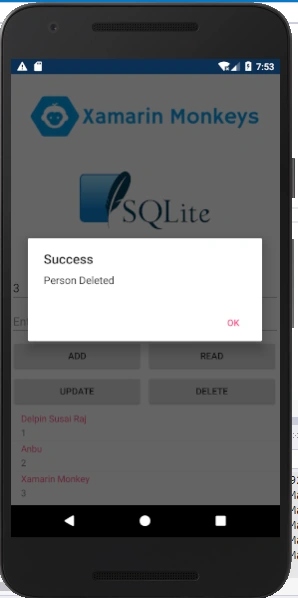
- await DisplayAlert("Success", "Person Deleted", "OK");
- //Get All Persons
- var personList = await App.SQLiteDb.GetItemsAsync();
- if (personList != null)
- {
- lstPersons.ItemsSource = personList;
- }
- }
- }
- else
- {
- await DisplayAlert("Required", "Please Enter PersonID", "OK");
- }
- }
Click the "Play" button to try it out.
Full code
SQLiteHelper.cs
- using System.Threading.Tasks;
- using SQLite;
- namespace XamarinSQLite
- {
- public class SQLiteHelper
- {
- SQLiteAsyncConnection db;
- public SQLiteHelper(string dbPath)
- {
- db = new SQLiteAsyncConnection(dbPath);
- db.CreateTableAsync<Person>().Wait();
- }
- //Insert and Update new record
- public Task<int> SaveItemAsync(Person person)
- {
- if (person.PersonID != 0)
- {
- return db.UpdateAsync(person);
- }
- else
- {
- return db.InsertAsync(person);
- }
- }
- //Delete
- public Task<int> DeleteItemAsync(Person person)
- {
- return db.DeleteAsync(person);
- }
- //Read All Items
- public Task<List<Person>> GetItemsAsync()
- {
- return db.Table<Person>().ToListAsync();
- }
- //Read Item
- public Task<Person> GetItemAsync(int personId)
- {
- return db.Table<Person>().Where(i => i.PersonID == personId).FirstOrDefaultAsync();
- }
- }
- }
MainPage.Xaml.cs
- using Xamarin.Forms;
- namespace XamarinSQLite
- {
- public partial class MainPage : ContentPage
- {
- public MainPage()
- {
- InitializeComponent();
- }
- protected async override void OnAppearing()
- {
- base.OnAppearing();
- //Get All Persons
- var personList = await App.SQLiteDb.GetItemsAsync();
- if(personList!=null)
- {
- lstPersons.ItemsSource = personList;
- }
- }
- private async void BtnAdd_Clicked(object sender, EventArgs e)
- {
- if (!string.IsNullOrEmpty(txtName.Text))
- {
- Person person = new Person()
- {
- Name = txtName.Text
- };
- //Add New Person
- await App.SQLiteDb.SaveItemAsync(person);
- txtName.Text = string.Empty;
- await DisplayAlert("Success", "Person added Successfully", "OK");
- //Get All Persons
- var personList = await App.SQLiteDb.GetItemsAsync();
- if (personList != null)
- {
- lstPersons.ItemsSource = personList;
- }
- }
- else
- {
- await DisplayAlert("Required", "Please Enter name!", "OK");
- }
- }
- private async void BtnRead_Clicked(object sender, EventArgs e)
- {
- if (!string.IsNullOrEmpty(txtPersonId.Text))
- {
- //Get Person
- var person = await App.SQLiteDb.GetItemAsync(Convert.ToInt32(txtPersonId.Text));
- if(person!=null)
- {
- txtName.Text = person.Name;
- await DisplayAlert("Success","Person Name: "+ person.Name, "OK");
- }
- }
- else
- {
- await DisplayAlert("Required", "Please Enter PersonID", "OK");
- }
- }
- private async void BtnUpdate_Clicked(object sender, EventArgs e)
- {
- if (!string.IsNullOrEmpty(txtPersonId.Text))
- {
- Person person = new Person()
- {
- PersonID=Convert.ToInt32(txtPersonId.Text),
- Name = txtName.Text
- };
- //Update Person
- await App.SQLiteDb.SaveItemAsync(person);
- txtPersonId.Text = string.Empty;
- txtName.Text = string.Empty;
- await DisplayAlert("Success", "Person Updated Successfully", "OK");
- //Get All Persons
- var personList = await App.SQLiteDb.GetItemsAsync();
- if (personList != null)
- {
- lstPersons.ItemsSource = personList;
- }
- }
- else
- {
- await DisplayAlert("Required", "Please Enter PersonID", "OK");
- }
- }
- private async void BtnDelete_Clicked(object sender, EventArgs e)
- {
- if (!string.IsNullOrEmpty(txtPersonId.Text))
- {
- //Get Person
- var person = await App.SQLiteDb.GetItemAsync(Convert.ToInt32(txtPersonId.Text));
- if (person != null)
- {
- //Delete Person
- await App.SQLiteDb.DeleteItemAsync(person);
- txtPersonId.Text = string.Empty;
- await DisplayAlert("Success", "Person Deleted", "OK");
- //Get All Persons
- var personList = await App.SQLiteDb.GetItemsAsync();
- if (personList != null)
- {
- lstPersons.ItemsSource = personList;
- }
- }
- }
- else
- {
- await DisplayAlert("Required", "Please Enter PersonID", "OK");
- }
- }
- }
- }
I hope you have understood, how to use the SQLite Database with CRUD operations in Xamarin.Forms. Thanks for reading. Please share your comments and feedback.
Happy Coding :)
Abdul Amin KhanPosted May 25, 2023, 1:51 PM
Is that data will be retain permanently in sqlite db or clear every time
Lalit SapraPosted Aug 25, 2022, 12:05 PM
Hi thanks what is the location of sqlite in local drive or how can i will find out.
abhijeet kumarPosted Jul 13, 2020, 5:14 AM
I need to develop a Mobile App for my office project, can you guide me How to do CRUD operation using XAMARIN form and MS SQL database (It's urgent)
Yassine BkPosted May 15, 2020, 8:33 PM
Hi thanks for explaining i have question how can i add lot of details for same user for example our user have hobbies i want to read all his hobbies how can i do it please
Adeel AhmedPosted Jan 11, 2020, 2:37 AM
Your application is fantastic but I am having these errors on reading and updating the records: System.FormatException: Input string was not in a correct format. Kindly help me out as I am a newbie
Steffen ReuterPosted Nov 21, 2019, 12:45 PM
Could you please Tell me how to add the Model person.cs and the SQLHelper.cs?
JosephsPosted Oct 17, 2019, 4:44 AM
Can you share code how to connect remote Database for this same
JosephsPosted Oct 15, 2019, 4:00 AM
Your project error come can you resolve it?
Hiệu PhanPosted Oct 1, 2019, 11:12 PM
Hello sir, I have .db file. How can I working with it. Please help me !.
ousainou ceesayPosted Aug 12, 2019, 8:51 AM
Thank you sir. It worked for me but another functionally that I wanted in the SQLiteHelper class to have a method that will sum the values of a particular row in a table. I really need help on this because it is the only thing stopping me in my project. Thank you
Hafiz IrfanPosted Jul 22, 2019, 6:49 AM
How many row Add in sql lite?
Amol RathodPosted Feb 19, 2019, 11:24 AM
Thank it's working now
Amol RathodPosted Feb 19, 2019, 5:02 AM
I am getting error on App.xaml.cs page ---- "Inconsistent acceessibility: property type 'SQLiteHelper' is less accessible than property 'App.SQLiteDb' ", please suggest me
Amol RathodPosted Feb 19, 2019, 5:00 AM
I am getting following error on App.xaml.cs page
Amol RathodPosted Feb 19, 2019, 5:00 AM
Inconsistent acceessibility: property type 'SQLiteHelper' is less accessible than property 'App.SQLiteDb'