

Applying the paging and filtering in the Kendo gird is simply and easy to implement by using the pageable and filterable property in Kendo Grid.
Step 1:
Create a HTML page and write a following code in it.
HTML Design
- <!DOCTYPE html>
- <html>
- <head>
- <meta charset="utf-8">
- <title>Untitled</title>
- <link rel="stylesheet" href="http://kendo.cdn.telerik.com/2015.3.930/styles/kendo.common.min.css">
- <link rel="stylesheet" href="http://kendo.cdn.telerik.com/2015.3.930/styles/kendo.rtl.min.css">
- <link rel="stylesheet" href="http://kendo.cdn.telerik.com/2015.3.930/styles/kendo.default.min.css">
- <link rel="stylesheet" href="http://kendo.cdn.telerik.com/2015.3.930/styles/kendo.mobile.all.min.css">
- <script src="http://code.jquery.com/jquery-1.9.1.min.js"></script>
- <script src="http://kendo.cdn.telerik.com/2015.3.930/js/angular.min.js"></script>
- <script src="http://kendo.cdn.telerik.com/2015.3.930/js/jszip.min.js"></script>
- <script src="http://kendo.cdn.telerik.com/2015.3.930/js/kendo.all.min.js"></script>
- </head>
- <body>
- <div id="grid"></div>
- </body>
- </html>
JavaScript:
- $(document)
- .ready(function ()
- {
- ("#grid")
- .kendoGrid(
- {
- selectable: "multiple cell",
- allowCopy: true,
- pageable:
- {
- pageSizes: true,
- },
- filterable: true,
- columns: [
- {
- field: "productName"
- },
- {
- field: "category"
- }],
- dataSource: [
- {
- productName: "Tea",
- category: "Beverages"
- },
- {
- productName: "Coffee",
- category: "Beverages"
- },
- {
- productName: "Ham",
- category: "Food"
- },
- {
- productName: "Bread",
- category: "Food"
- },
- {
- productName: "Chocolate",
- category: "Food"
- },
- {
- productName: "Cake",
- category: "Food"
- }]);
- })
Result in Browser:
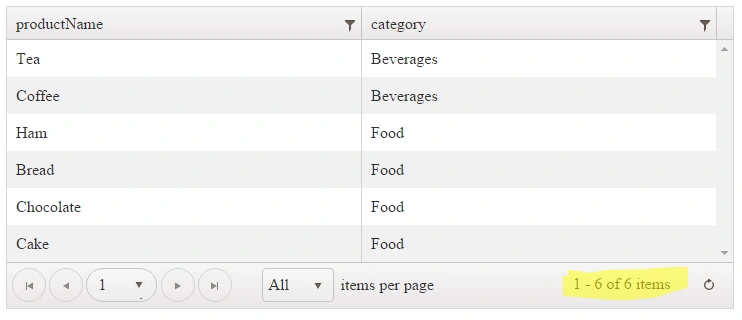
Figure 1
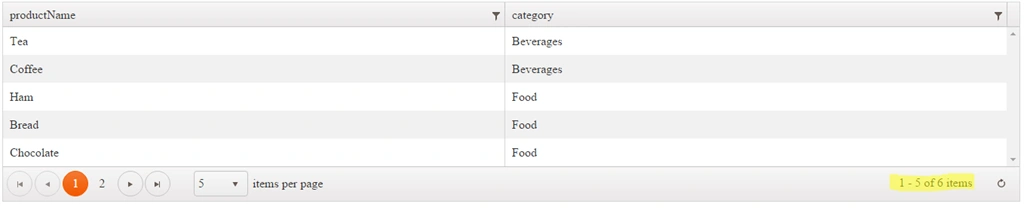 Figure 2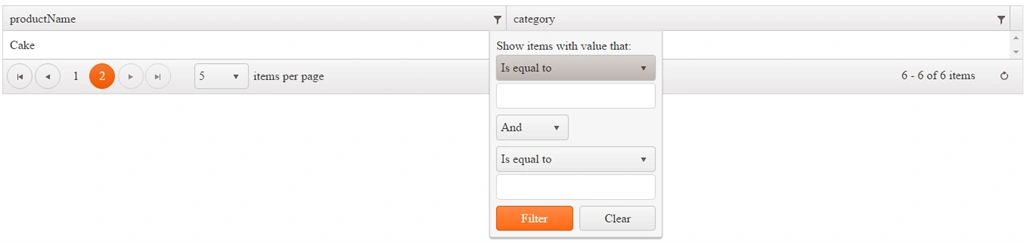
Figure 3
Join the conversation! Your thoughts help the community grow.