

Localizing a LightSwitch Application
This article shows creation of a LightSwitch application then how to localize it.
If we are localizing a Silverlight client then we need to upgrade it first. Go to the menu bar, choose Project, then Upgrade Project. If the Upgrade Project command doesn't appear then the project is already upgraded.
We need Microsoft LightSwitch for Visual Studio Update 2 to localize a LightSwitch application.
Creating the LightSwitch HTML Application using Visual Studio 2012 - Part 1
Procedure for creating a LightSwitch HTML Application
Step 1
Getting Started
- Open Visual Studio 2012.
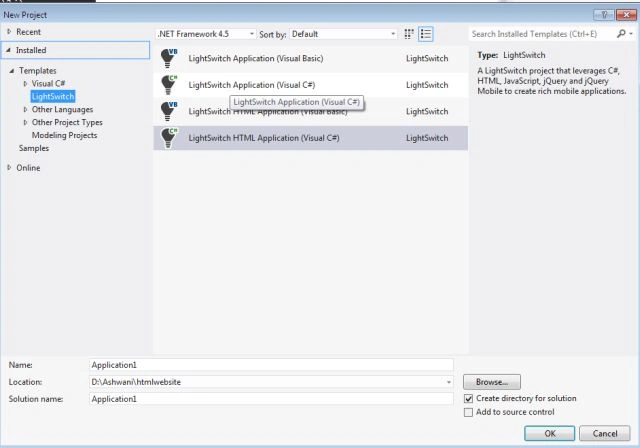
- Go to "File" => "New" => "Project..."
- Select "LightSwitch" in installed templates.
- Select "LightSwitch HTML Application (Visual C#)".
- Enter the Name and choose the location.
- Click "OK".
Step 2
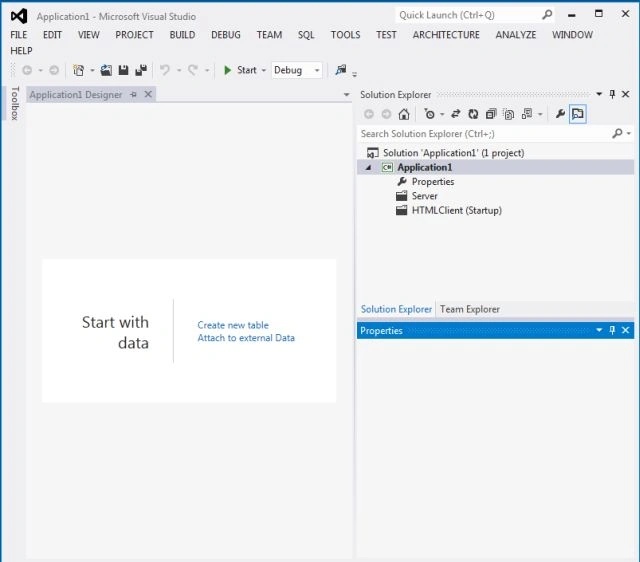
The Application Designer appears.
Step 3
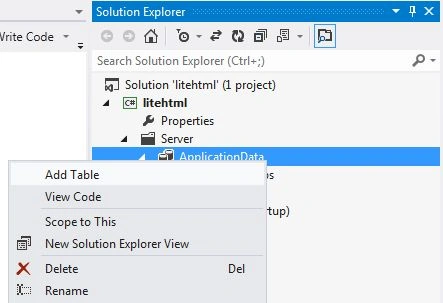
Right-click on the Server or Application data to add a table.
Step 4
In the table add the following fields and name it "Employee".
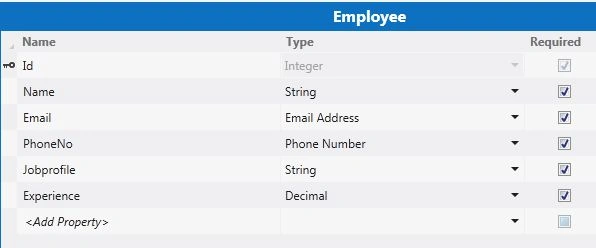
Step 5
Now the Solution Explorer consists of the following items:
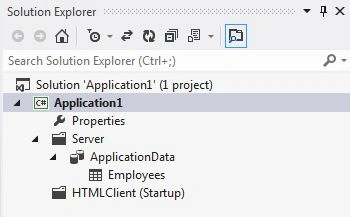
Step 6
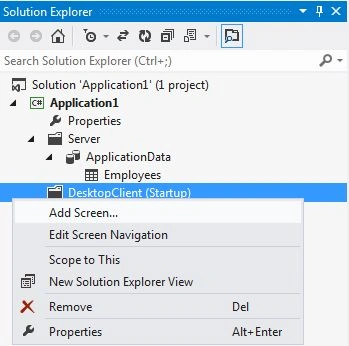
In the Solution Explorer, right-click or double-click on "HTML Client" and choose "Add Screen".
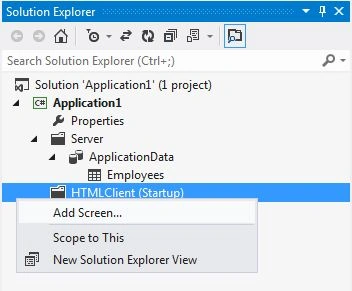
Step 7
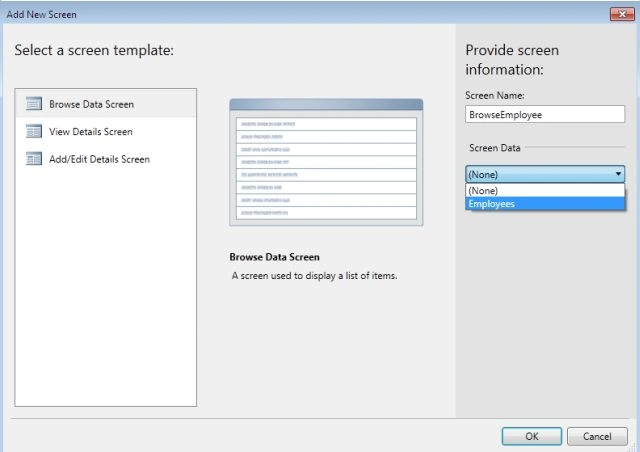
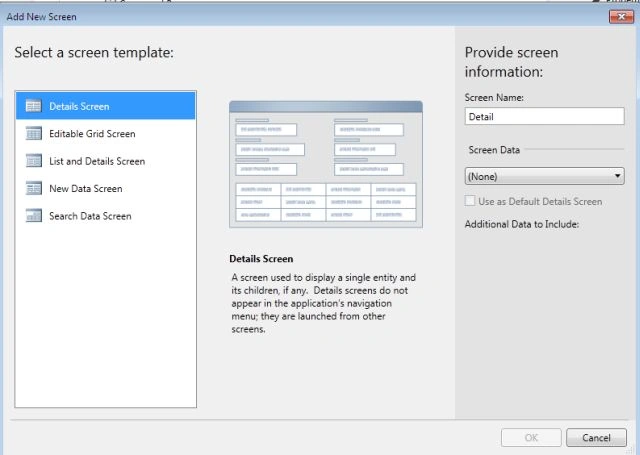
The Add New Screen Dialog box will appear.
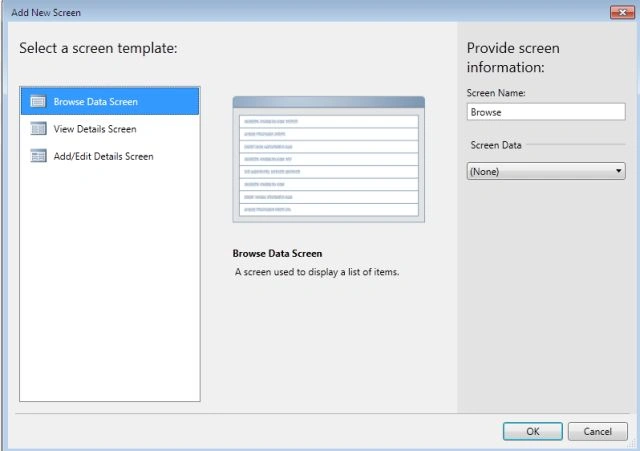
Step 8
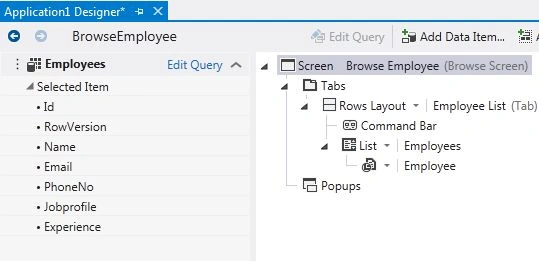
Add a Browse Data screen that's named "BrowseEmployee", and then choose "Employee" as the Screen Data.
Step 9
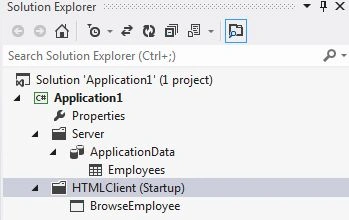
Now the solution consists of the following items:
Step 10
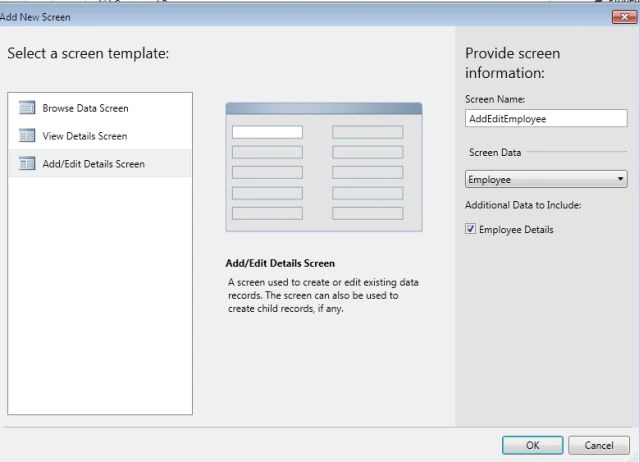
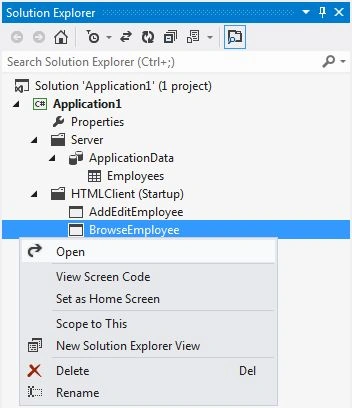
Again form the Solution Explorer, right-click or double-click on "HTML Client" and choose "Add Screen".
Step 11

Join the conversation! Your thoughts help the community grow.