
Introduction
This article explains screen orientation in Android. Android Studio is used to create the sample.
The screen orientation attribute is provided by the activity element in the Android Manifest.Xml file. The orientations provided by the activity are Portrait, Landscape, Sensor, Unspecified and so on. To perform a screen orientation activity you define the properties in the Android Manifest.Xml file.
Example
- <activity
- android:name="com.screenorientation.MainActivity"
- android:label="@string/app_name"
- android:screenOrientation="portrait">
- Portrait: In a portrait mode the screen will be taller, not wider.
- LandScape: In a landscape mode the screen will be wider, not taller.
- Sensor: This orientation will be determined depending on the device sensor.
- Unspecified: For this, the orientation will be chosen by the system.
- <RelativeLayout xmlns:android="http://schemas.android.com/apk/res/android"
- xmlns:tools="http://schemas.android.com/tools"
- android:layout_width="match_parent"
- android:layout_height="match_parent"
- android:paddingBottom="@dimen/activity_vertical_margin"
- android:paddingLeft="@dimen/activity_horizontal_margin"
- android:paddingRight="@dimen/activity_horizontal_margin"
- android:paddingTop="@dimen/activity_vertical_margin"
- android:background="#123456"
- tools:context=".MainActivity" >
- <Button
- android:id="@+id/button"
- android:layout_width="150dp"
- android:layout_height="wrap_content"
- android:layout_marginLeft="100dp"
- android:layout_marginTop="73dp"
- android:text="Button"
- android:onClick="onClick"
- />
- <EditText
- android:id="@+id/editText1"
- android:layout_width="wrap_content"
- android:layout_height="wrap_content"
- android:layout_centerHorizontal="true"
- android:ems="10" />
- </RelativeLayout>
Step 2
Create a Java class file.
In it, you will create the id of a Button and EditText. After this set the button's click event handler and on a button click you will set the text of edittext to Android.
- package com.screenorientation;
- import android.os.Bundle;
- import android.app.Activity;
- import android.view.Menu;
- import android.view.View;
- import android.view.View.OnClickListener;
- import android.widget.Button;
- import android.widget.EditText;
- public class MainActivity extends Activity{
- EditText editText;
- @Override
- protected void onCreate(Bundle savedInstanceState) {
- super.onCreate(savedInstanceState);
- setContentView(R.layout.activity_main);
- editText=(EditText)findViewById(R.id.editText);
- Button button=(Button)findViewById(R.id.button);
- button.setOnClickListener(new OnClickListener() {
- @Override
- public void onClick(View v) {
- editText.setText("O android");
- }
- });
- }
- }
Step 3
Android Manifest.Xml file
- <?xml version="1.0" encoding="utf-8"?>
- <manifest xmlns:android="http://schemas.android.com/apk/res/android"
- package="com.screenorientation"
- android:versionCode="1"
- android:versionName="1.0" >
- <uses-sdk
- android:minSdkVersion="7"
- android:targetSdkVersion="16" />
- <application
- android:allowBackup="true"
- android:icon="@drawable/ic_launcher"
- android:label="@string/app_name"
- android:theme="@style/AppTheme" >
- <activity
- android:name="com.screenorientation.MainActivity"
- android:label="@string/app_name"
- android:screenOrientation="landscape"
- >
- <intent-filter>
- <action android:name="android.intent.action.MAIN" />
- <category android:name="android.intent.category.LAUNCHER" />
- </intent-filter>
- </activity>
- </application>
- </manifest>
Step 4
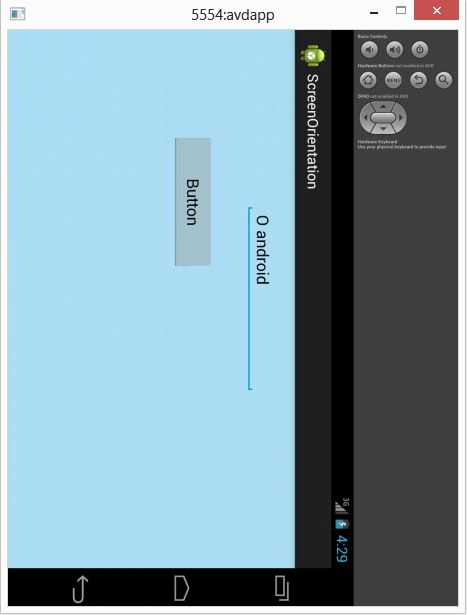
Landscape oriented image:
Join the conversation! Your thoughts help the community grow.