

Introduction
This article describes how to allow a HTML Element in a Web API form. Now see how to create the application.
Step 1
Create a Web API application
- Start Visual Studio 2012.
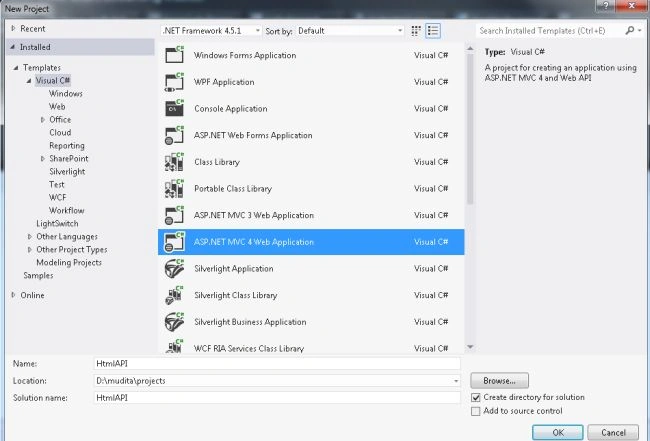
- From the start window select "Installed" -> "Visual C#" -> "Web".
- Select "ASP.NET MVC4 Web Application" and click on the "OK" button.
- From the "MVC4 Project" window select "Web API".
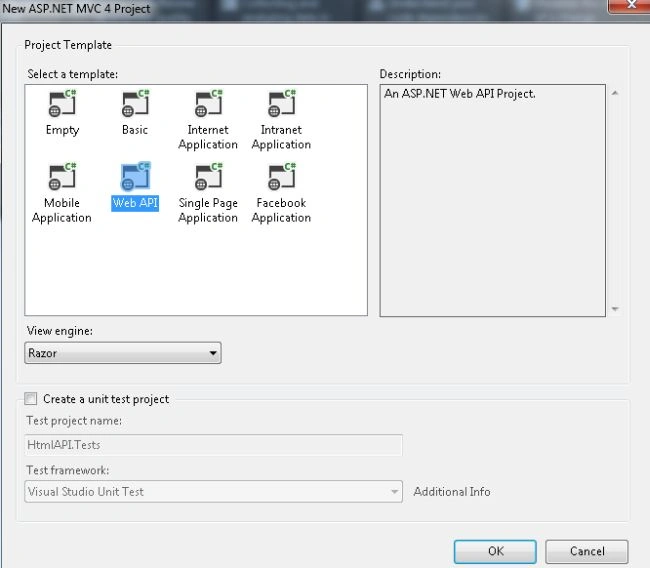
- Click on the "OK" button.
Step 2
Create the Model Class as in the following:
- In the "Solution Explorer".
- Right-click on the Model folder.
- Select "Add" -> "Class".
- Select "Installed" -> "Visual C#" and select "Class".
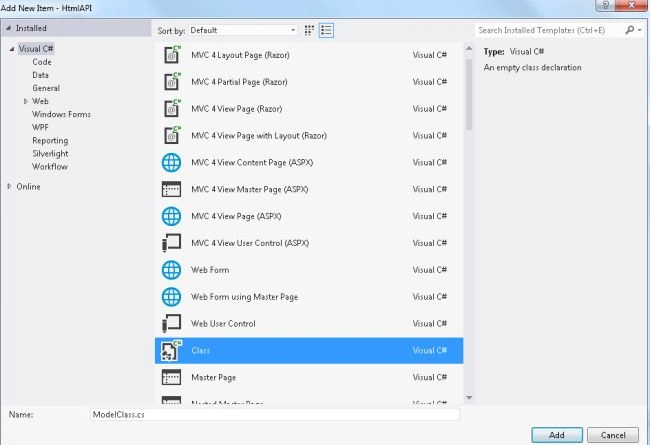
- Click on the "Add" button.
Add the following code:
- using System;
- using System.Collections.Generic;
- using System.Linq;
- using System.Web;
- using System.Web.Mvc;
- namespace HtmlAPI.Models
- {
- public class ModelClass
- {
- [AllowHtml] public String Topic { get; set; }
- [AllowHtml] public String Doc { get; set; }
- }
- }
Step 3
In the HomeController write the following code:
- In the "Solution Explorer".
- Select "Controller" -> "HomeController".
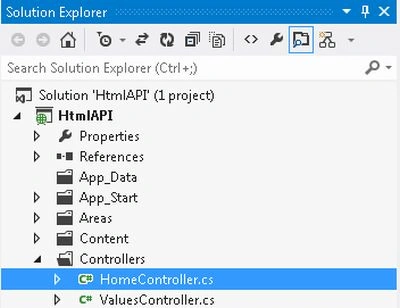
Add the following code:
- using System;
- using System.Collections.Generic;
- using System.Linq;
- using System.Web;
- using System.Web.Mvc;
- using HtmlAPI.Models;
- namespace HtmlAPI.Controllers
- {
- public class HomeController : Controller
- {
- [HttpGet]
- public ActionResult Index()
- {
- return View();
- }
- [HttpPost]
- public ActionResult GetData(ModelClass obj)
- {
- if (ModelState.IsValid)
- {
- string Top = obj.Topic;
- string Con = obj.Doc;
- return Content("Topic =" + Top + "Doc= :-" + Con);
- }
- else
- return Content("It is Invalide");
- }
- }
- }
Step 4
In the view add the following code:
-
In the "Solution Explorer".
-
Expand the "Views" folder.
-
Select "Home" -> "Index.cshtml".
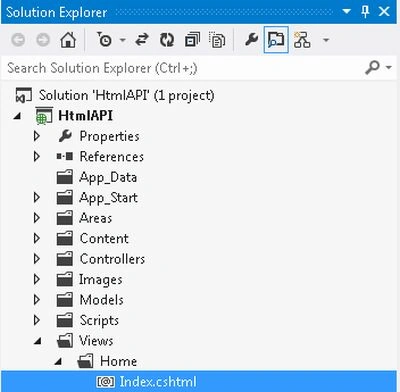
Add the following code:
- @model HtmlAPI.Models.ModelClass
- @{
- Layout = null;
- }
- <!DOCTYPE html>
- <html>
- <head>
- <title>Index</title>
- </head>
- <body>
- <div>
- @using (Html.BeginForm("GetData", "Home", FormMethod.Post))
- {
- @Html.LabelFor(p=>p.Topic,"Topic")
- @Html.TextBoxFor(p=> p.Topic)
- @Html.LabelFor(p=>p.Doc)
- @Html.TextBoxFor(p => p.Doc, "Doc");
- <input type="submit" name="Submit" value="submit" />
- }
- </div>
- </body>
- </html>
Step 5
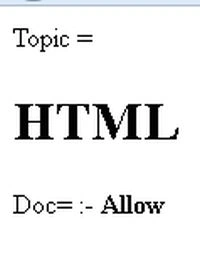
Execute the application:


Join the conversation! Your thoughts help the community grow.