

In this article we can explore Connected Web Parts which is an advanced SharePoint Web Part feature. The connected web parts denote communication between 2 web parts.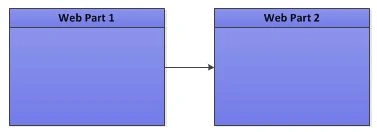
The connected web part resolves the following requirements:
- Master Web Part and Slave web part data exchange
- Data Selection and Data Display web part communication
Summary of the application is:
- There are 2 web parts
- Web Part 1 has a drop down list for selecting Car
- Web Part 2 displays the car picture based on selection
Steps Involved
Following are the steps involved in creating connected web parts:
- Create Project
- Create Communication Interface
- Create Web Part 1 (Provider) implementing Interface
- Create Web Part 2 (Consumer)
- Build and Deploy
Create Project
We can experiment with a Car showcase application where there are 2 web parts.
- The first web part allows selecting a Car from the drop down list.
- The second web part displays the image of the car.
to begin, create a new Web Part project in Visual Studio.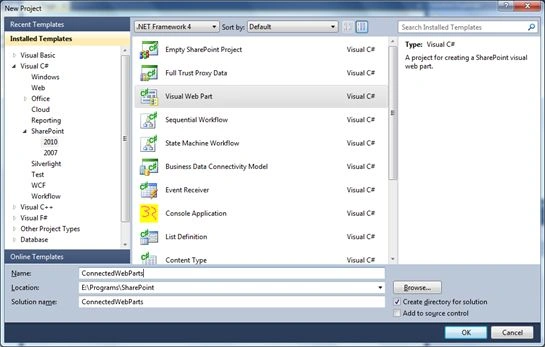
Remove the default VisualWebPart1 web part. We will be adding our own web parts.
Create Interface
For communication between the 2 web parts we need to create an interface. Please create the following interface, which returns the selected Car name:
public interface ICar
{
string Car { get; }
}
Create Provider Web Part implementing Interface
Now you can create a new web part named CarSelectionWebPart. Expand the webpart item and in the User Control (CarSelectionWebPartUserControl.ascx) class file:
- Add a drop down list control
- Place the following code
public partial class CarSelectionWebPartUserControl : UserControl
{
protected void Page_Load(object sender, EventArgs e)
{
if (!this.IsPostBack)
{
DropDownList1.Items.Clear();
DropDownList1.Items.Add("Camry");
DropDownList1.Items.Add("Figo");
DropDownList1.Items.Add("Diablo");
}
}
// Property to expose selected car outside
public string Car
{
get;
set;
}
// Set the Car property
protected void Button1_Click(object sender, EventArgs e)
{
if (DropDownList1.SelectedItem != null)
Car = DropDownList1.SelectedItem.Text;
}
}
In the CarSelectionWebPart.cs (web part class file) add the following code:
// Property to return the selected Car
public string Car
{
get
{
return (_control as CarSelectionWebPartUserControl).Car;
}
}
// Special Purpose Attribute to denote ICar interface is provided
[ConnectionProvider("Car")]
public ICar GetCar()
{
return this;
}
The ConnectionProvider attribute and the interface of the method denotes that this web part provides data for ICar interface. The Connection Provider also says that the name is Car (in string).
Create Consumer Web Part
Now we can create the consumer web part which will get the selected Car to display the car picture. Add a new web part and name it CarDisplayWebPart. Place an image control on the user control of the web part. In the class view of the user control add the following method:
// Set the image to url
public void SetImage(string car)
{
if (car == "Camry")
Image1.ImageUrl = "/_layouts/images/ConnectedWebParts/Camry.png";
else if (car == "Figo")
Image1.ImageUrl = "/_layouts/images/ConnectedWebParts/Figo.png";
else if (car == "Diablo")
Image1.ImageUrl = "/_layouts/images/ConnectedWebParts/Diablo.png";
}
Now add Images Mapped Folder and place 3 image files (Camry.png, Figo.png, Diablo.png) in the folder as shown below: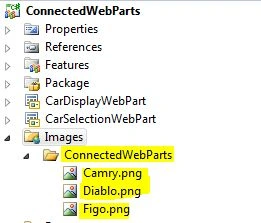
Build and Deploy
Now build the project and use the Deploy command. Open the SharePoint site in edit mode and add the above 2 web parts into it. You are now ready with the following 2 web parts.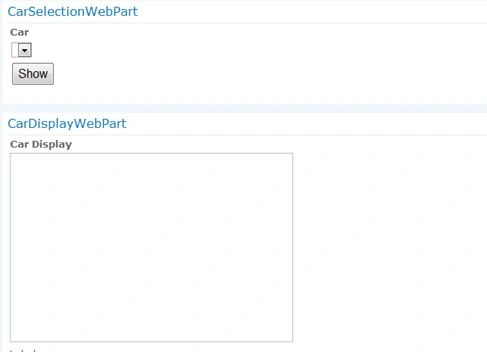
Set Connection
Use the context menu of CarDisplayWebPart to set the connection to provider web part.
Testing the Web Parts
Now stop editing the web page and refresh the site. Select a car from the first web part and the car picture is displayed on the second web part.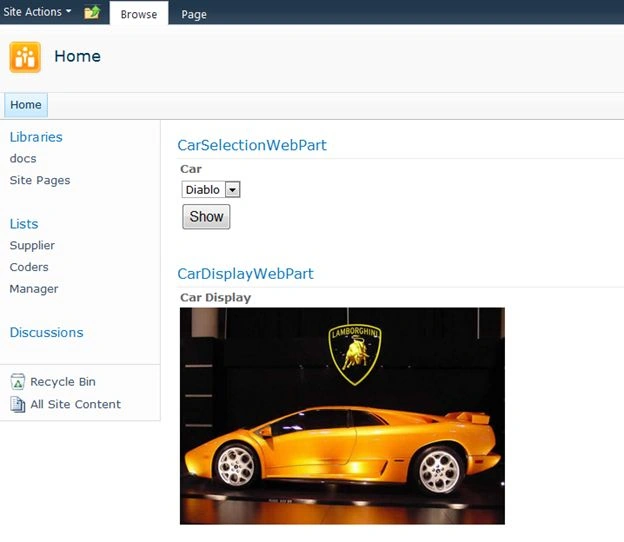
This concludes our article on Connected Web Parts creation.
Debugging the Web Parts
You can debug the application, by executing the project in Debug mode. Any break points set will be executed.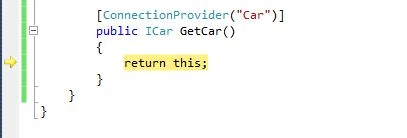
References
http://msdn.microsoft.com/en-us/library/ms469765.aspx
http://rtmgroupq8.com/en/add-image-to-sharepoint-visual-web-part
Summary
In this article we have explored the Connected Web Parts feature of SharePoint Web Parts. In real-world scenarios there could be multiple web parts communicating with each other through connected web parts. SharePoint also supports AJAX enabled web parts which provide a better communication between web parts. The attachment contains the source code of the web parts we discussed.
mohit singhPosted Jan 31, 2014, 5:56 AM
I also faced the same issue.. "Connections" option is not available in CarDisplayWebPart
Jean PaulPosted Jan 16, 2014, 12:15 PM
You a Welcome Dear Kiran! :)
Kiran Kumar TalikotiPosted Jan 16, 2014, 6:49 AM
Good Work JP,Thanks for Sharing :)
Jean PaulPosted Jun 20, 2013, 1:39 PM
Hello Durga.. Please send me your project @ jeanpaulvaATgmail.com.. i will have a look
Durga SekaranPosted Jun 20, 2013, 1:01 PM
I have followed the steps mentioned in this blog. But, there is no luck for me. How to set the attribute or interface properly in my code. I need to find out issue in my code. Please give me some clue to find out the solution.
Durga SekaranPosted Jun 20, 2013, 12:55 PM
Hi, Nice Article. I implemented the same code in my end. But, I am facing the same issue which Praveen faced it. "Connections" option is not available in CarDisplayWebPart. Please suggest me the solution
Jean PaulPosted Jan 15, 2013, 6:38 AM
Thank You Rojin. Great to hear that everything worked good.. Usually connected web parts, a simple step missing will end with non-working web parts.
Rogin RobertPosted Jan 15, 2013, 5:15 AM
Good work Jean. It worked perfect for me when i used the code attached in the site.
pinaki bhattacharyyaPosted Nov 18, 2012, 2:01 AM
Thanks a lot..
Jean PaulPosted Jun 10, 2012, 2:16 PM
Then it means that the Interface or Attribute are not properly set. Can you please try using the article source code?
praveen kumarPosted Jun 10, 2012, 2:05 PM
Hi i implemented the same program, but connections option is not there for CarDisplayWebPart. when i check the webpart settings connections are allowed. what could be the reason? Please let me know. Anyhow thanks for sharing nice article
Jean PaulPosted May 30, 2012, 2:51 PM
Thanks a lot my friend!!
Vijay PrativadiPosted May 30, 2012, 2:45 PM
Good Work Jean!!