

Introduction
Before reading this article, please go through the following articles:
- Part 1: jQuery UI Demystified: Part 1
- Part 2: jQuery UI Demystified: Part 2
In this article, we will learn about jQuery effects.The following effects will be covered.
- Add Class
- Color Animation
- Effect
- Hide
- Remove Class
- Show
- Switch Class
- Toggle
- Toggle Class
In my Part 1 article we learned how to add a jQuery Widget on a HTML element. In Part 2 we learned how to add jQuery Interactions on HTML elements. Now in this part, we will complete this jQuery Demystified series. jQuery effects are very important for making a good website design. It gives your site a smooth transition and a pleasant appeal. So what are we waiting for? Let's Dive In!
Quick Synopsis of Part 2
In Part 2 we cover the jQuery interactions. We covered the following effects:

Let's move ahead now on jQuery effects.
Preparing the workspace
- Add the following code in your new HTML to make it ready for the rest of the article.
- <html>
- <head>
- <link href="http://ajax.googleapis.com/ajax/libs/jqueryui/1/themes/smoothness/jquery-ui.min.css" rel="stylesheet" type="text/css" />
- <script src="http://ajax.googleapis.com/ajax/libs/jquery/1/jquery.min.js"></script>
- <script src="http://ajax.googleapis.com/ajax/libs/jqueryui/1/jquery-ui.min.js"></script>
- <meta charset="utf-8" />
- <title>jQuery Demystified Part 3</title>
- <style>
- /* we will use this section for adding css classes */
- </style>
- </head>
- <body>
- <script>
- $(document).ready(function () {
- // We will use this for adding our jQuery
- });
- </script>
- </body>
- </html>
Working with jQuery Effects
Add Class
- Add this peice of code in the html section:
- <div class='addcls'></div>
-
Add these two classes in your style section:
- .addcls{
- width:50px;
- height:20px;
- background-color:orange;
- }
- .addclsOP{
- width:300px;
- height:80px;
- background-color:blue;
- }
Here 'addcls' is the default class and we will change it to 'addclsOP'. -
Add this in your script section:
- $(document).ready(function () {
- $(".addcls").click(function () {
- $(this).addClass("addclsOP", 1000, "easeOutBounce");
- });
- });
Here we add the "addclsOP" in the div when the user clicks on it. This changes the property of the element on which the click is performed. ".addClass" has syntax like this:
".addClass("class_to_add",duration,other_options)".

Remove Class
-
Append this in your HTML section:
- <div class="addclsOP addcls"></div>
This div has two classes "addclsOP" and "addcls". We'll remove the addclsOP on the click of the user on the second div. -
Append this code to your script section:
- $( ".addclsOP" ).click(function() {
- $( this ).removeClass( "addclsOP", 3000, "easeOutBounce" );
Here the class addclsOP is removed from the div when the user clicks on that div. The general syntax of ".removeClass" is
".removeClass("class_to_remove",duration,other_options)".
Animate
-
Append this in your HTML section:
- <div class='clrAnim'>Color Animation</div>
This div will be used to animate its color and size when the user clicks on it. -
Append this class in your style section:
- .clrAnim{
- width:300px;
- height:80px;
- background-color:pink;
- }
This is the default class on the div and its content will be changed using the ".animate" method. -
Now append this script in your script section:
- $(".clrAnim").click(function () {
- $(this).animate({
- color: "white",
- backgroundColor: "black",
- height: "160px"
- }, 1000);
- });
The syntax for ".animate" is: ".animates("options_to_animate",duration,other_options)".
Effect
-
Append this HTML snippet in your HTML:
- <div class='effectDemo'>effect Demo</div>
On this div, we will be performing various effects. -
Append this class in your Style section.
- .effectDemo{
- width:300px;
- height:80px;
- background-color:brown;
- }
-
Append this code in your script section
- $(".effectDemo").click(function () {
- $(this).effect("explode", 2000, "easeOutBounce");
- });
Here we are performing the "explode" effect on the div when the user clicks on it. We have various kinds of effects, like blind, fold, slide, pulsate and so on. The general syntax is .effect("Effect_name",duration,other_options).
Hide
-
Append this snippet in your HTML
- <div class='hidecls'>Hide Demo</div>
We will hide this div when the user clicks on it. -
Append this class in your Style section:
- .hidecls{
- width:300px;
- height:80px;
- background-color:yellow;
- }
-
Append this code in your script section:
- $(".hidecls").click(function () {
- $(this).effect( 2000);
- });
Here we are performing the "Hide" effect on the div when the user clicks on it. The general syntax is ".hide(["Effect_name"],[options],[duration],[callback])." Everything that is in [] is optional, so simply ".hide()" will also work.

Switch Class
-
Append this snippet in your HTML
- <div class="switchDemo">Switch CLass Demo</div>
On this div, we will perform various effects. -
Append this class in your Style section:
- .switchDemo{
- width:300px;
- height:80px;
- background-color:olive;
- }
-
Append this code to your script section:
- $(".switchDemo").click(function () {
- $(this).switchClass("switchDemo", "clrAnim", 3000, "easeOutBounce");
- });
Here we are performin the "switchClass" effect on the div when the user clicks on it. The general syntax is ".switchClass("Current_class","New_class",[duration],[callback])". The callback event occurs when the switching is completed.
Toggle Class
-
Append this snippet to your HTML:
- <div id="tc" class="td">Toggle demo</div>
On this div, we will be performing the Toggle class effect between the "td" class and "td2" class. -
Append this class in your Style section:
- .td{
- width:300px;
- height:80px;
- background-color:green;
- }
- .td2{
- width:300px;
- height:160px;
- background-color:black;
- }
These two classes will be switched on click of the user.
-
Append this code in your script section
- $( "#tc" ).click(function() {
- $( this).toggleClass( "td2",1000);
- });
Here we are performing the "toggleClass" effect on the div when the user clicks on it. The general syntax is ".toggleClass("Class_to_switch_with",[duration],[easing_type],[callback])." The class will be added on the div if it's not present and if it's present then it will be removed.

Toggle
-
Append this snippet to your HTML:
- <div id="container">
- <div id="slider">Toggle demo</div>
- </div>
On this div, we will be adding a sliding effect using the toggle. -
Append this class in your Style section.
- #slider{
- width: 180px;
- height: 100px;
- background: #ccc;
- }
- #container{
- height:100px;
- }
These two classes are the design of our slider.
-
Append this code in your script section
- $("#container").click(function () {
- $("#slider").toggle("slide", { direction: "left" }, 1000);
- });
Here we are performing the "toggle" effect on the div when the user clicks on it. It looks like a slider. The general syntax is ".toggle("effect_name",[options],[duration],[callback])".
Summary
So in this article, we learned about jQuery effects and how to use them. We saw various effects that can be used to create various useful anim effects on a website. Now the jQuery is completed. It is demystified now. Your foundation is made, now you can start using it on your website and make it more attractive. If you are stuck somewhere then don't worry, the C#-forums are there. You can also have a look at jQuery UI API to check out the various options available for widgets.
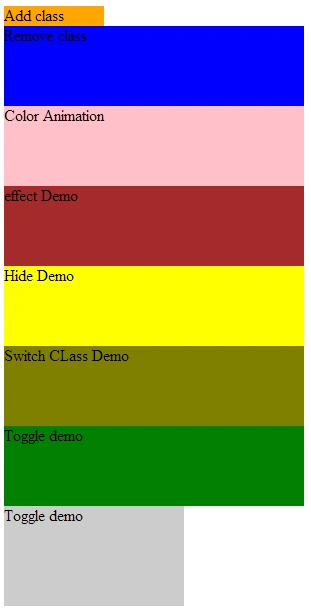
Final output
Don't forget to comment. :)
Join the conversation! Your thoughts help the community grow.