
In this article we are going to look at how we can create Triggers in
Silverlight and what do they offer for us.
First Step:
Install Blend 4 SDK from the Microsoft Site.
http://www.microsoft.com/download/en/details.aspx?displaylang=en&id=3062
The Dll we require to implement the triggers is
Microsoft.Expression.Interactions.dll.
Please find the screenshot below :
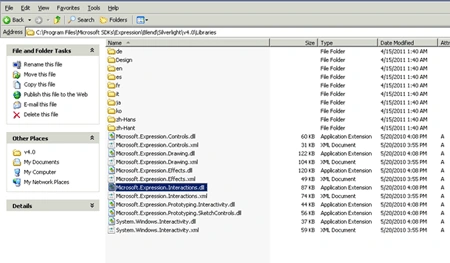
Created a new Silverlight Project and named it as SilverlightTriggers .
Add a reference to the Dll Microsoft.Expression.Interactions.dll .
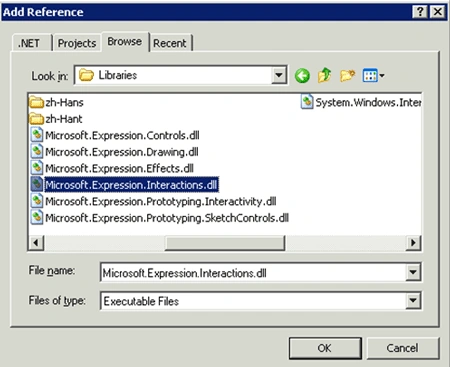
Lets create a simple trigger to animate the border of the Button .
No code Behind is required . All the work has to be done on the Xaml .
Lets go one step at a time .
Add a Button to the Grid .
<Grid
x:Name="LayoutRoot"
Background="White">
<Button
Content="Button"
Height="87"
HorizontalAlignment="Left"
Margin="219,113,0,0"
Name="Btn"
VerticalAlignment="Top"
Width="148">
</Button>
</Grid>
Add the namespaces to the Button Tag .
<Grid
x:Name="LayoutRoot"
Background="White">
<Button
xmlns:interactivity="http://schemas.microsoft.com/expression/2010/interactivity"
xmlns:interactions="http://schemas.microsoft.com/expression/2010/interactions"
Content="Button"
Height="87"
HorizontalAlignment="Left"
Margin="219,113,0,0"
Name="Btn"
VerticalAlignment="Top"
Width="148">
</Button>
</Grid>
Add the StoryBoard in the Resource Tag of the Button .
<Grid
x:Name="LayoutRoot"
Background="White">
<Button
xmlns:interactivity="http://schemas.microsoft.com/expression/2010/interactivity"
xmlns:interactions="http://schemas.microsoft.com/expression/2010/interactions"
Content="Button"
Height="87"
HorizontalAlignment="Left"
Margin="219,113,0,0"
Name="Btn"
VerticalAlignment="Top"
Width="148">
<Button.Resources>
<Storyboard
x:Key="Story"
Duration="200"
Storyboard.TargetName="Btn"
Storyboard.TargetProperty="BorderBrush">
<ObjectAnimationUsingKeyFrames>
<DiscreteObjectKeyFrame
KeyTime="0:0:0.1"
Value="Yellow"
/>
<DiscreteObjectKeyFrame
KeyTime="0:0:0.2"
Value="{x:Null}"
/>
</ObjectAnimationUsingKeyFrames>
</Storyboard>
</Button.Resources>
</Button>
</Grid>
Finally Add the Trigger . I have added a Simple Trigger which performs the play
operation on the storyboard .
<Grid
x:Name="LayoutRoot"
Background="White">
<Button
xmlns:interactivity="http://schemas.microsoft.com/expression/2010/interactivity"
xmlns:interactions="http://schemas.microsoft.com/expression/2010/interactions"
Content="Button"
Height="87"
HorizontalAlignment="Left"
Margin="219,113,0,0"
Name="Btn"
VerticalAlignment="Top"
Width="148">
<Button.Resources>
<Storyboard
x:Key="Story"
Duration="200"
Storyboard.TargetName="Btn"
Storyboard.TargetProperty="BorderBrush">
<ObjectAnimationUsingKeyFrames>
<DiscreteObjectKeyFrame
KeyTime="0:0:0.1"
Value="Yellow"
/>
<DiscreteObjectKeyFrame
KeyTime="0:0:0.2"
Value="{x:Null}"
/>
</ObjectAnimationUsingKeyFrames>
</Storyboard>
</Button.Resources>
<interactivity:Interaction.Triggers>
<interactivity:EventTrigger
EventName="Click">
<interactions:ControlStoryboardAction
Storyboard="{StaticResource
Story}"
ControlStoryboardOption="Play"
/>
</interactivity:EventTrigger>
</interactivity:Interaction.Triggers>
</Button>
</Grid>
Output
The Button is displayed as shown below :
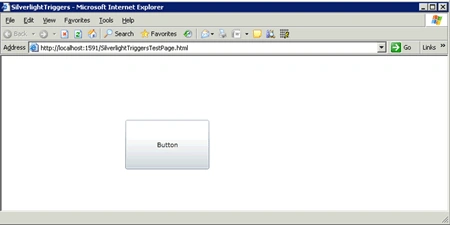
Click on it and you can see it animate . Well you can animate it differently by
changing the storyboard . This is just a illustration . Happy Coding .
chetan vaghelaPosted Nov 23, 2011, 12:47 AM
excellent stuff regarding silverlight http://soft-engineering.blogspot.com
Angelina ErinPosted Aug 11, 2011, 12:13 AM
Nice Article..........