

Introduction
In
Part 1 of this article series we have discussed how to Display Data with
FormView Control. Now in this article we will discuss how to use Paging in
FormView Control.
Paging with FormView Control
We can enable users to navigate through a set of data items by enabling paging.
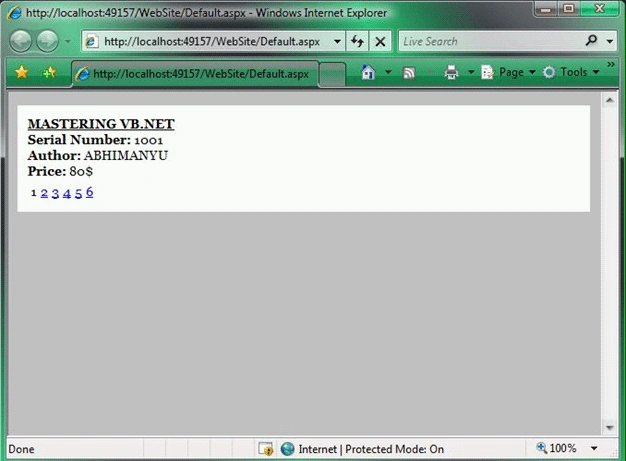
We can allow the FormView control to automatically render the paging interface
or we can use a PagerTemplate to customize the paging interface. The page given
below automatically will render an additional row that contains buttons for
navigating between data items.
<%@
Page Language="VB"
%>
<!DOCTYPE html PUBLIC "-//W3C//DTD XHTML 1.0 Transitional//EN" "http://www.w3.org/TR/xhtml1/DTD/xhtml1-transitional.dtd">
<script runat="server">
</script>
<html
xmlns="http://www.w3.org/1999/xhtml">
<head
id="Head1"
runat="server">
<style
type="text/css">
html
{
background-color:silver;
}
#content
{
margin:auto;
width:400px;
padding:10px;
background-color:white;
font:14px
Georgia,Serif;
}
a
{
color:blue;
}
</style>
<title></title>
</head>
<body>
<form
id="form1"
runat="server">
<div id="content">
<asp:FormView
id="frmBooks"
DataSourceID="SqlDataSource1"
AllowPaging="true"
Runat="server">
<ItemTemplate>
<b><u><%#
Eval("TITLE")%></u></b>
<br
/>
<b>Serial
Number:</b>
<%#
Eval("ID")%>
<br
/>
<b>Author:</b>
<%#
Eval("AUTHOR")%>
<br
/>
<b>Price:</b>
<%#
Eval("PRICE")%>
</ItemTemplate>
</asp:FormView>
<asp:SqlDataSource
ID="SqlDataSource1"
runat="server"
ConnectionString="<%$
ConnectionStrings:DatabaseConnectionString1 %>"
ProviderName="<%$
ConnectionStrings:DatabaseConnectionString1.ProviderName
%>"
SelectCommand="SELECT
[ID], [TITLE], [AUTHOR], [PRICE] FROM [BOOK_LIST]">
</asp:SqlDataSource>
</div>
</form>
</body>
</html>
In above code, FormView included an AllowPaging property that is assigned the
value True. Adding this property generates the paging interface automatically.
Unlike the DetailsView and GridView controls, the FormView control does not
support AJAX.
We can customize the appearance of the automatically rendered paging interface
with the PagerSettings property, which exposes the PagerSettings class. The
PagerSettings class supports the following properties:
- FirstPageImageUrl: Enables us to display an image for the first page link.
- FirstPageText: Enables us to specify the text for the first page link.
- LastPageImageUrl: Enables us to display an image for the last page link.
- LastPageText: Enables us to specify the text for the last page link.
- Mode: Enables us to select a display mode for the pager user interface. Possible values are NextPrevious, NextPreviousFirstLast, Numeric, and NumericFirstLast.
- NextPageImageUrl: Enables us to specify the text for the next page link.
- NextPageText: Enables us to specify the text for the next page link.
- PageButtonCount: Enables us to specify the number of page number links to display.
- Position: Enables us to specify the position of the paging user interface. Possible values are Bottom, Top, TopAndBottom.
- PreviousPageImageUrl: Enables us to display an image for the previous page link.
- PreviousPageText: Enables us to specify the text for the previous page link.
- Visible: Enables us to hide the paging user interface.
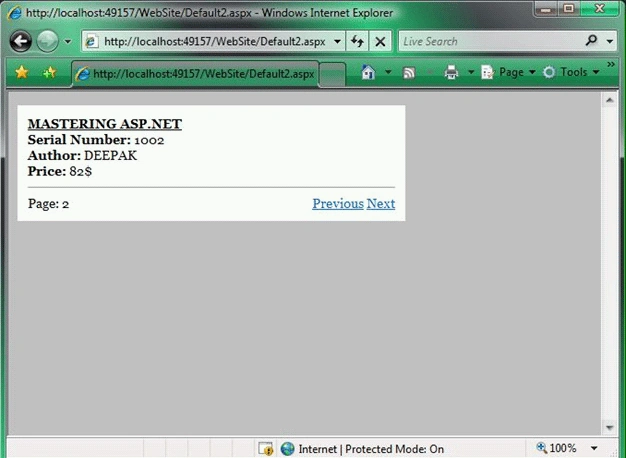
If we need to customize the appearance of the
paging interface completely, then we can create a PagerTemplate. The page given
below uses the PagerTemplate to create a custom paging interface. The
PagerTemplate displays the current page number. It also contains buttons for
navigating to the previous and next page.
<%@
Page Language="VB"
%>
<!DOCTYPE html PUBLIC "-//W3C//DTD XHTML 1.0 Transitional//EN" "http://www.w3.org/TR/xhtml1/DTD/xhtml1-transitional.dtd">
<script runat="server">
</script>
<html
xmlns="http://www.w3.org/1999/xhtml">
<head
id="Head1"
runat="server">
<style
type="text/css">
html
{
background-color:silver;
}
#content
{
margins:auto;
width:400px;
padding:10px;
background-color:white;
font:14px
Georgia,Serif;
}
.frmBooks
{
width:100%;
}
</style>
<title></title>
</head>
<body>
<form
id="form1"
runat="server">
<div
id="content">
<asp:FormView
id="frmBooks"
DataSourceID="SqlDataSource1"
AllowPaging="true"
CssClass="frmBooks"
Runat="server">
<ItemTemplate>
<b><u><%#
Eval("Title")
%></u></b>
<br
/>
<b>Serial
Number:</b>
<%#
Eval("ID")%>
<br
/>
<b>Author:</b>
<%#
Eval("AUTHOR")%>
<br
/>
<b>Price:</b>
<%#
Eval("PRICE")%>
<br
/>
</ItemTemplate>
<PagerTemplate>
<hr
/>
<div
style="float:left">
Page: <%#
frmBooks.PageIndex + 1%>
</div>
<div
style="float:right;white-space:nowrap">
<asp:LinkButton
id="lnkPrevious"
Text="Previous"
CommandName="Page"
CommandArgument="Prev"
Runat="server"
/>
<asp:LinkButton
id="lnkNext"
Text="Next"
CommandName="Page"
CommandArgument="Next"
Runat="server"
/>
</div>
</PagerTemplate>
</asp:FormView>
<asp:SqlDataSource
ID="SqlDataSource1"
runat="server"
ConnectionString="<%$
ConnectionStrings:DatabaseConnectionString1 %>"
ProviderName="<%$
ConnectionStrings:DatabaseConnectionString1.ProviderName
%>"
SelectCommand="SELECT
[ID], [TITLE], [AUTHOR], [PRICE] FROM [BOOK_LIST]">
</asp:SqlDataSource>
</div>
</form>
</body>
</html>
In above code, each button contained in the PagerTemplate has both a CommandName
and CommandArgument property. The CommandName is set to the value Page. The
CommandArgument specifies a particular type of paging operation.
We can use the following values for the CommandArgument property:
- First Navigates to the first page
- Last Navigates to the last page
- Prev Navigates to the previous page
- Next Navigates to the next page
- Number Navigates to a particular page number
But we have only used Next and Previous in above
example.
Note: Continue in Next Part.
HAVE A GREAT CODING!
Join the conversation! Your thoughts help the community grow.