

Description: One difference between the full ASP.NET MVC 3 Web Application template and the ASP.NET MVC 3 Empty Web Application template is that the empty template doesn't include an Account Controller. That means you have to do your entire customization login form authentication for user and role.
Please see my articles about customizing Login form authentication.
Article 1
Article 2
But if you want to do Membership and Authorization by system account then we have to use ASP.NET MVC 3 Web Application template.
Step 1:
Create a New ASP.NET MVC 3 project named "Membership" just like Figure 1. Click Ok.
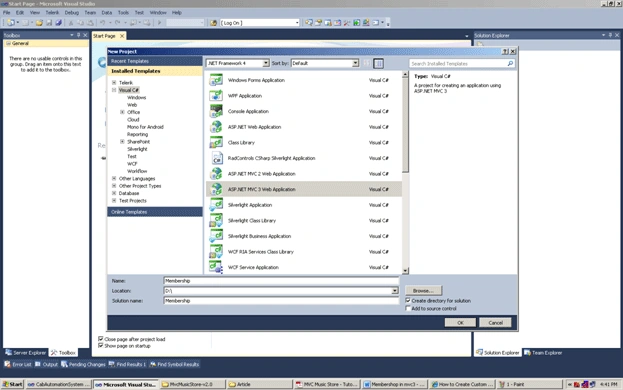
Figure 1:
Step 2:
After Clicking "Ok" you will find a Window where you have to choose Project Type
- Empty
- Internet application
If you choose "Empty" project type then the project will not have by default code for membership roles setting.
If you choose "Internet application" then you will see by default the account controller class and model class created. And you will have all the code needed for membership and roles.
Select the "Internet application" project type and choose the default view engine Razor just like Figure 2:
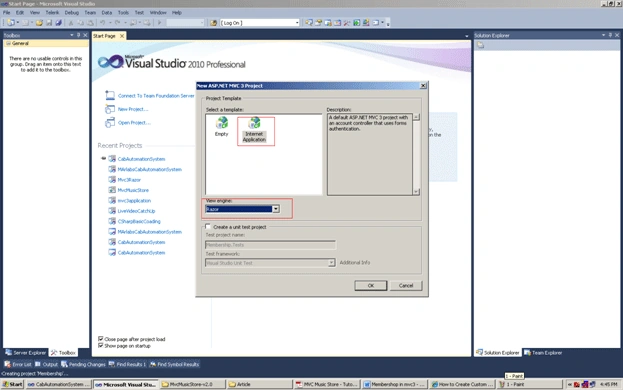
Figure 2:
Step 3:
When you click Ok finally you will see the "membership" project having "accountcontroller" under the "Controller" folder and the "accountmodel" under the model folder. You will see that account login related Views are also created under the "views" folder Just like Figure 3.
This will be created automatically because we choose the project type "Internet" application.
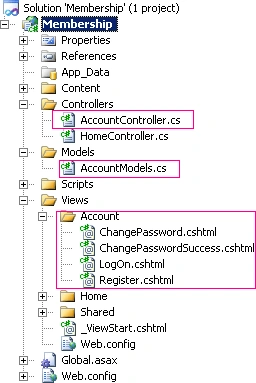
Figure 3:
Step 4:
Before we require Authorization in our website, we'll need to create a user with access. The easiest way to create a user is to use the built-in ASP.NET Configureuration website.
Click the ASP.NET configuration website by clicking the icon in the Solution Explorer just like Figure 4 marked in red.
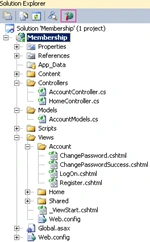
Figure 4:
This will launch a configuration website.
Step 5:
Click the Security tab on the home screen, after that click the "Enable roles" link in the center of the screen just like Figure 5 and Figure 6:
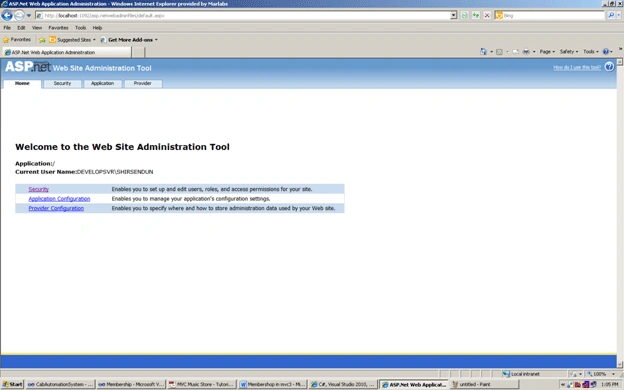
Figure 5:
Step 6:
Click the "Create or Manage roles" like Figure 7 marked in red.
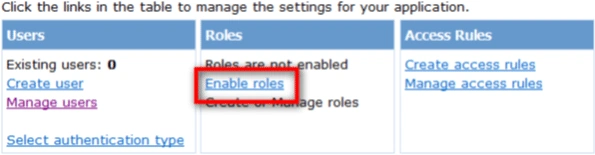
Figure 6:
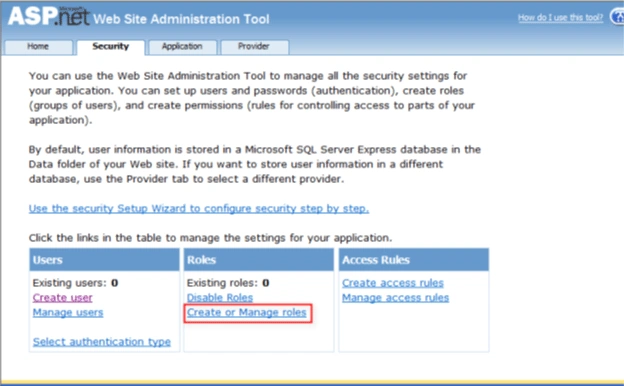
Figure 7
Step 7:
Now enter "Administrator" as the role name textbox and after that press the Add Role button.
Step 8:
Click the Back button then after that on the left side click on the Create user link. Just like Figure 8.
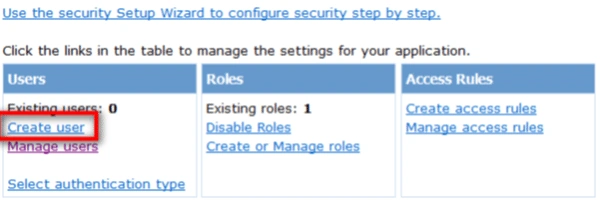
Figure 8:
Step 9:
After that fill in the user information fields on the left side box by giving your required credentials just like Figure 9.Check the administrator
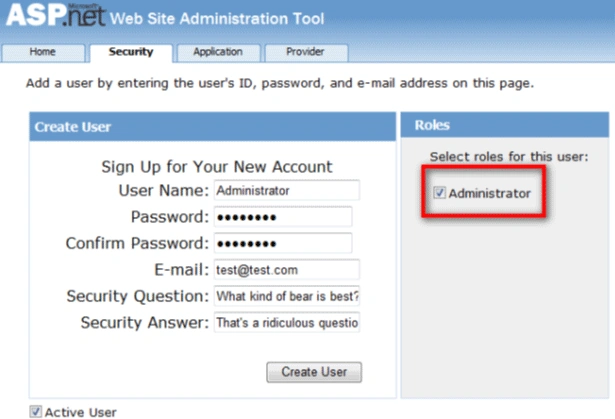
Figure 9:
After clicking the "createuser" button you will see a message saying "Your account has been successfully created.".
Just like Figure 10:
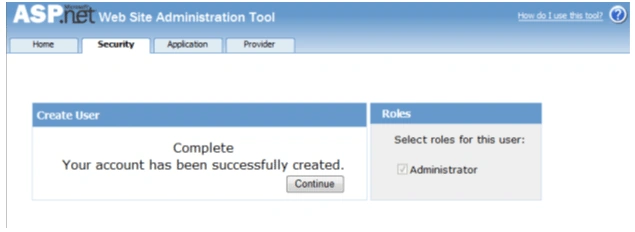
Figure 10
Conclusion:
So in this article we have learned how to create the settings of membership in ASP.Net MVC 3 using ASP.Net web configuration setting.
SY CaiPosted Jun 10, 2011, 2:51 AM
Hi Shirsendu: I write the Web.Config like below, and I can visit Account/LogOn, but can't visit Account/Register. Why ? <location path="~/Account/Register"> <system.web> <authorization> <allow users="*"/> </authorization> </system.web> </location> <system.web> <compilation debug="true" targetFramework="4.0"> <assemblies> <add assembly="System.Web.Abstractions, Version=4.0.0.0, Culture=neutral, PublicKeyToken=31BF3856AD364E35" /> <add assembly="System.Web.Helpers, Version=1.0.0.0, Culture=neutral, PublicKeyToken=31BF3856AD364E35" /> <add assembly="System.Web.Routing, Version=4.0.0.0, Culture=neutral, PublicKeyToken=31BF3856AD364E35" /> <add assembly="System.Web.Mvc, Version=3.0.0.0, Culture=neutral, PublicKeyToken=31BF3856AD364E35" /> <add assembly="System.Web.WebPages, Version=1.0.0.0, Culture=neutral, PublicKeyToken=31BF3856AD364E35" /> </assemblies> </compilation> <authentication mode="Forms"> <forms loginUrl="~/Account/LogOn" timeout="2880" /> </authentication> <authorization> <deny users="?" /> <allow users="*" /> </authorization> <membership> <providers> <clear/> <add name="AspNetSqlMembershipProvider" type="System.Web.Security.SqlMembershipProvider" connectionStringName="ApplicationServices" enablePasswordRetrieval="false" enablePasswordReset="true" requiresQuestionAndAnswer="false" requiresUniqueEmail="false" maxInvalidPasswordAttempts="5" minRequiredPasswordLength="6" minRequiredNonalphanumericCharacters="0" passwordAttemptWindow="10" applicationName="/" /> </providers> </membership> <profile> <providers> <clear/> <add name="AspNetSqlProfileProvider" type="System.Web.Profile.SqlProfileProvider" connectionStringName="ApplicationServices" applicationName="/" /> </providers> </profile> <roleManager enabled="false"> <providers> <clear/> <add name="AspNetSqlRoleProvider" type="System.Web.Security.SqlRoleProvider" connectionStringName="ApplicationServices" applicationName="/" /> <add name="AspNetWindowsTokenRoleProvider" type="System.Web.Security.WindowsTokenRoleProvider" applicationName="/" /> </providers> </roleManager> <pages> <namespaces> <add namespace="System.Web.Helpers" /> <add namespace="System.Web.Mvc" /> <add namespace="System.Web.Mvc.Ajax" /> <add namespace="System.Web.Mvc.Html" /> <add namespace="System.Web.Routing" /> <add namespace="System.Web.WebPages"/> </namespaces> </pages> </system.web> Thanks !
Former memberPosted Apr 7, 2011, 6:40 AM
Thanks for sharing a nice article. Having said that there is one place you can improve and that is in Image. I too was doing the same mistake and Images did not come clear. I suggest you how to copy --paste Image 1. Press Ctrl + Print Screen ..... 2. Paste in MSPAINT ... 3. selcet the required area of image need to be highligted .... 4. Cut that and paste on word document... Thanks and again a very nice article