

This article explains how to upload a file in a Document Library.
In SharePoint, library files are uploaded using the Add method on the Files property of a SPWeb like this:
SPContext.Current.Web.Files.Add(docLibrary.RootFolder.Url + "/" + fileUpload.FileName, contents);
I have created a webpart that uploads a file provided by the user to a SharePoint library.
Use the following procedure to create a sample of doing it.
1. Create an empty SharePoint project and add a webpart. 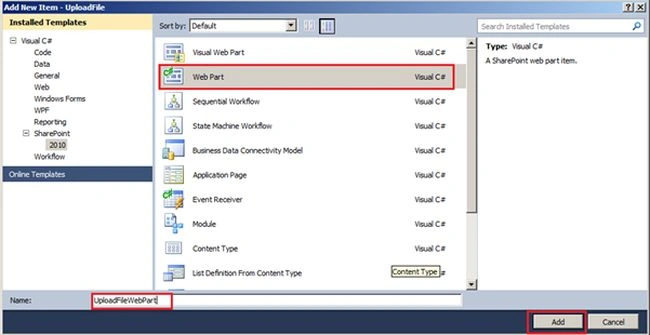
2. Modify the code as below:
- using System;
- using System.ComponentModel;
- using System.Web;
- using System.Web.UI;
- using System.Web.UI.WebControls;
- using System.Web.UI.WebControls.WebParts;
- using Microsoft.SharePoint;
- using Microsoft.SharePoint.WebControls;
- using System.IO;
- namespace UploadFile.UploadFileWebPart
- {
- [ToolboxItemAttribute(false)]
- public class UploadFileWebPart : WebPart
- {
- private FileUpload fileUpload = new FileUpload();
- private Button btnUpload = new Button();
- private string docLibrary;
- [WebBrowsable, Personalizable]
- public string DocumentLibrary
- {
- Get
- {
- return docLibrary;
- }
- Set
- {
- docLibrary = value;
- }
- }
- protected override void CreateChildControls()
- {
- Controls.Add(fileUpload);
- Controls.Add(btnUpload);
- btnUpload.Text = "Upload";
- btnUpload.Click += new EventHandler(OnUploadClick);
- }
- void OnUploadClick(object sender, EventArgs e)
- {
- SPList docLibrary;
- Try
- {
- docLibrary = ValidateList();
- }
- catch (Exception ex)
- {
- Controls.Add(new LiteralControl(ex.Message));
- return;
- }
- Stream fStream = fileUpload.PostedFile.InputStream;
- byte[] contents = new byte[fStream.Length];
- fStream.Read(contents, 0, (int)fStream.Length);
- fStream.Close();
- SPSecurity.CatchAccessDeniedException = false;
- Try
- {
- SPContext.Current.Web.Files.Add(docLibrary.RootFolder.Url + "/" + fileUpload.FileName, contents);
- }
- catch (UnauthorizedAccessException)
- {
- Controls.Add(new LiteralControl("You are not authorized to upload files to the document library"));
- }
- }
- private SPList ValidateList()
- {
- if (string.IsNullOrEmpty(DocumentLibrary))
- {
- throw new Exception("Please edit the webpart and fill the Document Library property!");
- }
- if (!fileUpload.HasFile)
- {
- throw new Exception("Please select a file to upload.");
- }
- Try
- {
- return SPContext.Current.Web.Lists[DocumentLibrary];
- }
- catch (ArgumentException)
- {
- throw new Exception("Library not found!");
- }
- }
- }
- }
3. Build the solution and deploy.
4. Go to the Site Page library and create a page as in the following: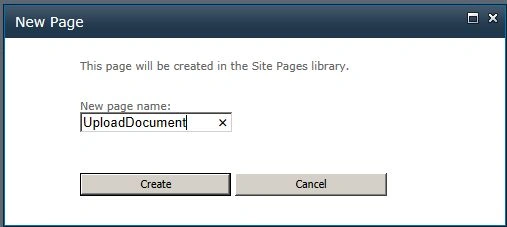
5. Add the Webpart.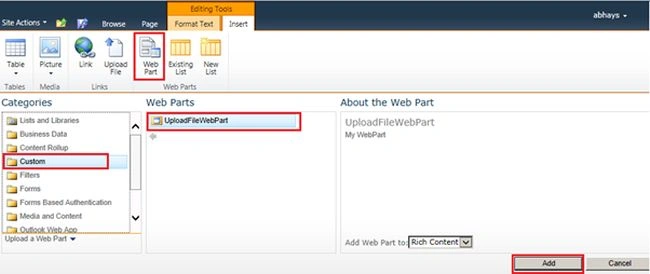
6. Try to upload a document in the library. You will get the error as below: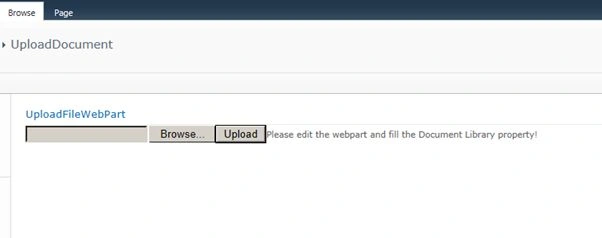
7. Edit the webpart and fill in the name of the Document Library where you want to add the document through this page's webpart.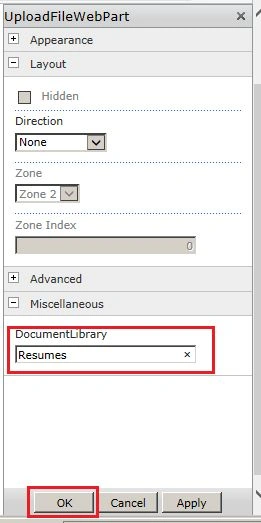
8. Now upload a file.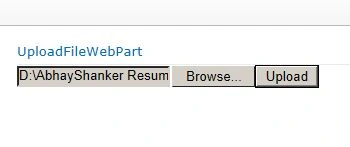
9. Navigate to the Document Library. You will find your uploaded document in the library.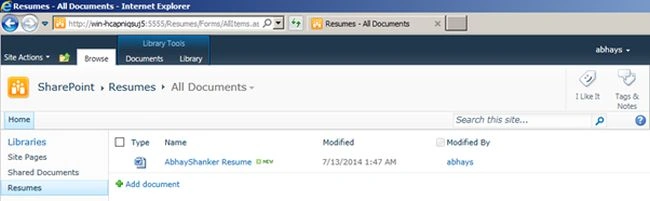
Conclusion
This article explained how to upload a document in a Document Library using a custom webpart property.
Sirisha KPosted Mar 19, 2016, 3:32 PM
good step wise explanation with diagrams and source code
Sirisha KPosted Mar 19, 2016, 3:31 PM
In this articles how figures be added