

Introduction
The Camera object provides the access to the Camera's default pictures or application. There are two type of methods that we use in Camera objects; they are:
Camera.getPicture
Camera.cleanup
In this article I will explain the Camera.getPicture method in details. The Camera.getPicture method can be used to get or retrieve the pictures from the camera and we can also take the picture using the camera. The picture is returned either as an URL of the image or the base64 encoded string.
navigator.camera.getPicture( cameraSuccess, cameraError, [ cameraOptions ] );
First of all I will explain the parameters of getPicture that are cameraSuccess, cameraError and cameraOptions.- CameraSuccess
This function shows the success of the callback function which means that if the picture or image is captured successfully then this provides the image data.
- CameraError
This shows the error or onError callback function that gives an error. It takes as the parameter the Error Message.
function onFail(message) {
//Error message
}
- CameraOptions
These are the optional parameters to customize the camera setting. Some of the options are:
Options
Descriptions
Quality Represents the quality of the image, range is [0,100] number. DestinationType The format of the return value that is defined in navigator.camera.DestinationType (number) SourceType Set the source of the picture. Defined in nagivator.camera.PictureSourceType (number) allowEdit Allow simple editing of image before selection. (boolean) encodingType The encoding of the returned image file. Defined in navigator.camera.EncodingType (number) targetWidth Width in pixels to scale image. Must be used with targetHeight. Aspect ratio is maintained.(number) targetHeight Height in pixels to scale image. Must be used with targetWidth. Aspect ratio is maintained. (number) mediaType Set the type of media to select from. Only works when PictureSourceType is PHOTOLIBRARY or SAVEDPHOTOALBUM. Defined in nagivator.camera.MediaType (number) correctOrientation Rotate the image to correct for the orientation of the device during capture. (boolean) saveToPhotoAlbum Save the image to the photo album on the device after capture. (boolean) popoverOptions iOS only options to specify popover location in iPad.
function onPhotoDataSuccess(imageData) {
//Do something for image
}
The parameter that we use for CameraSuccess is imageData.ImageData to return the image as an URL of the image or the of Base64 encoded imageData, depanding on the third attribute of the Camera.getPicture method.
Example
function onPhotoDataSuccess(imageData) {
var smallImage = document.getElementById('smallImage');
smallImage.src = "data:image/jpeg;base64," + imageData;
}
The Function camera.getPicture opens the mobile device's default camera application so that we can take a picture if the following condition is satisfied. Once the picture is taken the camera application closes and the picture is saved.
(if Camera.sourceType = Camera.PictureSourceType.CAMERA,
But if we want to choose from the camera application then the conditions are:
If Camera.sourceType = Camera.PictureSourceType.PHOTOLIBRARY or Camera.PictureSourceType.SAVEDPHOTOALBUM,
The return value will be sent to the cameraSuccess parameter of the getPicture mathod.
- A
Stringcontaining the Base64 encoded photo image (default). - A
Stringrepresenting the image file location on local storage.
The supported platforms of this method are:
- Android
- Blackberry WebWorks (OS 5.0 and higher)
- iOS
- Windows Phone 7 ( Mango )
- Bada 1.2
- webOS
Now let's develop the application. For this the following steps are followed:
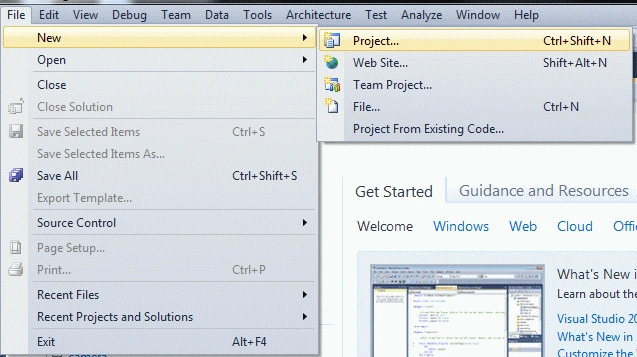
Step 1: Open Visual Studio and then select File -> New -> Project.
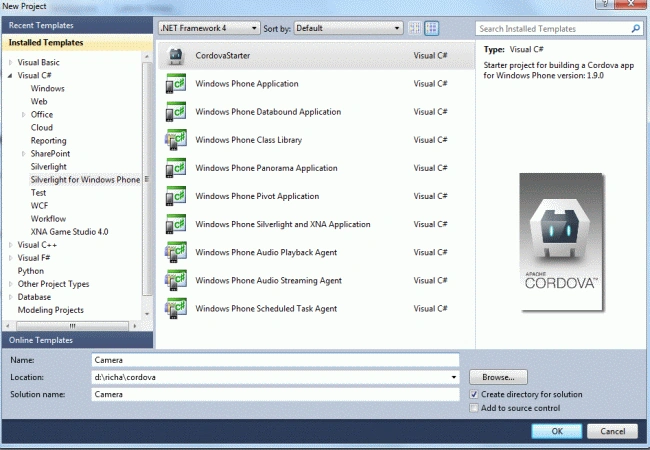
Step 2: A window is shown; from this select Silverlight for Window Phone from Visual C#; now select CordovaStarter and name the application "camera".
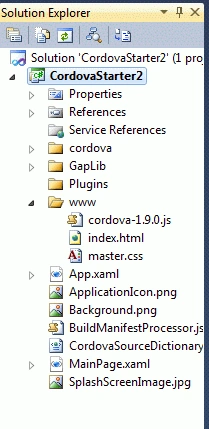
Step 3: In the Solution Explorer, there is a folder named www; inside this are the HTML, JavaScript and CSS files.
Step 4: Inside the index.html, write the code as:
<!DOCTYPE html>
<html>
<head>
<meta name="viewport" content="width=device-width, height=device-height, initial-scale=1.0, maximum-scale=1.0, user-scalable=no;" />
<meta http-equiv="Content-type" content="text/html; charset=utf-8" />
<title>Camera Example</title>
<link rel="stylesheet" href="master.css" type="text/css" media="screen" title="no title"
charset="utf-8" />
<script type="text/javascript" charset="utf-8" src="cordova-1.9.0.js"></script>
<script type="text/javascript" charset="utf-8" src="javascript.js"></script>
</head>
<body>
<button onclick="capturePhoto();">
Capture Photo</button><br />
<button onclick="capturePhotoEdit();">
Capture Editable Photo</button><br />
<button onclick="getPhoto(pictureSource.PHOTOLIBRARY);">
From Photo Library</button><br />
<button onclick="getPhoto(pictureSource.SAVEDPHOTOALBUM);">
From Photo Album</button><br />
<img style="display: none; width: 60px; height: 60px;" id="smallImage" src="" alt="" />
<img style="display: none;" id="largeImage" src="" alt="" />
</body>
</html>
Step 4: Inside the www folder add the new file by right-clicking on the folder then Add -> New item.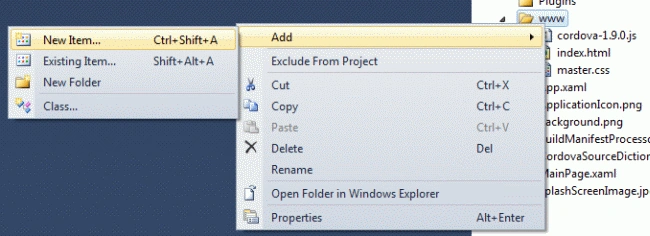
step 4 : Now select the text file and give it the name "javascript.js":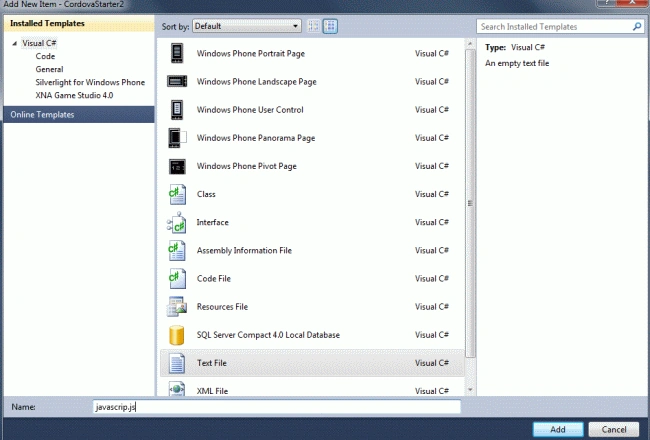
Step 5 : Now add the following code in the javascript.js file:
var pictureSource; // picture source
var destinationType; // sets the format of returned value
// Wait for Cordova to connect with the device
document.addEventListener("deviceready", onDeviceReady, false);
// Cordova is ready to be used!
function onDeviceReady() {
pictureSource = navigator.camera.PictureSourceType;
destinationType = navigator.camera.DestinationType;
}
// Called when a photo is successfully retrieved
function onPhotoDataSuccess(imageData) {
// Uncomment to view the base64 encoded image data
// console.log(imageData);
// Get image handle
var smallImage = document.getElementById('smallImage');
// Unhide image elements
smallImage.style.display = 'block';
// Show the captured photo
// The inline CSS rules are used to resize the image
smallImage.src = "data:image/jpeg;base64," + imageData;
}
// Called when a photo is successfully retrieved
function onPhotoURISuccess(imageURI) {
// Uncomment to view the image file URI
//console.log(imageURI);
// Get image handle
var largeImage = document.getElementById('largeImage');
// Unhide image elements
largeImage.style.display = 'block';
// Show the captured photo
// The inline CSS rules are used to resize the image
largeImage.src = imageURI;
}
// A button will call this function
function capturePhoto() {
// Take picture using device camera and retrieve image as base64-encoded string
navigator.camera.getPicture(onPhotoDataSuccess, onFail, { quality: 50,
destinationType: destinationType.DATA_URL
});
}
// A button will call this function
function capturePhotoEdit() {
// Take picture using device camera, allow edit, and retrieve image as base64-encoded string
navigator.camera.getPicture(onPhotoDataSuccess, onFail, { quality: 20, allowEdit: true,
destinationType: destinationType.DATA_URL
});
}
// A button will call this function
function getPhoto(source) {
// Retrieve image file location from specified source
navigator.camera.getPicture(onPhotoURISuccess, onFail, { quality: 50,
destinationType: destinationType.FILE_URI,
sourceType: source
});
}
// Called if something bad happens.
function onFail(message) {
alert('Failed because: ' + message);
}
Step 6 : Run the application by pressing F5. The Window phone emulaor is then loaded.
After it is loaded then it gives output as: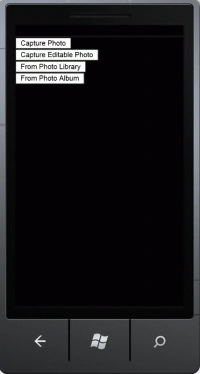
When I click on Capture Image it looks like:
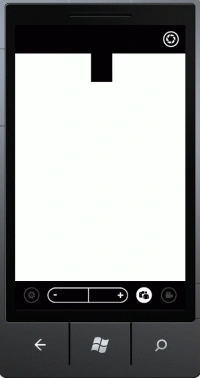
Now I captured the image by clicking on the upper-right button, then the image looks like:
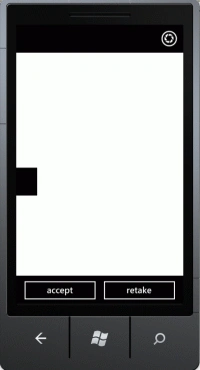
When I click on the accept button then the image is saved and when I click on the retake button the image layout will open again. In that case I will click the accept button then it looks like:
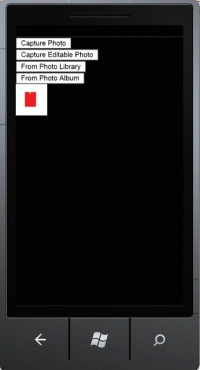
When I click on From Photo Albums the default images that are already present in the mobile application are opened like:
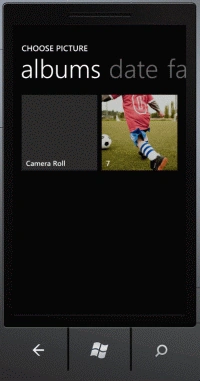
In order to open the images the images options are opened, like:
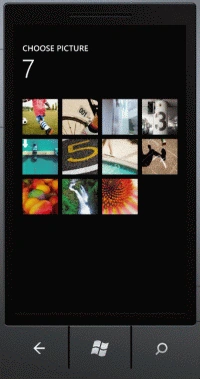
Now click on any image in order to choose the images, it looks like:
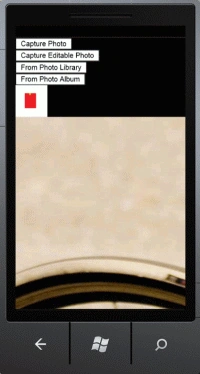
From the Photo library options we can also select the application's default images and by pressing the editable image we can edit the image.
Summary
In this article I will explain the Camera.getPicture method, its properties and parameters and how to choose the images from the existing images in the mobile application and also take the images.
SubashPosted Jul 14, 2016, 6:22 AM
Nice