

Approach 1: Web Deployment Package from VS2010

Approach 2: Publish Option from VS2010

Approach 1: Web Deployment Package
In VS2010 you can create a web Deployment
Package which you can import from IIS to deploy your web application. Follow
these steps to accomplish this:
1, Right-click you asp.net web
application project and select "package/Publish Setting".

2, Provide a few basic data in
the configuration form (you may not want to change any setting in the first
attempt). Select the project and click on properties.

3, Right-click on the project and
select "Build Deployment Package". Visual Studio will build the deployment
package (zip file) and will store it in the default location.

4, Open IIS manager(type
"inetmgr" in Run command), Right-click on the target web site (where you want
to deploy your Asp.net application), Select
deploy=>Import application

Important Note
If
your IIS doesn't have this Deploy option
then you need to install Extension of the IIS.
So that visits
this web site:
http://www.iis.net/downloads/microsoft/web-deploy Click on Install this Extension
install that
extension and you will get this message.
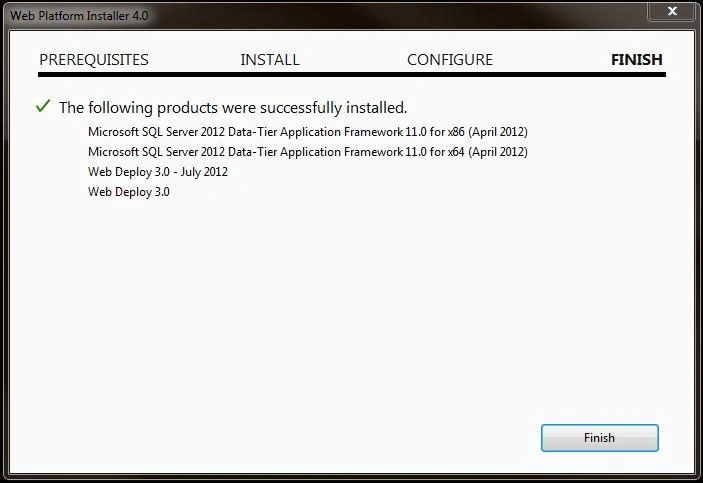
Then will be able to see the
deploy option in IIS.
5, Browse the deployment package
file (the Zip file) to select it and select "Next" buttons on wizard steps and
click the "finish" button on the
last step. You can alter the connection string in wizards steps.

6, Now Browse your website from
the IIS.
Approach 2: Publish option from VS2010
You need to create a simple website
in iis, but careful about Application Pool version if your application version
is less than 4.0 then the Pool version should be 2.0.
Then from VS2010 Right-click on
application and select publish
Option

A form will appear where you need
to provide some basic information (The target hostname and Site/Application
name). Provide this two information and (Along with, check the checkbox
"Mark as IIS application on destination") click on the
"Publish" button to publish the web application.

Service
URL: Localhost
Site/Application:
Name of Website which you have created in IIS/folder name in which you have
store application data for the website.
Select option Mark as IIS application on destination.
Click on Publish.
Important notes
Enable
the directory Browsing.
- If you get any error like 500.19 then check the version of pool or refer to this link
http://support.microsoft.com/kb/943891
- If you are getting an error that pool is not able to login then change the connection string and provide the Username and password in the connection string and set false to Integrated Security.
Example:
<add name="ConnectionString"
connectionString="Data Source=Servername;Initial Catalog=databaseName;User
ID=Userid;Password=password;Integrated Security=false" providerName="System.Data.SqlClient"
/>
Sagar Pandurang KapPosted Dec 12, 2017, 1:04 AM
Thank you .. Useful Article..Keep Posting..
Bhuvanesh MohankumarPosted May 23, 2016, 1:15 PM
Good one
Chandu KumawatPosted Dec 30, 2015, 8:50 AM
nice
Sam HobbsPosted Jun 3, 2013, 11:38 PM
I meant "now the service works".
Sam HobbsPosted Jun 3, 2013, 11:37 PM
I changed the identity for the application pool and no the service works. I hope this helps someone else in tge future.
Sam HobbsPosted Jun 3, 2013, 8:12 PM
I just now realized something that is probably relevant. My service uses a SQL Server database. I probably need to do something additional for that.
Sam HobbsPosted Jun 3, 2013, 2:48 AM
Thank you, Jay. Probably the use of Administrator privileges is important. I did not do that previously; perhaps the article needs to be revised but at least these comments should help others in the future. Unfortunately I get the same error when I try to consume the service as I get when I deploy in other ways. I created a forum thread about my situation; look at that if you want to.
Jay ParekhPosted Jun 3, 2013, 12:33 AM
@Sam Hobbs,Sir if we are on same page if you are using vs2010 than 1] In my article "Approach 2: Publish option from VS2010" second Image in that There is section Credentials are you have to Uncheck that check Box after that it will not ask any username or Password 2] Run your Visual Studio as Administrator If there is error than please let me know.
Sam HobbsPosted Jun 3, 2013, 12:02 AM
I tried using "Publish..." but it asked for userid and password. I do not know what to provide so it does not work. I will post a question in a forum.
Gaurav GuptaeditedPosted Apr 10, 2013, 4:19 AMEdited Apr 10, 2013, 4:19 AM
Good
Jay ParekhPosted Nov 20, 2012, 11:04 PM
Thank you so much Harshith,
HarshithPosted Nov 20, 2012, 5:15 AM
thank u very much .....