

Introduction
HTML is an acronym for "HyperText Markup Language" that is used to display data in a browser. HTML 5 is the advanced version of HTML. HTML 5 is used to develop 3D or multimedia applications. This is a
simple application developed with HTML 5 and XAML that helps show how to integrate the canvas on your Web application. Mainly Canvas is used to display the data or image on a browser. The HTML5 canvas element uses JavaScript to draw graphics on a web page. A canvas is a rectangular area, and you control every pixel of it. The canvas element has several methods for drawing paths, boxes,
circles, characters, and adding images.
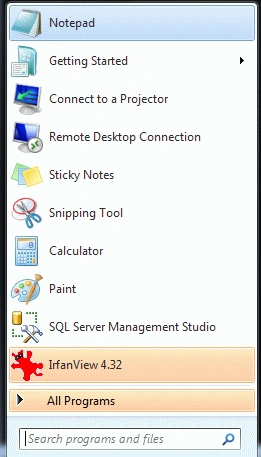
Step 1: Open Notepad
- Click->Start button->Notepad
- Give the file a name of your choice
- Click New button->save
- There the name is "Joy.html"
Step 2: Create a Folder
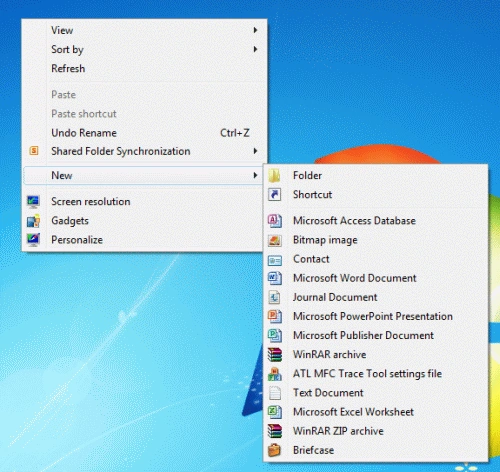
- Right-click of Desktop Screen-> New-> Folder
- Name of Folder is "Manish"
- Finally all HTML files and related sources are saved in that folder
Step 3: Canvas is used to display the graphics using HTML 5 Tools
Code
- < html >
- <
- head >
- <
- script type = "application/javascript" >
- function drawBowtie(manish, fillStyle) {
- manish.fillStyle = "rgba(200,200,200,0.3)";
- manish.fillRect(-30, -30, 60, 60);
- manish.fillStyle = fillStyle;
- manish.globalAlpha = 1.0;
- manish.beginPath();
- manish.moveTo(25, 25);
- manish.lineTo(-25, -25);
- manish.lineTo(25, -25);
- manish.lineTo(-25, 25);
- manish.closePath();
- manish.fill();
- }
- function dot(manish) {
- manish.save();
- manish.fillStyle = "black";
- manish.fillRect(-2, -2, 4, 4);
- manish.restore();
- }
- function draw() {
- var canvas = document.getElementById("canvas");
- var manish = canvas.getContext("2d");
- manish.translate(45, 45);
- manish.save();
- drawBowtie(manish, "red");
- dot(manish);
- manish.restore(); |
- manish.save();
- manish.translate(85, 0);
- manish.rotate(45 * Math.PI / 180);
- drawBowtie(manish, "YellowGreen");
- dot(manish);
- manish.restore();
- manish.save();
- manish.translate(0, 85);
- manish.rotate(135 * Math.PI / 180);
- drawBowtie(manish, "MistyRose");
- dot(manish);
- manish.restore();
- manish.save();
- manish.translate(85, 85);
- manish.rotate(90 * Math.PI / 180);
- drawBowtie(manish, "BlanchedAlmond");
- dot(manish);
- manish.restore();
- } <
- /script> < /
- head > <
- body onload = "draw()" >
- <
- canvas id = "canvas"
- width = "300"
- height = "300" > < /canvas> </body >
- <
- /html>
Output

- Open Visual Studio 2010.
- Click New-> Project-> Web site application.
- The name of the Web site is Tom.


- Now help with XAML language.
- First, we define the canvas on a web page.
Code
Output
- <Window x:Class="manish.MainWindow"
- xmlns="http://schemas.microsoft.com/winfx/2006/xaml/presentation"
- xmlns:x="http://schemas.microsoft.com/winfx/2006/xaml"
- Title="MainWindow" Height="350" Width="525">
- <Canvas>
- <Ellipse Canvas.Left="105" Canvas.Top="99" Width="58" Height="58" Fill="Cyan" />
- <Path Canvas.Left="61" Canvas.Top="28" Width="133" Height="98" Fill="Blue"
- Stretch="Fill" Data="M61,125 L193,28"/>
- <Canvas></Canvas>
- <Ellipse Fill="YellowGreen" Width="60" Height="60" Canvas.Left="177" Canvas.Top="20" Canvas.ZIndex="1" />
- <Ellipse Fill="MistyRose" Width="60" Height="60" Canvas.Left="50" Canvas.Top="43" />
- <Canvas>
- <Ellipse Fill="BlanchedAlmond" Width="60" Height="60" Canvas.Left="30" Canvas.Top="20"
- Canvas.ZIndex="1"/>
- </Canvas>
- <Ellipse Fill="Purple" Width="60" Height="60" Canvas.Left="161" Canvas.Top="43" />
- <Ellipse Fill="#FF17DE17" Width="60" Height="60" Canvas.Left="12" Canvas.Top="170"
- Canvas.ZIndex="1"/>
- <Ellipse Fill="Blue" Width="60" Height="60" Canvas.Left="39" Canvas.Top="142"/>
- <Ellipse Fill="#FFFD27FA" Width="60" Height="60" Canvas.Left="161" Canvas.Top="154"
- Canvas.ZIndex="1"/>
- <Ellipse Fill="#FF60A797" Width="60" Height="60" Canvas.Left="199" Canvas.Top="142"/>
- </Canvas>
- </Window>

- Now help with XAML language.
- First, add canvas on a page.
Code
Output
 Step 7:
Show both outputs on the same page
Step 7:
Show both outputs on the same page
- <Window x:Class="mana.MainWindow"
- xmlns="http://schemas.microsoft.com/winfx/2006/xaml/presentation"
- xmlns:x="http://schemas.microsoft.com/winfx/2006/xaml"
- Title="MainWindow" Height="350" Width="525">
- <Canvas>
- <Rectangle Canvas.Left="159" Canvas.Top="78" Width="89" Height="79" Fill="#FF1ED248" />
- <Rectangle Canvas.Left="64" Canvas.Top="12" Fill="#FFC41ED2" Height="79" Width="89" />
- <Rectangle Canvas.Left="112" Canvas.Top="48" Fill="#FF71231E" Height="79" Width="89" />
- <Rectangle Canvas.Left="238" Canvas.Top="123" Fill="Chocolate" Height="79" Width="89" />
- <Rectangle Canvas.Left="301" Canvas.Top="161" Fill="#FFC48BF8" Height="79" Width="89" />
- <Rectangle Canvas.Left="370" Canvas.Top="199" Fill="#FF8D0651" Height="79" Width="89" />
- </Canvas>
- </Window>
Code
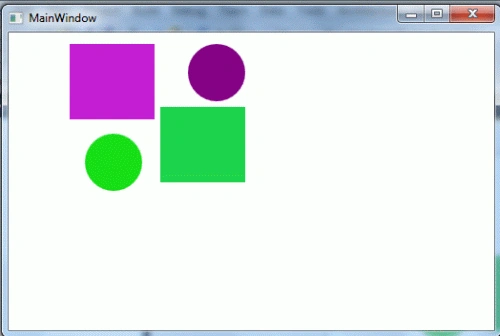
- <Window x:Class="WpfApplication1.MainWindow"
- xmlns="http://schemas.microsoft.com/winfx/2006/xaml/presentation"
- xmlns:x="http://schemas.microsoft.com/winfx/2006/xaml"
- Title="MainWindow" Height="350" Width="525">
- <Canvas>
- <Rectangle Canvas.Left="159" Canvas.Top="78" Width="89" Height="79" Fill="#FF1ED248" />
- <Rectangle Canvas.Left="64" Canvas.Top="12" Fill="#FFC41ED2" Height="79" Width="89" />
- <Ellipse Fill="Purple" Width="60" Height="60" Canvas.Left="188" Canvas.Top="12" />
- <Ellipse Fill="#FF17DE17" Width="60" Height="60" Canvas.Left="80" Canvas.Top="106"
- Canvas.ZIndex="1"/>
- </Canvas>
- </Window>
Step 8: Press Crtl+F5 to run the application
Output
Join the conversation! Your thoughts help the community grow.