

Before reading this article, please go through the following articles.
- Object-Oriented Programming Using C#: Part 1
- Object-Oriented Programming Using C#: Part 2
- Object-Oriented Programming Using C#: Part 3
- Object-Oriented Programming Using C#: Part 4
- Object-Oriented Programming Using C#: Part 5
- Object-Oriented Programming Using C#: Part 6
- Object-Oriented Programming Using C#: Part 7
- Object-Oriented Programming Using C#: Part 8
User Activity Log Using OOP
Key Concept behind the application
In this part, we will use a few OOP concepts that we learned earlier. We will create a small application. Please read my article user-activity-log-using-C-Sharp-with-sql-server/ before continuing. In this session, we will again redesign the same application using the following concepts. It will help us to understand these concepts more clearly plus how to implement them in our own applications.
- Class
- Member variables
- Read-only Properties
- Methods
- Object
- Default Constructor
- Constructor Overloading
Application Detail
Keep track of user activities in a Database Management System. Especially while working in the Client-server environment where we need to keep track of the System IP/System Name, Login ID, Timestamp, and the action performed on any of the database applications. Either the user edits any client record or does a transition etcetera.
Step 1. Create the table with the name User_Activity_Log.
CREATE TABLE [dbo].[User_Activity_Log](
      NOT NULL,
    [UAL_Timestamp] [datetime] NOT NULL,
    [UAL_Function_Performed] [nvarchar](100) NOT NULL,
    [UAL_Other_Information] [nvarchar](100) NULL,
    [UAL_IP_Address] [nvarchar](15) NOT NULL,
    PRIMARY KEY CLUSTERED
    (
        [UAL_User_Id] ASC,
        [UAL_Timestamp] ASC
    ) WITH (PAD_INDEX = OFF, STATISTICS_NORECOMPUTE = OFF, IGNORE_DUP_KEY = OFF, ALLOW_ROW_LOCKS = ON, ALLOW_PAGE_LOCKS = ON) ON [PRIMARY]
) ON [PRIMARY]

GO
SET ANSI_PADDING OFF
Step 2. Create a Login table.
CREATE TABLE [dbo].Login_Client(
        NULL,
        NULL,
      [LON_Employee_No] [varchar](10) NULL,
      [LON_Login_Password] [varchar](20) NULL,
        NULL,
        NULL
) ON [PRIMARY]

GO
SET ANSI_PADDING OFF
Step 3. Now insert one record in the login table.
INSERT INTO PSH.[dbo].[Login_Client]
VALUES ('Naveed Zaman', 'naveed.zaman', '22339', 'khan@123', 'A', 'Active')
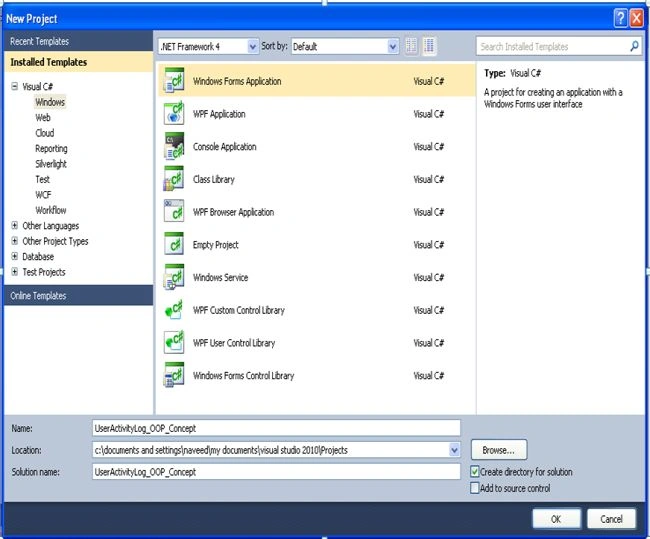
Step 4. Start Visual Studio and create a new Desktop project with the name "UserActivityLog_OOP_Concept".
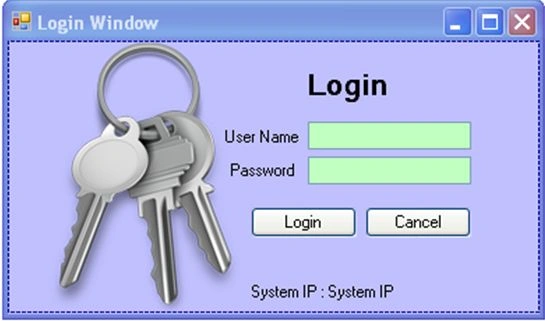
Step 5. First of all, we create the login form that will help us to understand the basic concepts of the topic. Create the form as shown in the picture.
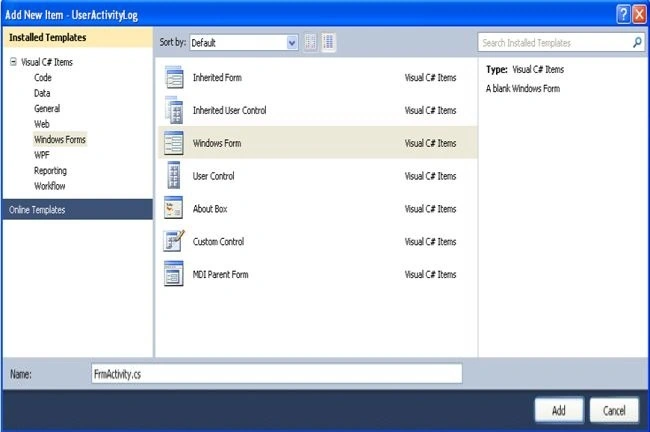
Step 6. Create another form with the name of frmActivity.
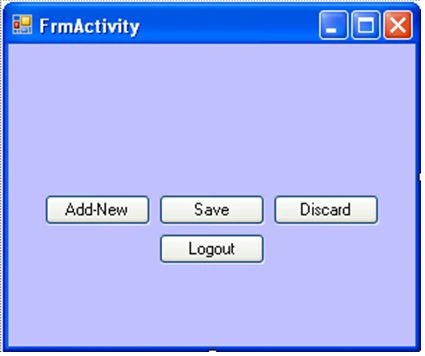
Step 7. Now add a few buttons on it. For example "Add-New", "Save", "Discard" and "Logout" buttons on a form as shown in the following picture.
Step 8. Add a new class with the name "Main".
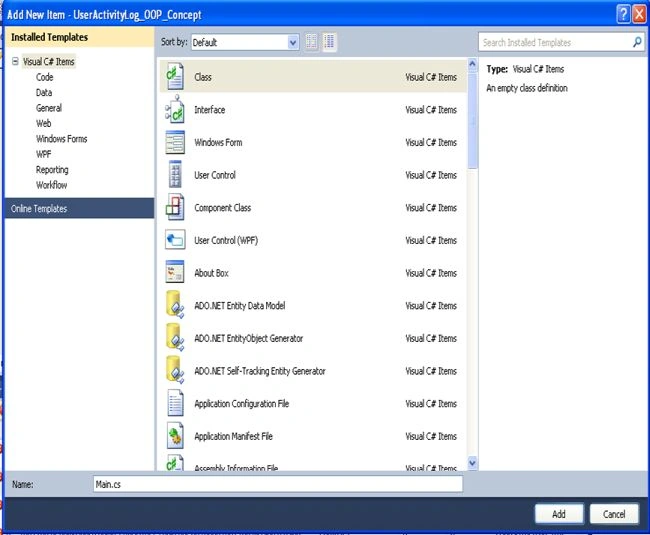
Step 9. Now we will create the function GetDBConnection. It is a public function so it can be accessed from anywhere in the project. But you must modify the data source settings relevant to your own settings.
For example
- SQL Server instance name. (.\\CRMIS)
- SQL Server user name and password. (user id sa password.###Reno123)
- Initial Catalog=PSH (database name)
Add the public static class to "Main. cs.
public static SqlConnection GetDBConnection()
{
    SqlConnection conn = new SqlConnection(
        "Data Source=.\\CRMIS;Initial Catalog=PSH;User ID=sa;Password=###Reno321");
    return conn;
}
Step 10. Now we will create another class login that will help us verify the authorization of the user. After providing a username and password.
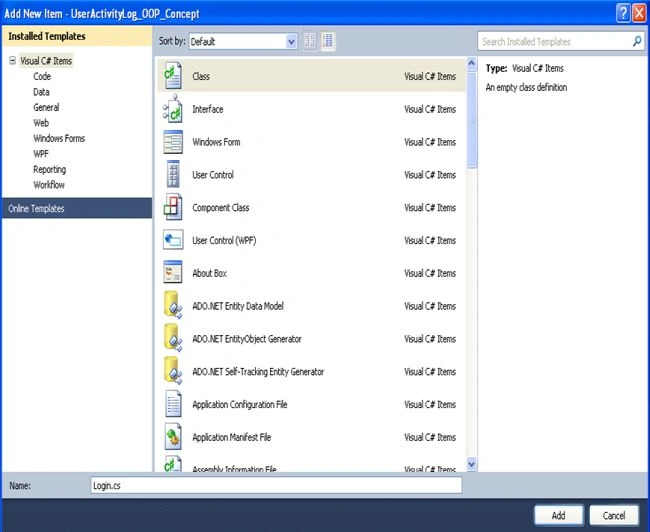
Step 11. Insert the following code in the class login.
using System;
using System.Collections.Generic;
using System.Linq;
using System.Text;
using System.Data.SqlClient;
using System.Data;

namespace UserActivityLog_OOP_Concept {
    class Login {
        static string userid;
        static string password;
        static string ip;
        public string EmpNo = string.Empty;
        SqlConnection con = Main.GetDBConnection();

        public Login() {}

        public Login(string _userid, string _password, string _ip) {
            userid = _userid;
            password = _password;
            ip = _ip;
        }

        public string getidinfo {
            get {
                return userid;
            }
        }

        public string getpassinfo {
            get {
                return password;
            }
        }

        public string getipinfo {
            get {
                return ip;
            }
        }

        public string Validation() {
            try {
                DataTable consultanttable = new DataTable();
                string SQL = @"SELECT LON_Employee_No FROM Login_Client where LON_Login_Name = '" + userid + "' AND LON_Login_Password = '" + password + "'";
                SqlDataAdapter Consultantdataadapter = new SqlDataAdapter(SQL, con);
                Consultantdataadapter.Fill(consultanttable);
                foreach(DataRow myrow in consultanttable.Rows) {
                    EmpNo = (myrow[0].ToString());
                }
            } catch (InvalidCastException e) {
                throw (e); // Rethrowing exception e
            }
            return EmpNo;
        }
    }
}
Please check the code carefully.
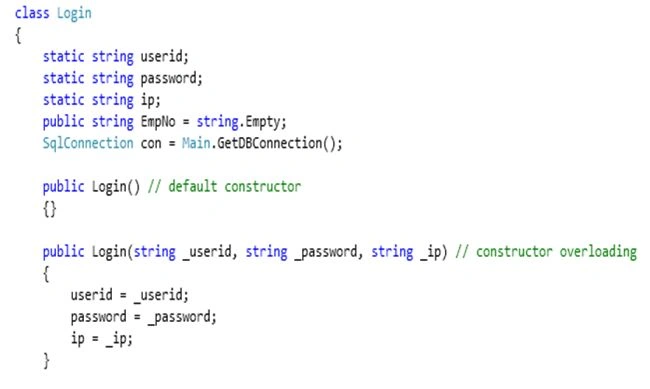
We have created the class login and in that class, we define four member variables, three of them static and one is public. We have already discussed access modifiers in previous articles. After that, we created an object icon of the class Main that we defined in Step 6. It will help us to create a connection between C# and SQL Server.
After that, we defined the default constructor of a class Login and overloaded the Constructor with two parameters.
It's very important to understand the importance of the overloaded constructor. It will be initialized whenever we create the object of the class with the two parameters, userid, and password. We have defined a default constructor as well that will help us when we need an object on a class without parameters.
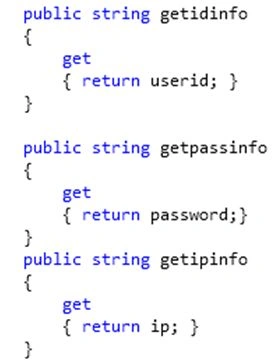
Further, we have defined read-only properties of the class login that will help us to read member variables.
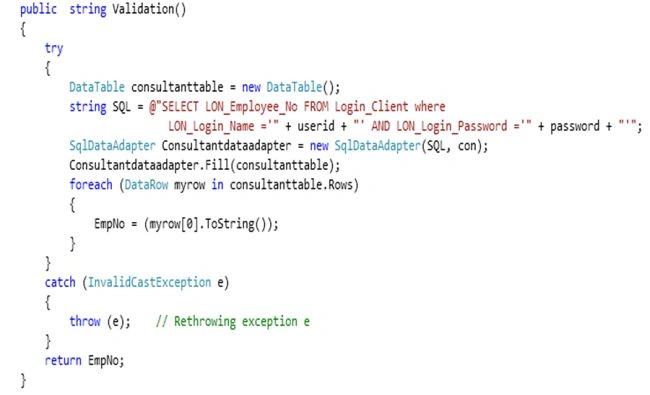
In this session, we have defined a method validation of a class login that will help us validate the login info and return EmpNo.
Step 12. Please insert the following code in the UserActivityLog class.
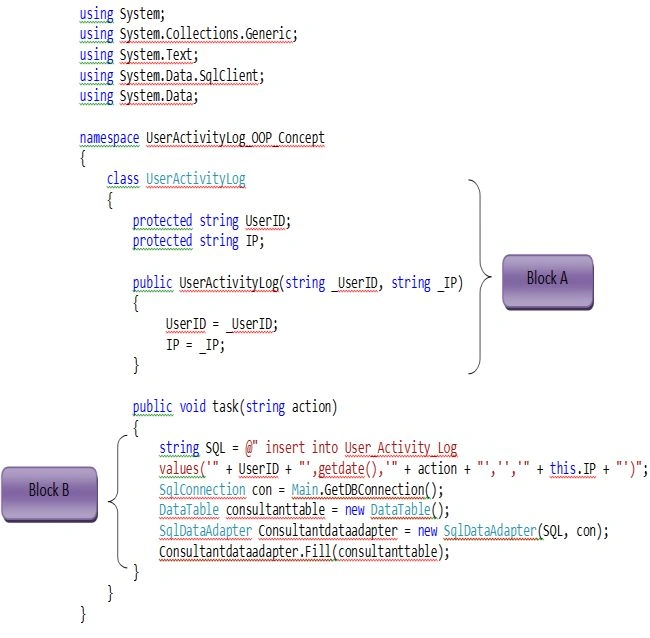
Block A
- We have defined two member variables.
- We have defined the constructor of the class User_Activity_Log with a two-parameter that will initialize the member variables of the class.
Block B
- A method task will be used to insert the data into the database, so we need to create the object on the main class with the name of the icon.
- Using an insert statement we can insert the new row into the database that will get the parameter action which can be "login", "add new", "save" etcetera.
Step 13. Please insert the following code in the form.
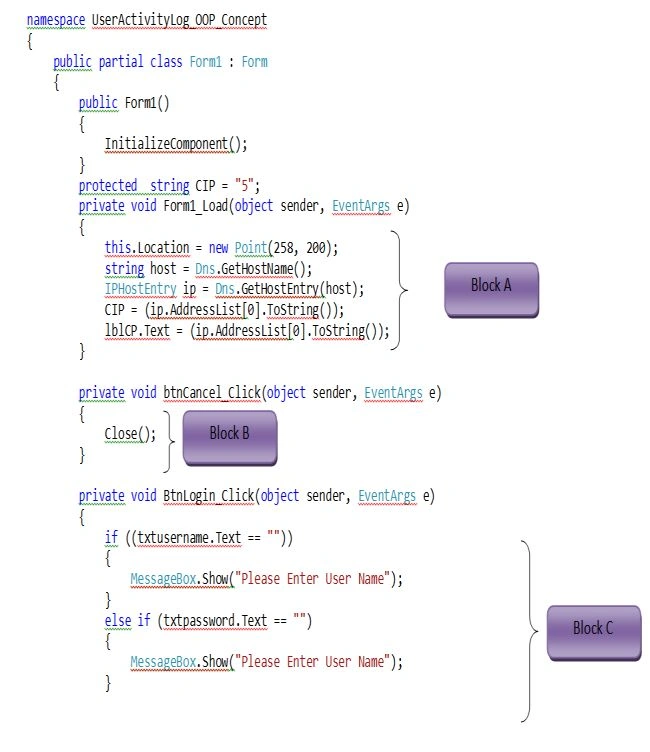
Block A
- We have initialized the position of the form.
- String variable host Find host by name System.
- Gets a list of IP addresses that are associated with a host.
- Assign the IP address to CIP.
- lblCP. Text is assigned the IP address to the label that will display the IP info.
Block B
- Close the login windows.
Block C
- Checking if textboxes are not empty.
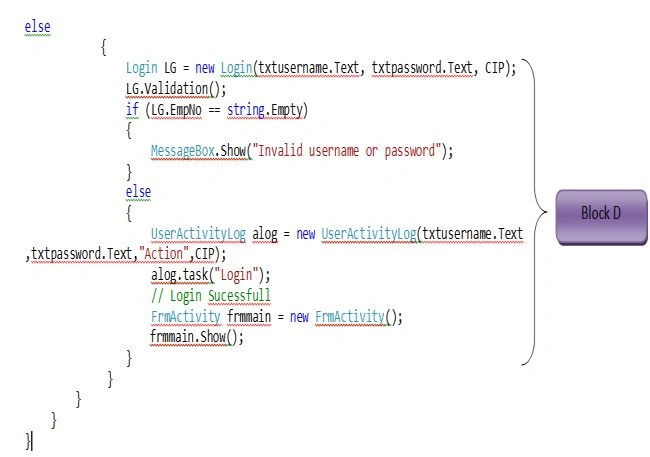
Block D
- Creating object LG that will activate the constructor of the class login with three parameters.
- Call the method validation using the object LG.
- Using the "LG.EmpNo" public variable we check either user and password correctly.
- Message box if the information is not correct.
- If the information is correct then we will create the object "alog" of the class UserActivityLog; it calls the constructor with four parameters.
- Using the "log" object we call the method task that will insert the data in the database.
- FrmActivity creates the object of the form.
- Load the form using the object name remains.
Step 14. Insert the following code into the FrmActivity form.
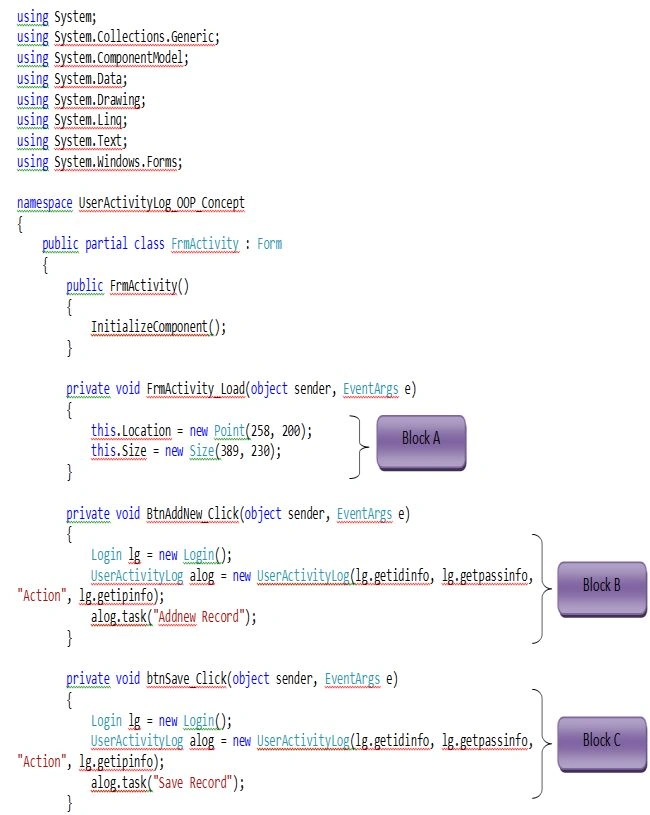
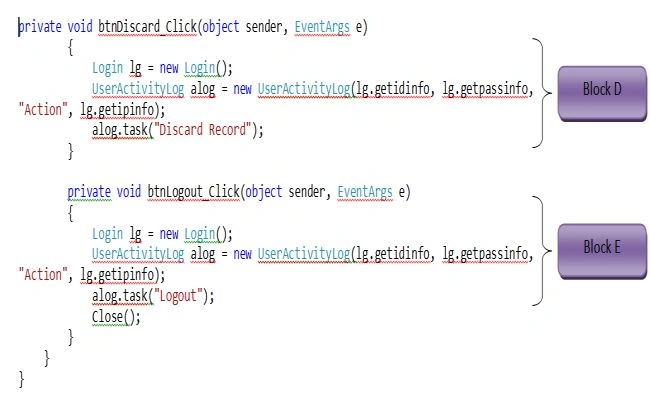
Block A
- We have initialized the position of the form.
- We create the object "alog" for the class UserActivityLog that will initialize member variables of the class UserActivityLog using three parameters and the values of the parameters are the properties of the login class.
- The next step is to use a method "task" of the class UserActivityLog with the parameter "Add new Record".
Block B
- We have initialized the position of the form.
- We create an object "alog" for the class UserActivityLog that will initialize the member variables of a class UserActivityLog using three parameters and the values of the parameter are the properties of the login class.
- The next step is to use the method "task" of the class UserActivityLog with the parameter "Save Record".
The same with the blocks, C, D, and E.
Step 15. Now press F5. You will see the login screen; just enter.
- user name: Naveed.zaman
- user name: khan@123
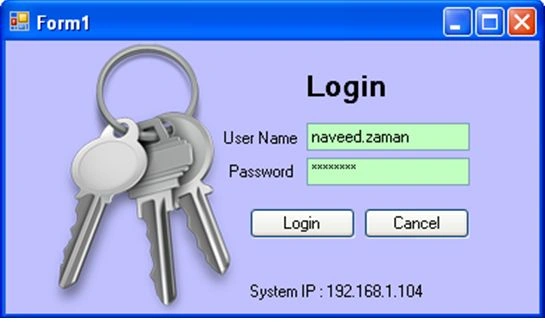
Click the login button.
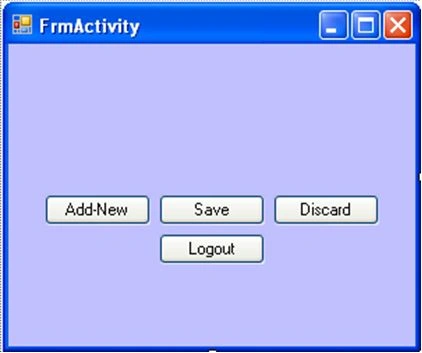
Now press the "Add-New" button, "Save" button, "Discard" button, and then press the "Login" button.
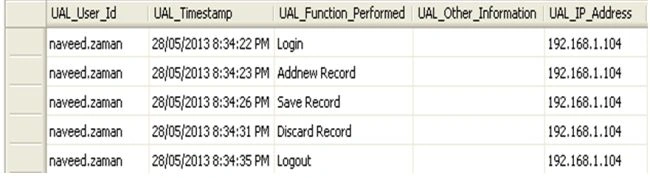
Step 16. Now open the SQL Server table; you will get a result like the following.
JB DelgadoPosted Feb 23, 2021, 2:46 AM
Learned a lot on OOP. Thanks for sharing!
Kimseng SiengPosted Jun 12, 2014, 7:41 AM
very good sir with clear explain
Naveed ZamanPosted Jun 3, 2013, 11:48 PM
thanks
Sandeep SharmaPosted Jun 3, 2013, 11:08 AM
nice article
Naveed ZamanPosted May 29, 2013, 8:46 PM
thank Anurag
Anurag SarkarPosted May 29, 2013, 4:49 PM
nice one.