
Introduction:
Here we are going to discuss how to create a custom web control in ASP.NET. The custom control is the control made by the user for a specific purpose and later we can use it in our application. We create a custom control in which the size of text written on the custom server control increases whenever we click on the Button. Further we have to add it to the toolbox items.
Step 1: First Open the Web server Control application
-
Go to visual studio and open File->New->Project->Add ASP.NET Server Control application.
-
Click OK.
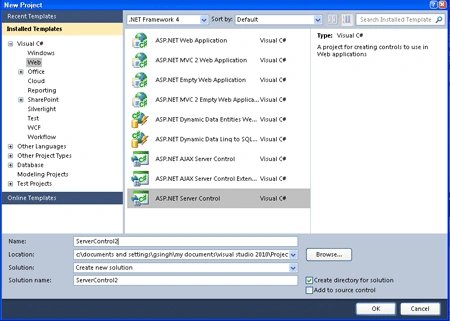
Step 2: Now you should change the name of the ServerControl.cs file to IncreaseSize.cs.
Step 3: Further, the toolbox data attribute for the IncreaseSize class, change the string "ServerControl2" to "IncreaseSize" in both places where it occurs.
[ToolboxData("<{0}:IncreaseSize runat=server></{0}:IncreaseSize>")]
Step 4: Now write code in the IncreaseSize.cs class, which inherits the base class name as WebControl.
Code:
using
System;
using
System.Collections.Generic;
using
System.ComponentModel;
using
System.Linq;
using
System.Text;
using
System.Web;
using
System.Web.UI;
using
System.Web.UI.WebControls;
namespace
ServerControl2
{
[DefaultProperty("Text")]
[ToolboxData("<{0}:IncreaseSize
runat=server></{0}:IncreaseSize>")]
public class
IncreaseSize :
WebControl
{
private string
text;
public IncreaseSize()
{
ViewState["IncrSize"]
= "1";
}
[Bindable(true)]
[Category("Appearance")]
[DefaultValue("")]
[Localizable(true)]
public string
Text
{
get
{
String s = (String)ViewState["Text"];
return ((s == null)
? "[" + this.ID
+ "]" : s);
}
set
{
ViewState["Text"]
= value;
}
}
public int
IncrSize
{
get { return
Convert.ToInt32((string)ViewState["IncrSize"]);
}
set { ViewState["IncrSize"]
= value.ToString(); }
}
protected override
void RenderContents(HtmlTextWriter
output)
{
output.Write("<font
size = " + IncrSize + ">" + Text +
"</font>");
}
}
}
Description: Now, first of all, we have to make a constructor of a class to
store the update size in a view state of a control in which the default value
held by view state is 1. On each click, the size of the control increases at that
will store into the constructor which will give us only the updated value.
Further we have to create a property name as IncrSize which must maintain it's
state through the post backs occurs during pressing button.
The property Get method retrieves the value from
ViewState, casts it to a string in the case of C#, and then converts that string
to its integer equivalent. The property Set method stashes a string representing
the size into ViewState. At last we have a method name as RenderContents() which
is declared in the base class named as Web Control and will override into
the derived class named as IncreaseSize which will inherit it. It contains a
parameter of type HTML named as HtmlTextWriter. The
HtmlTextWriter
class derives from TextWriter and provides rich formatting capabilities.
HtmlTextWriter
will ensure that the elements produced are well-formed, and it will manage the
attributes, including style attributes.
Step 5: Now after doing all that we have to open a file named AssemblyInfo.cs and write the code given below.
-
Firstly add a namespace to the Top of the AssemblyInfo.cs file named as
using System.Web.UI;
-
Now write the assembly name at the end of the AssemblyInfo.cs file.
[assembly: TagPrefix("ServerControl2", "aspSample")].
Step 6: Now we have to build the application by clicking on build solution and close it.
Step 7: Now we have to make a website to test the application.
-
File->New->Web Site
-
Click OK.
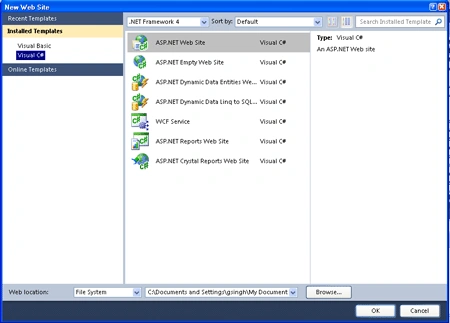
Step 8: Now we will add a new project
-
Go to Solution Explorer
-
Right Click on it and add existing project
-
Add the ServerControl2 project to the website project.
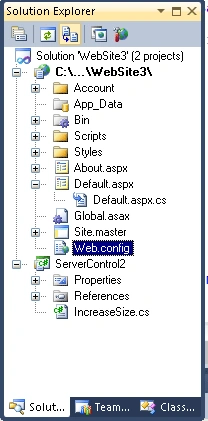
Step 9: Right click on Solution Explorer and set as start up project.
Step 10: Now Right Click on Solution explorer and add a reference to the project name as ServerControl2.
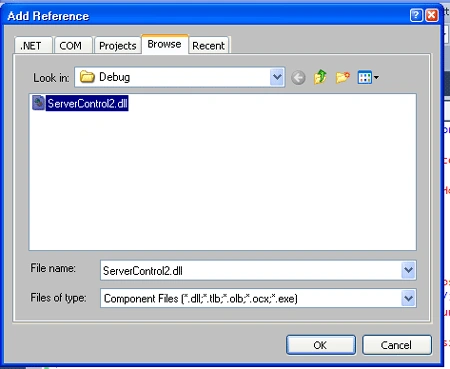
Step 11: Now the IncreaseSize control in the toolbox, under ServerControl2 Components.
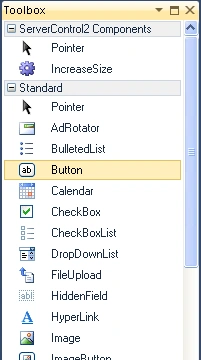
Step 12: Now if you want to add it into the Toolbox Control then
-
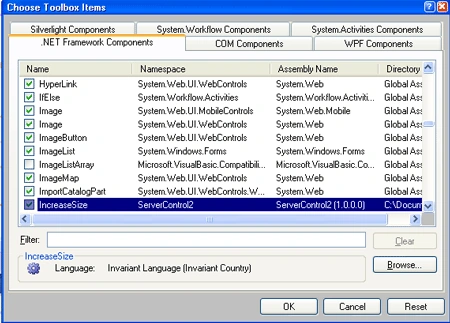
Right Click on any control of Toolbox.
-
And Select Choose item.
-
Select the .NET Component and browse the button add the ServerControl2.dll to the .NET Component
-
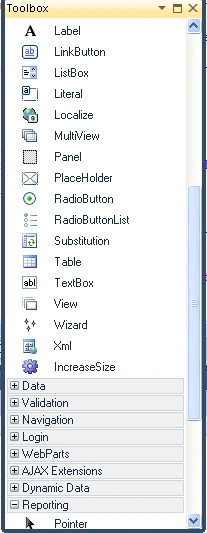
Now the control will appear in the toolbox.
Step 13: Now we have to Drag and drop the Increase size Custom Control to the Default.aspx page.
-
After Drag and Drop we see that in the source file of default.aspx something has been added
<%@ Register assembly="ServerControl2" namespace="ServerControl2" tagprefix="aspSample" %>
<aspSample:IncreaseSize ID="WC1" Text="Good Morning" runat="server" style="z-index: 1; left: 21px; top: 182px; position: absolute; width: 178px; height: 56px;" BackColor="#CCFFCC" BorderStyle="Groove" Font-Underline= "False" ForeColor="#990033" />
-
Now we have to drag and drop the Button Control to the Default.aspx page and press F5
Step 14: Let 'swrite the code for the Default.aspx.cs file.
Code :
using
System;
using
System.Collections.Generic;
using
System.Linq;
using
System.Web;
using
System.Web.UI;
using
System.Web.UI.WebControls;
using
ServerControl2;
public
partial class
_Default : System.Web.UI.Page
{
public _Default()
{
Page.Init +=
new System.EventHandler(Page_Init);
}
private void InitializeComponent()
{
this.Button1.Click +=
new System.EventHandler(this.Button1_Click);
his.Load +=
new System.EventHandler(this.Page_Load);
}
public void Button1_Click(object
sender, System.EventArgs e)
{
WC1.IncrSize += 1;
}
protected void Page_Load(object
sender, EventArgs e)
{
}
protected void Page_Init(object
sender, EventArgs e)
{
}
}
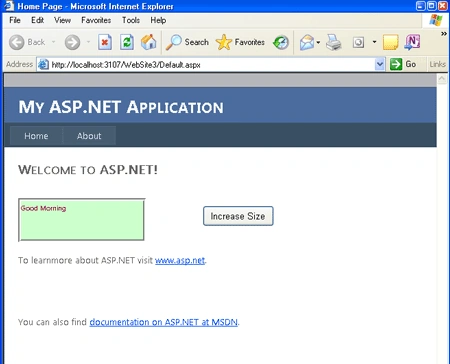
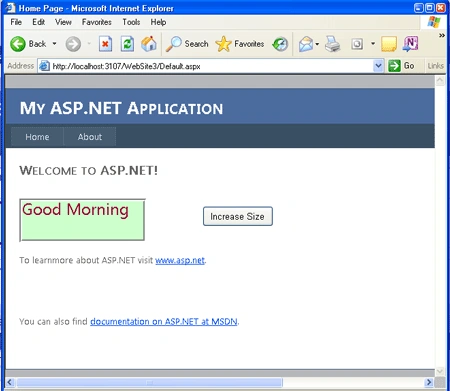
Step 15: Now run the web site application by pressing F5.
Before click on the Button:
After Clicking on the Button:
Join the conversation! Your thoughts help the community grow.