No matter how much time you spend designing your application there is one key stage where it can all fall apart, the build and deployment stage. This is a first in a series of articles in which I am going to demonstrate how to use Visual Studio .NET to build and deploy your applications.
- To start open new Visual Studio .NET class library application named myAssembly.

- Next right click on the solution in the solution explorer and click Add New Project and name this project myAssembly2 and click ok.
This is meant to simulate a solution with 2 or more assemblies, as you would have in an enterprise development environment. This same process could be used with 70 assemblies all in the same solution file. For now we will leave these assemblies as empty shells but they could have hundreds of lines of code in them doing anything you want.
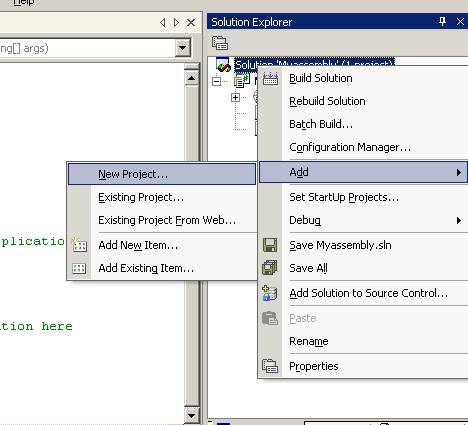
- Next we need to again right click on the solution and choose add project but this time choose add set-up project to the solution, as demonstrated below:
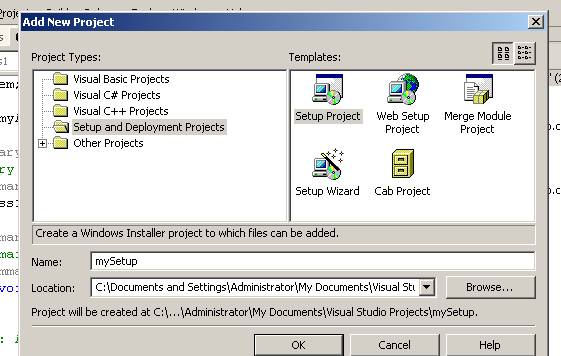
Click ok and now you should have a solution file with two assemblies and one set-up project.
- Now right click on the Set-up project shown in the solution explorer and choose Add Project output you should see the dialog shown below:

Notice the drop down with the project label currently says myAssembly and the Primary output text is highlighted. This is basically telling the installer program to take the primary output from the project myAssembly project and place it inside the MSI file. Click ok and repeat this process but this time choose the myAssembly2 from the project drop down. (Be sure to again choose the project output).
The solution explorer should now look something like the following:

At this point it is important to understand that you could add more assemblies if you needed to and simply repeat the above process to add the primary outputs to the set-up project. You can even build the project as is and by default the set-up project will not actually be built which comes in handy when testing and debugging an application.
- Finally right click on the solution icon in the solution explorer and choose properties. Then click on the configuration section and click the build check box next to the set-up project name.
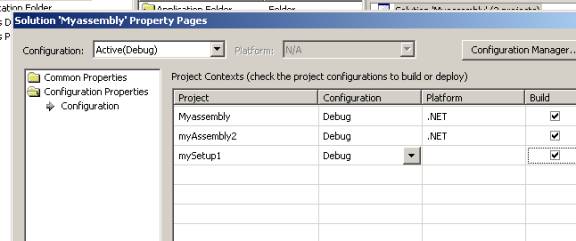
This will tell the IDE to now build the set-up file when you compile the solution. *By default it will not compile the set-up project.
- Next right click on the solution in the solution explorer and click build. This will build both projects in the solution and put the resulting assemblies into the MSI file.
You now should have a complete MSI file with the just compiled assemblies inside of it located in the debug folder where you created the project. If you double click on this MSI you will be prompted as to where you want to install the assemblies.
In summary this is the first in a series of articles outline the Visual Studio 7 Set-up projects and demonstrates how you can use the set-up projects as a build and deploy mechanism instead of using the wizards at the end of the process.