Follow this link to see a running example of the end animated navigation bar result of the project
Introduction
This article is a tutorial on how to use Silverlight 2.0 to make a nifty animated navigation bar much like the one at the top of the Silverlight.net website (and also at the top of my own website SilverlightWebApps.com). When you mouse over the title you want to navigate to the background lights up with a glow and the triangular pointer zooms to the item your pointed at. When you click on the navigation item, a content panel on your silverlight page is replaced with the new selected content.
Step By Step Tutorial
A brief description of
- Create an empty web site in VS2008 and name it TutorialNavbar
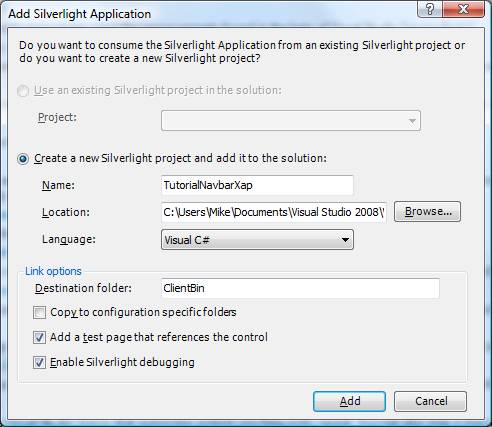
- Add a new item, select Silverlight Application and save the project as TutorialNavbarXap.csproj
- Select the option Create a new Silverlight Project and add it to the solution:
- Delete the TutorialNavbarTestPage.aspx file that was auto generated by VS2008. Leave the TutorialNavbarTestPage.html page. The reason I like to build my projects from a Visual Studio website as opposed to an Expression Blend project is the following:
- It appears to me that Intellisense does not work when you open up C# files in Expression Blend (At least in the Expression Blend 2.5 June Preview version - hopefully that will be solved in production release)
- I don't believe you can debug projects that are purely Expression Blend projects whereas if you start with a VS2008 project as I've described above, break points work normally.
- Expression Blend creates its own default test page that you have no control over. That can be a problem, for example if you have a page that is bigger than the browser window the default Expression Blend page does not have a scroll bars. By creating your projects as I've described above, you can modify the style sheet as necessary to add these elements.
Theoretically VS2008 and Expression Blend will coordinate and keep in sync with each other so that you can seamlessly make edits to your files from within the VS2008 and/or the Expression Blend environments and have no troubles. In practice however, I have seen the two environments get out of sync and you can see a project work when you hit F5 from within Expression Blend by not from within VS2008. To get back in sync make sure all files are saved in Expression Blend, hit F5 to build it, and then from VS2008 try Build Clean Solution, then Build Rebuild All.
- In Expression Blend 2.5 June Preview open the newly created project TutorialNavbarXap
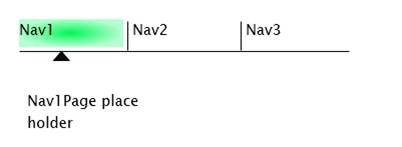
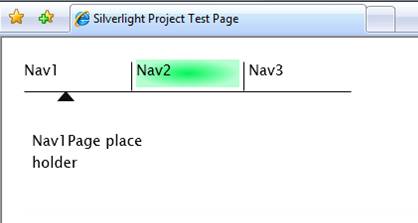
- Create something that visually looks similar to what you see below. Note to get the background effect of the green highlighting what I did was select a radial gradient brush and set the transparency of the right stop to 30%. Name the triangle pointer NavIndicator, and name each of the green highlights Nav1Highlight, Nav2Highlight, Nav3Highlight.

- Add a canvas to the main page that takes up most of the page and name it ContentCanvas
- Create a rectangular that covers up the entire green highlight area Nav1Highlight and the region below where the arrow is located. Name this region Nav1ClickArea. Copy this rectangle for Nav1 and Nav2 and name appropriately. Set Opacity of each of these regions to 0%. As the name suggests this is the area that you're going to click in to allow the navigation to occur.
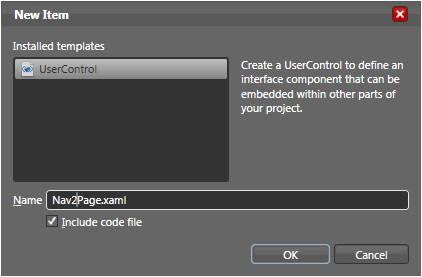
- Create some place holder pages that we can navigate to. In Expression Blend, go to the project view, click on the project and select add new item. Call the item Nav1Page.xaml and leave the "Include code file" check box checked. Repeat for Nav2Page.xaml and Nav3Page.xaml. On Nav1Page.xaml add a text block with the words "Nav1Page place holder". Repeat for Nav2Page and Nav3Page changing the stated text as appropriate.
- Select Nav1ClickArea, go to properties, select the events button (the one with the lightning bolt) and under the event MouseLeftButtonDown enter the method name OnNav1Click.
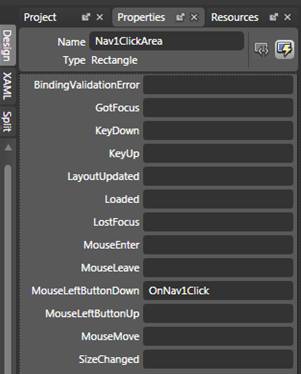
- Once you click enter, VS2008 should fire up and you should find that Expression Blend has entered the empty method below in page.xaml.cs. Repeat above step for the Nav2ClickArea and the Nav3ClickArea.
private void OnNav1Click(object sender, MouseButtonEventArgs e)
{

}
- We're constructing instances of each of the pages we are going to want to display
- We're attaching the PageLoaded method to the Loaded event and using that method to set Nav1Page as the default
- We've added code to OnNavClick methods to remove whatever page was previously displayed and add a new page.
public partial class Page : UserControl
{

Nav1Page m_nav1Page = new Nav1Page();
Nav2Page m_nav2Page = new Nav2Page();
Nav3Page m_nav3Page = new Nav3Page();

public Page()
{
InitializeComponent();
Loaded += new RoutedEventHandler(PageLoaded);
}

void PageLoaded(object sender, RoutedEventArgs e)
{
RemoveAll();
ContentCanvas.Children.Add(m_nav1Page);
}

void RemoveAll()
{
ContentCanvas.Children.Remove(m_nav1Page);
ContentCanvas.Children.Remove(m_nav2Page);
ContentCanvas.Children.Remove(m_nav3Page);
}

private void OnNav1Click(object sender, MouseButtonEventArgs e)
{
RemoveAll();
ContentCanvas.Children.Add(m_nav1Page);
}

private void OnNav2Click(object sender, MouseButtonEventArgs e)
{
RemoveAll();
ContentCanvas.Children.Add(m_nav2Page);
}

private void OnNav3Click(object sender, MouseButtonEventArgs e)
{
RemoveAll();
ContentCanvas.Children.Add(m_nav3Page);
}

}
- Build and debug. What you should see is that when you click each of the regions the specified page should appear.
- Now lets make the highlights appear. As shown above with the MouseLeftButtonDown event, add OnNav1Enter method name to the MouseEnter event. Repeat for Nav2 and Nav3.
- Create a HighlightNone method to make all the highlights invisible and then call that from the PageLoaded method. Then add to the OnNavEnter methods a call to HighlightNone followed by a call to make the selected item highlighted. The code snippet that follows illustrates this:
void PageLoaded(object sender, RoutedEventArgs e)
{
RemoveAll();
ContentCanvas.Children.Add(m_nav1Page);
HighlightNone();
Nav1Highlight.Opacity = 100.0;
}
private void HighlightNone()
{
Nav1Highlight.Opacity = 0.0;
Nav2Highlight.Opacity = 0.0;
Nav3Highlight.Opacity = 0.0;
}
private void OnNav1Enter(object sender, MouseEventArgs e)
{
HighlightNone();
Nav1Highlight.Opacity = 100.0;
}
private void OnNav2Enter(object sender, MouseEventArgs e)
{
HighlightNone();
Nav2Highlight.Opacity = 100.0;
}
private void OnNav3Enter(object sender, MouseEventArgs e)
{
HighlightNone();
Nav3Highlight.Opacity = 100.0;
}
- Build and debug. What you should see is that whenever you mouse over the different navigation sections the highlight appears.
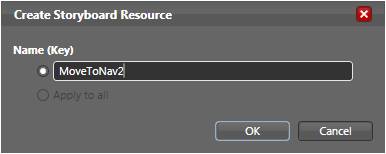
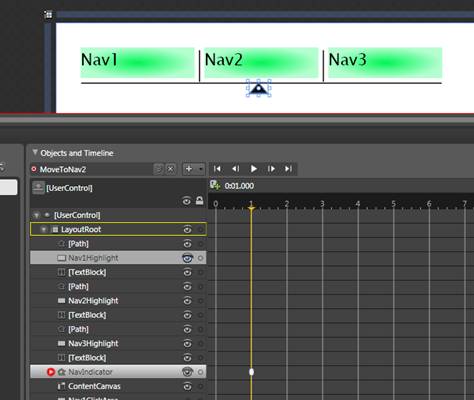
- Now lets animate the NavIndicator triangle. Create a storyboard called MoveToNav2.
- Without making a key frame at time zero move the timeline to 1 seconds, then drag the NavIndicator triangle to a centered position under Nav2.
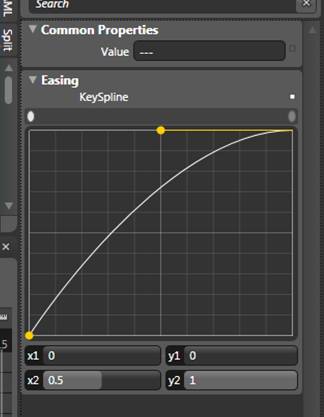
- Click on the key frame marker for the NavIndicator and adjust the easing to x1=0 and x2=.5. If you don't see the easing box below when you click on the NavIndicator key frame, make sure the properties box is set to properties and not events. Hit play on the storyboard to see the effect of these adjustments. Close the storyboard once you're done.
- Now go to the XAML view and see what was generated for this storyboard. You'll see two sections that begin DoubleAnimationUsingKeyFrames. The first one animates the X direction as indicated by the line Storyboard.TargetProperty="(UIElement.RenderTransform).(TransformGroup.Children)[3].(TranslateTransform.X). The second DoubleAnimationUsingKeyFrames animates the y direction as indicated by the TranslateTransform.Y item. We only want the NavIndicator to move horizontally, so delete the second DoubleAnimationUsingKeyFrames Section.
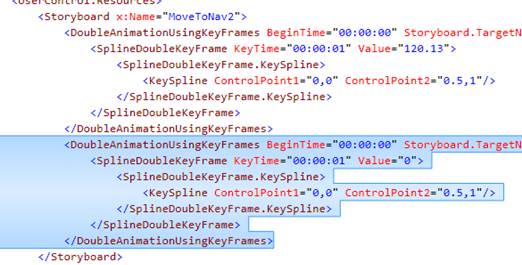
- Now make a copy of the entire storyboard but change two things:
- Change the name of the storyboard to MoveToNav1 as shown here: <Storyboard x:Name="MoveToNav1">
- Change the SplineDoubleKeyFrame Value to 0 as shown here: <SplineDoubleKeyFrame KeyTime="00:00:01" Value="0">
What this does is makes the same storyboard but instead of moving to the Nav2 position it move to back to where it started (i.e. 0). We're going to do the same for MoveToNav3. How do the value to move to for Nav3? I actually created a MoveToNav3 storyboard using the Objects and Timelines menu, read the value of the X move and then copied that value into my own XAML storyboard that I based on the MoveToNav2 storyboard above. If you didn't want to work with the XAML, you could repeat the steps listed above for the original MoveToNav2 storyboard for each of the other moves.
- Now add code to start the corresponding animation whenever the mouse passes over the navigation area.
private void OnNav1Enter(object sender, MouseEventArgs e)
{
HighlightNone();
Nav1Highlight.Opacity = 100.0;
MoveToNav1.Begin();
}

private void OnNav2Enter(object sender, MouseEventArgs e)
{
HighlightNone();
Nav2Highlight.Opacity = 100.0;
MoveToNav2.Begin();
}

private void OnNav3Enter(object sender, MouseEventArgs e)
{
HighlightNone();
Nav3Highlight.Opacity = 100.0;
MoveToNav3.Begin();
}
- Hmm… One second is a little slow for that transition. Let's change the time for the transition to .5 seconds. Go to the XAML and change the time from 1 second to a half second
<Storyboard x:Name="MoveToNav1">

    <DoubleAnimationUsingKeyFrames BeginTime="00:00:00"…

        <SplineDoubleKeyFrame KeyTime="00:00:00.50" Value="0">
- Much better! That's it. You now have an animated navigation bar.
History
July 2008, First Revision