Part of our deployment process at work is to not only build the .NET applications, but to go through a bunch of XML configuration files and change the tags contained within them manually. That drudge work is starting to get old, so I figured, why not automate the process. The first thing that came to mind to do the automation was to use NANT, but then I remembered...wait a minute...doesn't Microsoft have a similar utility built into the 2005 .NET framework? The answer is yes, and you may be surprised to find yourself experience a certain deja vu when you utilize this utility.
What is MSBuild?
MSBuild allows you compile C# from the command line...just like NANT. MSBuild is a make file in XML...just like NANT. MSBuild has tasks, targets and properties...just like NANT. MSBuild is basically...NANT. (Well, you can't blame Microsoft for taking a good idea and making it better. Look what they did for Lotus 123.)
A few features I like about the MSBuild utility.
- Microsoft Visual Studio 2005 can read it. Let me rephrase that...Microsoft's csproj project files are MSBuild files.
- You can create custom tasks in .NET with ease.
- The help documentation and Reference on MSBuild is extensive and rich.
Let's take a quick look at an MSBuild File. The easiest way to do this is to simply create a project in Visual Studio 2005 and look at the xml inside of the file. I opted to create a simple Windows Form "Hello World" Project in Visual Studio as shown in figure 1.
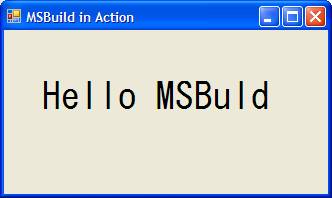
Figure 1 - Simple Windows Form Application
Examining an MSBuild File
The name of the csproj file created by Visual studio is HelloWorldWindow.csproj. Below is the csproj xml file you can view in notepad (haven't figured out how to view it in Visual Studio, but there is probably some trick, short of making a copy of the csproj file and changing the extension to xml).
Listing 1 - A typical MSBuild file generated by Visual Studio
<Project DefaultTargets="Build" xmlns="http://schemas.microsoft.com/developer/msbuild/2003">
<PropertyGroup>
<Configuration Condition=" '$(Configuration)' == '' ">Debug</Configuration>
<Platform Condition=" '$(Platform)' == '' ">AnyCPU</Platform>
<ProductVersion>8.0.50727</ProductVersion>
<SchemaVersion>2.0</SchemaVersion>
<ProjectGuid>{EB58F162-CBA7-402F-A624-D4C272EB2E51}</ProjectGuid>
<OutputType>WinExe</OutputType>
<AppDesignerFolder>Properties</AppDesignerFolder>
<RootNamespace>HelloWorldWindow</RootNamespace>
<AssemblyName>HelloWorldWindow</AssemblyName>
</PropertyGroup>
<PropertyGroup Condition=" '$(Configuration)|$(Platform)' == 'Debug|AnyCPU' ">
<DebugSymbols>true</DebugSymbols>
<DebugType>full</DebugType>
<Optimize>false</Optimize>
<OutputPath>bin\Debug\</OutputPath>
<DefineConstants>DEBUG;TRACE</DefineConstants>
<ErrorReport>prompt</ErrorReport>
<WarningLevel>4</WarningLevel>
</PropertyGroup>
<PropertyGroup Condition=" '$(Configuration)|$(Platform)' == 'Release|AnyCPU' ">
<DebugType>pdbonly</DebugType>
<Optimize>true</Optimize>
<OutputPath>bin\Release\</OutputPath>
<DefineConstants>TRACE</DefineConstants>
<ErrorReport>prompt</ErrorReport>
<WarningLevel>4</WarningLevel>
</PropertyGroup>
<ItemGroup>
<Reference Include="System" />
<Reference Include="System.Data" />
<Reference Include="System.Deployment" />
<Reference Include="System.Drawing" />
<Reference Include="System.Windows.Forms" />
<Reference Include="System.Xml" />
</ItemGroup>
<ItemGroup>
<Compile Include="Form1.cs">
<SubType>Form</SubType>
</Compile>
<Compile Include="Form1.Designer.cs">
<DependentUpon>Form1.cs</DependentUpon>
</Compile>
<Compile Include="Program.cs" />
<Compile Include="Properties\AssemblyInfo.cs" />
<EmbeddedResource Include="Form1.resx">
<SubType>Designer</SubType>
<DependentUpon>Form1.cs</DependentUpon>
</EmbeddedResource>
<EmbeddedResource Include="Properties\Resources.resx">
<Generator>ResXFileCodeGenerator</Generator>
<LastGenOutput>Resources.Designer.cs</LastGenOutput>
<SubType>Designer</SubType>
</EmbeddedResource>
<Compile Include="Properties\Resources.Designer.cs">
<AutoGen>True</AutoGen>
<DependentUpon>Resources.resx</DependentUpon>
</Compile>
<None Include="Properties\Settings.settings">
<Generator>SettingsSingleFileGenerator</Generator>
<LastGenOutput>Settings.Designer.cs</LastGenOutput>
</None>
<Compile Include="Properties\Settings.Designer.cs">
<AutoGen>True</AutoGen>
<DependentUpon>Settings.settings</DependentUpon>
<DesignTimeSharedInput>True</DesignTimeSharedInput>
</Compile>
</ItemGroup>
<Import Project="$(MSBuildBinPath)\Microsoft.CSharp.targets" />
<!-- To modify your build process, add your task inside one of the targets below and uncomment it.
Other similar extension points exist, see Microsoft.Common.targets.
<Target Name="BeforeBuild">
</Target>
<Target Name="AfterBuild">
</Target>
-->
</Project>
The MSBuild file consists of a Project tag containing Targets, PropertyGroups, and ItemGroups. The PropertyGroup contains properties you want to set for a particular compile configuration. The Item Group contains files to include in the project. Since a C# compile is a fairly templatized thing, you merely need to set the compile properties in the PropertyGroup and various included source and reference files in the ItemGroups and your ready to go. The Import tag allows you to import a whole set of MSBuild commands called Microsoft.CSharp.Targets. These commands contain the majority of the tasks executed for the compile. Note that Microsoft also gives you BeforeBuild and AfterBuild targets that you can fill in to do your extra changes such as deploying files, creating directories, or cleaning directories. We will use our AfterBuild tag to utilize our custom task for changing our xml configuration files.
Building with MSBuild
In order to build an MSBuild project, you'll need MSBuild in your path. Open your System folder in your control panel and place the directory C:\WINDOWS\Microsoft.NET\Framework\v2.0.50727 inside of your path. This will allow you to run MSBuild on the command line from any directory. To build the project, just launch the command prompt and type
MSBuild HelloWorldWindow.csproj
MSBuild will proceed to build your executable and give you tons of verbose information about the progress of your build as shown in listing 2. It is useful to see the execution of each target and what the tasks within it are doing. For example most of the compilation is being handled in the CoreCompile target which utilizes the Csc task:
Listing 2 - Compiling HelloWorldWindow.cspoj using MSBuild from the command line
Microsoft (R) Build Engine Version 2.0.50727.42
[Microsoft .NET Framework, Version 2.0.50727.42]
Copyright (C) Microsoft Corporation 2005. All rights reserved.
Build started 7/26/2006 5:53:24 PM.
__________________________________________________
Project "C:\Visual Studio 2005\Projects\TestMSBuild\HelloWorldWindow\HelloWorldW
indow.csproj" (default targets):
Target PrepareForBuild:
Creating directory "bin\Debug\".
Creating directory "obj\Debug\".
Target CoreResGen:
Processing resource file "Form1.resx" into "obj\Debug\HelloWorldWindow.Form1
.resources".
Processing resource file "Properties\Resources.resx" into "obj\Debug\HelloWo
rldWindow.Properties.Resources.resources".
Target CoreCompile:
C:\WINDOWS\Microsoft.NET\Framework\v2.0.50727\Csc.exe /noconfig /nowarn:1701
,1702 /errorreport:prompt /warn:4 /define:DEBUG;TRACE /reference:C:\WINDOWS\Micr
osoft.NET\Framework\v2.0.50727\System.Data.dll /reference:C:\WINDOWS\Microsoft.N
ET\Framework\v2.0.50727\System.Deployment.dll /reference:C:\WINDOWS\Microsoft.NE
T\Framework\v2.0.50727\System.dll /reference:C:\WINDOWS\Microsoft.NET\Framework\
v2.0.50727\System.Drawing.dll /reference:C:\WINDOWS\Microsoft.NET\Framework\v2.0
.50727\System.Windows.Forms.dll /reference:C:\WINDOWS\Microsoft.NET\Framework\v2
.0.50727\System.Xml.dll /debug+ /debug:full /optimize- /out:obj\Debug\HelloWorld
Window.exe /resource:obj\Debug\HelloWorldWindow.Form1.resources /resource:obj\De
bug\HelloWorldWindow.Properties.Resources.resources /target:winexe Form1.cs Form
1.Designer.cs Program.cs Properties\AssemblyInfo.cs Properties\Resources.Designe
r.cs Properties\Settings.Designer.cs
Target CopyFilesToOutputDirectory:
Copying file from "obj\Debug\HelloWorldWindow.exe" to "bin\Debug\HelloWorldW
indow.exe".
HelloWorldWindow -> C:\Visual Studio 2005\Projects\TestMSBuild\HelloWorldWin
dow\bin\Debug\HelloWorldWindow.exe
Copying file from "obj\Debug\HelloWorldWindow.pdb" to "bin\Debug\HelloWorldW
indow.pdb".
Build succeeded.
0 Warning(s)
0 Error(s)
Time Elapsed 00:00:01.04
Creating a Custom Task
MSBuild gives you the added ability of launching custom tasks that you can write yourself in .NET. First create a new class library for your task:
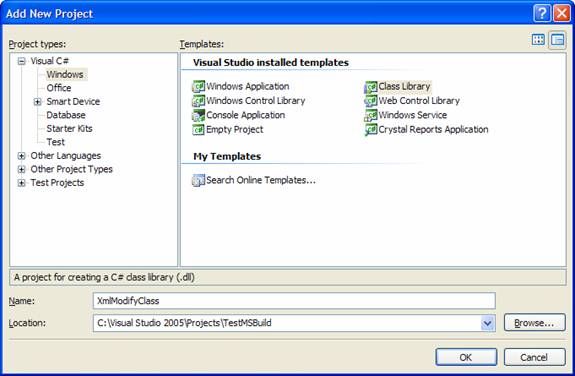
Figure 2 - Creating an assembly for our custom task
Right click on the references in your project and Add the reference Microsoft.Build.Utilities and Microsoft.Build.Framework.
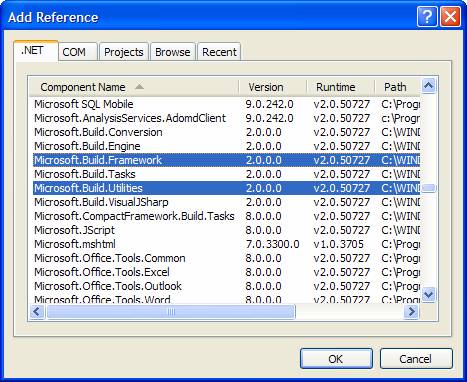
Figure 3 - Adding References to the project for using MSBuild
Create an initial class in your library for implementing your task that inherits from the Task class. You'll need to include Microsoft.Build.Utilities and override the Execute method.
using System;
using System.Collections.Generic;
using Microsoft.Build.Utilities;
using Microsoft.Build.Framework;
namespace XmlModifyClass
{
public class XmlTask : Task
{
public override bool Execute()
{
return true;
}
}
}
Building the XML Modify Task
We want our task to do the following:
1) Open an XML file and read the file into an XmlDocument
2) Find the tag indicated by the property
3) Replace the value in the tag with your value
4) Save the Xml back out to the file
Now let's fill in the Execute method to perform Xml modification as shown in listing 3. Inside the Execute method we create an XmlDocument and call the Load method to populate the XmlDocument from the file. Then we use XPath in the SelectSingleNode Method to find the node in the Xml Content indicated by the XmlTag property. If we find the node, we then decide whether or not we are modifying an attribute by looking at the AttributeChange property. If we had set the property in the script it to change the Attribute, then we modify the attribute indicated by the ModifiedAttribute Property.If AttributeChange is not set, we Modify the node content itself. Finally we save the Xml content back to the original
file.
If everything goes well, we return true and the task has completed successfully. If anything goes wrong, such as the node is null in the search or an exception is thrown, we call Log, to log the error and return false.
Listing 3 - Execute Method for replacing tag content in an Xml File
public override bool Execute()
{
try
{
// open the xml file that we want to modify
XmlDocument doc = new XmlDocument();
doc.Load(_fileName);
// find the specific node in the document we want to modify
XmlNode node = null;
if (_searchAttributeTag.Length == 0)
{
// only searches on the node tag using XPath
node = doc.SelectSingleNode(String.Format("//{0}", _xmlTag));
}
else
{
// here we are also searching on an attribute within the node with XPath,
// but not necessarily an attribute we are modifying
node = doc.SelectSingleNode(String.Format("//{0}[@{1}='{2}']", _xmlTag,
_searchAttributeTag, _searchAttributeValue));
}
if (node != null)
{
// see if we want to change an attribute or the content of an xml node
if (_attributeChange)
{
// see if the attribute exists. if it doesn't, create it.
if (node.Attributes[_modifiedAttribute] == null)
{
node.Attributes.Append(doc.CreateAttribute(_modifiedAttribute));
}
// assign the attribute to the modified value
node.Attributes[_modifiedAttribute].Value = _modifiedValue;
}
else
{
// assign the node if it exists to the modified value
node.InnerXml = _modifiedValue;
}
// save the xml content back to the file
doc.Save(_fileName);
// successful task, return
return true;
}
// the task failed, return false if the node doesn't exist
Log.LogError("Couldn't find Xml Node - {0}", _xmlTag);
return false;
}
catch (Exception ex)
{
Log.LogError(ex.Message);
}
// the task failed.
return false;
}
Registering with MSBuild
In order for MSBuild to run the task, you need to register your new task assembly with MSBuild. This requires two things:
-
MSBuild needs to know that the task exists from inside the project file.
-
MSBuild needs to be able to find the task in the path or in the global assembly cache. If you put the task assembly in the GAC, you will need to strong name it and reference it with a fully qualified assembly name.
The first requirement is accomplished with the line shown below placed right inside the csproj file:
<UsingTask TaskName="XmlBuildTasks.XmlModifyTask" AssemblyName="XmlBuildTasks"/>
If you strong named your assembly, your UsingTask xml tag may look like this:
<UsingTask TaskName="XmlBuildTasks.XmlModifyTask" AssemblyName="XmlBuildTasks, Version=1.0.0.0, Culture=neutral, PublicKeyToken=0db88d58057ef75f"/>
The second requirement can be accomplished by either placing the task assembly in the path or in the GAC. What I did is simply to stick the assembly in the C:\WINDOWS\Microsoft.NET\Framework\v2.0.50727, right next to MSBuild.exe. Some may consider this not this the most ideal place for the task assembly since you are mucking with the .NET framework directory, but it works. A better choice is to strong name the assembly in the build, and drag the assembly into the c:\windows\assembly directory (better known as the GAC).
Executing the Task
Now that we are finished installing our task, we'll want to execute it. The best place I found to stick any post build task operations are already provided to you by Microsoft. Simply uncomment the AfterBuild target section of the csproj file, and place your task inside here.
<!-- Target Name="BeforeBuild">
</Target -->
<Target Name="AfterBuild">
<XmlModifyTask FileName="C:\working\bin\mysettings.exe.config" XmlTag="appSettings/add" SearchAttributeTag="BackColor" SearchAttributeValue="Purple" ModifiedValue="LimeGreen" AttributeChange="true" ModifiedAttribute="value" />
</Target>
Now simply run msbuild.exe HelloWorldWindow.csproj and it will build with your new home-brewed task!
Conclusion
If Microsoft wants to encourage the use of MSBuild, one thing that would be nice to have in future Microsoft releases is to be ability to either edit the csproj file in either graphically (through the Visual Studio Interface) or edit it as an xml file inside a Visual Studio text editor. I had to download an open source freeware program called notepad++ to allow me to edit the csproj file as an xml file. Other than this drawback, MSBuild Opens up a world of flexibility into building C# Projects. I will probably add other Xml tasks to this project, such as the ability to delete nodes or create new nodes inside my config file. I'm even debating using MSBuild in place of those old DOS scripts I have to do all future deployment. Anyway, perhaps consider the next time you want to organize your compilation to msbuild it in .NET instead.